
Hiking Dude Blog
2025 - Aug Jul
2024 2023 2022 2021 2020 2019 2018 2017 2016 2015 2014 2013 2012 2011
09/22/2019
Last February, I climbed Mt. Kilimanjaro in Africa with a group of church friends and friends of friends. One of those folks was a bloke from Australia. Well, he came to America to visit friends around the country, in CA, MT, and MN. To make sure he experienced the best of Minnesota, four of us went on a 4-day canoe trek in the Boundary Waters Canoe Area Wilderness (the BWCA).

Map of our Route
The blue line is our route with green tents where we camped. You can zoom in on any part you want, or click the box icon in the upper-right to make it fullpage.
The Boundary Waters is a special place to Minnesotans. It is a million-acre wilderness set aside from development for recreational enjoyment, and is one of the most visited wilderness areas in the USA with about 250,000 users per year. There are over 2,000 established campsites spread around more than 1,100 lakes connected by hundreds of miles of riverways in the BWCA. Permits are required to access the BWCA.
Our adventure began with a 4+ hour drive 'up north' to Ely, MN where we picked up our permit and checked out the local Piragis Outfitters store in which you can find pretty much everything you need and anything you don't need. For example, if you don't want your fresh banana to get bruised, you can buy a plastic banana shell to keep it safe (no, seriously!) It really is a fun store to check out.
A couple miles east of Ely, we piled all our gear in a small motor boat at the boat launch and putted across Farm Lake to a friend's cabin we used as our starting point. We took a short hike through the woods to South Farm Lake and back to get a feel for the place. Then, a dinner of brats, beans, and beer followed by a game of cribbage and a nice night of rest in comfortable beds.
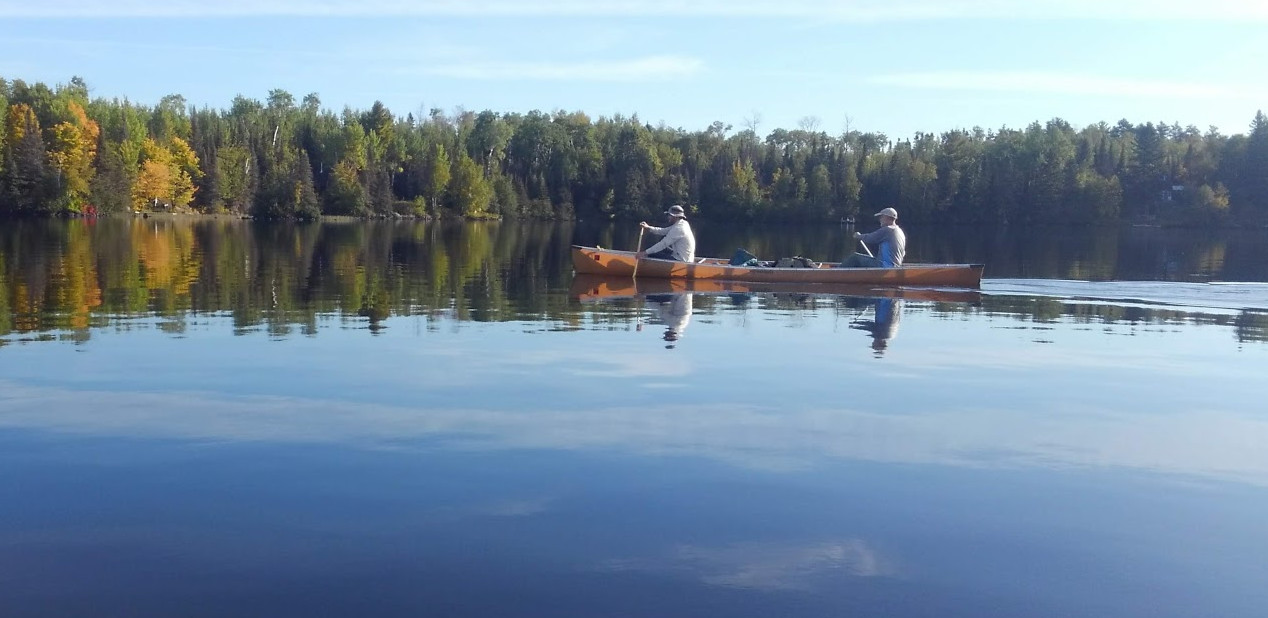

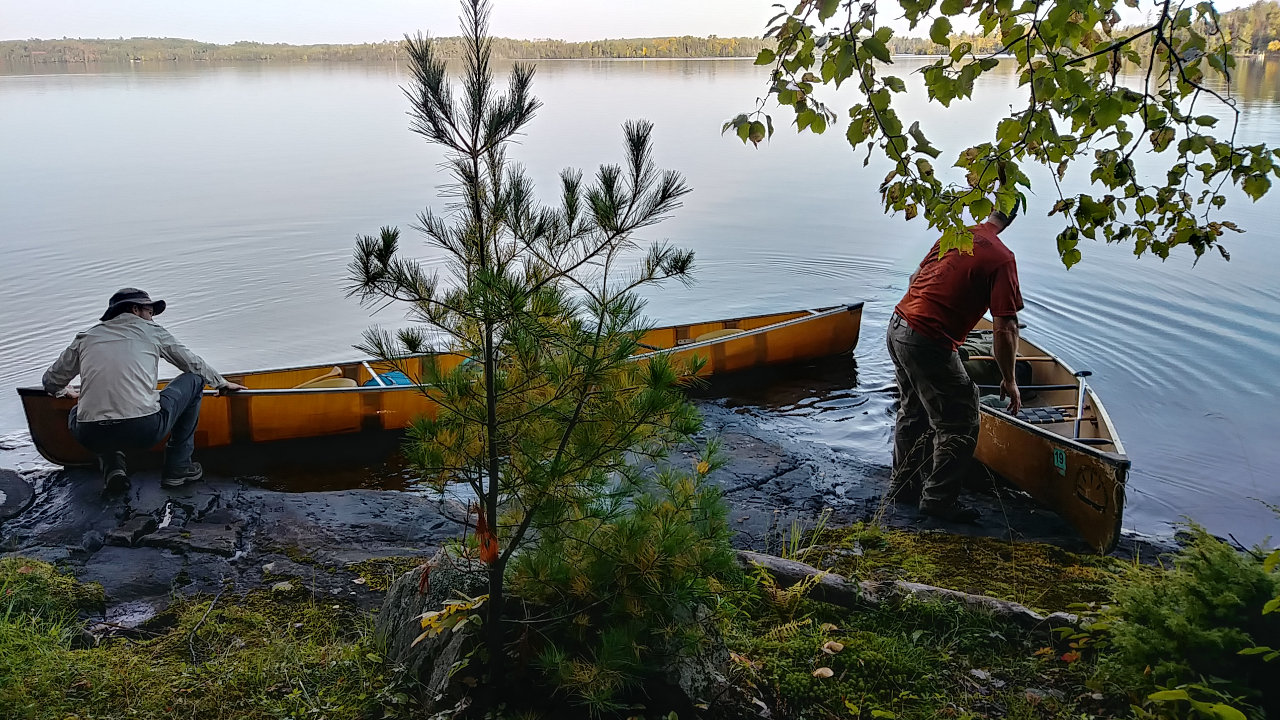
Pancakes for breakfast and we were on the water before 9am. The water was smooth as glass and no one else was around, so we had a wonderful morning paddle into the wilderness.
Minnesota has a wonderful fall color explosion, but we were just on the beginning edge of it. A couple maple trees were red, but most trees were only starting to lose their green, giving way to yellows and oranges.
Our route took us east, up the Kawishiwi River with a couple very short portages, followed by our longest portage of the trip at 210 rods. A portage is a great opportunity to get out of the canoe and hike for awhile. This was my first time balancing a canoe over my head and carrying a pack over a rocky trail through dense woods - it was fun, but hard work.
A 'rod' is an ancient measurement unit that translates to 16.5 feet, or 1/320 of a mile. Measuring canoe portages is one of the few times you'll see it in use these days, mostly from tradition but also because canoes are around 1 rod in length. So, our 210 rod portage meant I carried the canoe for 2/3 of a mile - that was far enough for me.
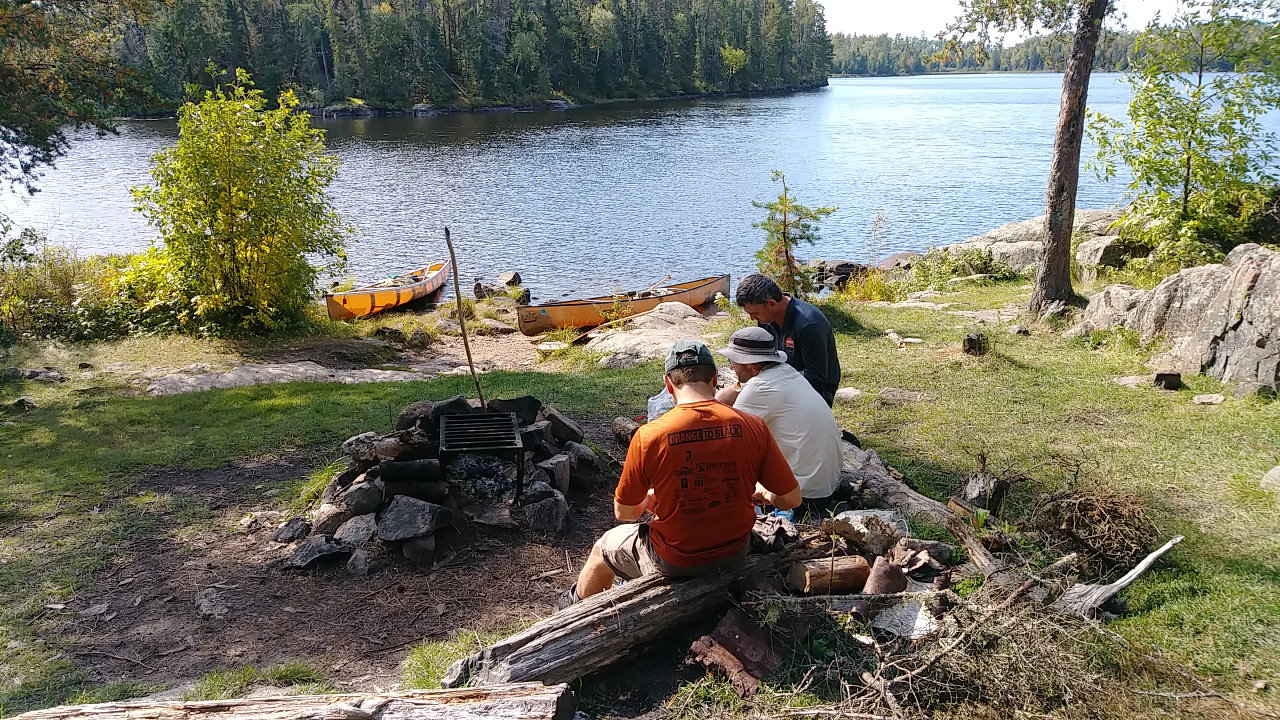

After canoeing a few hours, we stopped for lunch at a typical BWCA campsite. All camping is required to be done only at established sites, so they are often highly impacted. The thought is that concentrating impact to a vew spots will prevent ad-hoc sites from being created and keep the majority of the area pristine. In general, it works great but can mean frustration in high-use summer times when canoeists must keep on paddling until they find an open campsite. This week, we had no problem with campsites since school is in session and most folks are at work - but not us!
You can see the standard campsite layout here - a US Forest Service fire grate, logs around the social area, flat spots for tents, and somewhere off in the woods is an open-pit toilet.
After lunch, we continued up the river, completing another three portages. At one point, the maps showed the water route going two different ways. One way (the correct one) was a longer loop with a couple portages while the other (our choice) showed a more direct path with no portages. We followed the flat water to a creek flowing toward us that was too strong and rocky to paddle up. Rather than turning around and going back a mile or so, we decided to try hauling the canoes upstream since there was no portage trail.
We tied a 100-foot rope to a canoe and tied the 2nd canoe behind. I took the rope upstream and hauled the canoes up, with one person in each canoe steering. Once the canoes were up, Brad held the lead one while I scrambled another 100 feet upstream with the rope. We repeated this 5 times until the size of the rocks, depth of the water, and overhanging brush and trees finally made us give up.
We changed our plans and saw on the map that the alternate route's portage trail was probably less than 1/8 mile over a low hill to our west. Bob and I bushwhacked into the woods to see if we could find it. At this point, I mentioned to Bob, 'Hmmm, here I am in the wilderness with no compass, food, or water, hiking off into the dense forest.' After only a couple hundred feet, we surrendered to the extremely dense brush and admitted defeat.
Upon reaching the canoes, we untied them, piled in, turned around, and shot the rapids downstream. It was exciting and lots of fun for about 2 minutes. I'd say it was worth the effort of hauling them upstream, but I'd probably get some debate about that from Brad who cracked his shin on a rock, raising a big bump and drawing blood. At least, it was an adventure!

We covered around 13 miles our first day. Having not done a multi-day canoe trip before, I didn't know how far to expect to go. Two of us in each canoe, with our gear, we averaged over 2 miles/hour and that included time portaging and stopping for lunch. I'm now confident that 20-mile days are reasonable when planning future trips, if I want to cover more territory.
The canoeing was much easier than I expected. As long as you keep your paddle pulling through the water, you keep moving along. Trying to boost our speed seemed to take much more energy than the resulting speed gain, so a consistent pressure against the water is all it takes. Oh sure, the muscles get tired after 7 hours of paddling, but not nearly what I was expecting. With new views continually flowing past, and always looking around hoping for a moose, bear, or eagle sighting, the hours passed quickly.
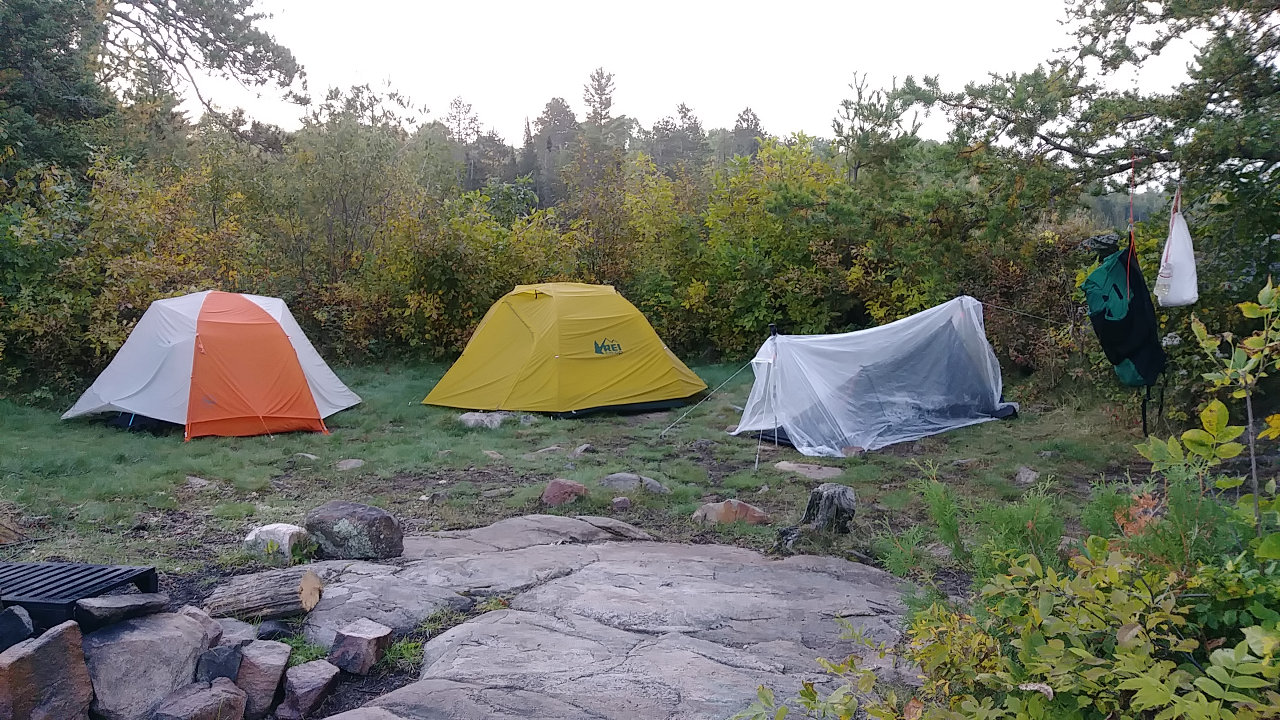
Our campsite for the night was on a small, exposed peninsula. There was plenty of room for 6 small tents and access to firewood far back in the forest. Here, you can see two real tents and my Hobo Hotel on the right. This is just a bug net with a plastic sheet thrown over the top. I'll post more about it later.
One thing about using established campsites means there are often (almost always) scavengers around looking for scraps. We had plenty of chipmunks scurrying around at each site and I expect many mice came out at night. Protecting your food from rodents is a good idea, as well as not dropping any crumbs, scraps, or garbage on the ground.
I found some Chili flavor ramen and Thai Chili flavored tuna packets at Walmart, so my simple dinner was pretty spicey! Each of us brought our own food, so we weren't very efficient but everything was just 'add boiling water' type food. After dinner, we had a nice fire and just chatted until it got dark. It was a great day, but the weather forecast says tomorrow won't be so nice.
I've found that bad weather at the start of a trip is not nearly as bad as at the end. Everyone forgets that awful day in a couple days. But, on a short trip, one lousy day is significant, and tomorrow is supposed to be that day.
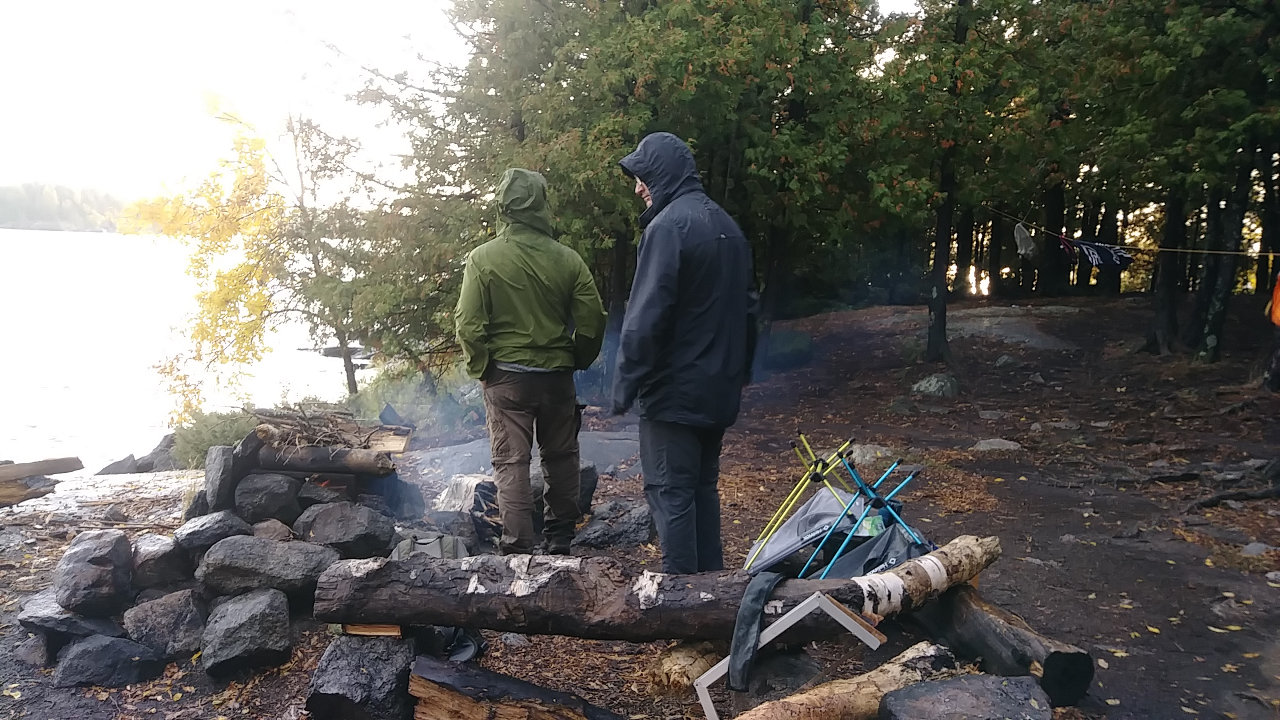

I didn't sleep very well last night, partly due to beavers slapping their tails in the river much of the night. We found out later that Kawishiwi means 'river full of beaver houses' which is a fitting name since we passed by well over a dozen of them.
Today, we decided to use the good morning weather to reach a campsite before the expected rain and winds picked up. It was a short paddle up the South Kawishiwi into and across Gabbro Lake to an excellent site on the southern tip of a very long peninsula. We had a great cedar forest for protection from wind, and a wonderful view across the entire lake from east to west so we could watch the storms roll through. And, roll through, they did!
Just before noon, the rain started, picked up, got very heavy, then torrential, then tapered off to basic rain that finally stopped around 10am the next morning. It was a good idea to keep this a short day on the lake and we stayed mostly dry and warm in camp. Fortunately, one person brought a 10x10 tarp under which we had shelter from the worst of the storm without being forced into our tents. One tent did get overcome by water during the worst of it, but most of their contents stayed dry.
We had gathered wood early, so we got to have a fire again this evening, along with our usual dinners. Tonight, I had chicken ramen with Hot Buffalo tuna - I tell you, StarKist has come out with some good flavored tuna choices.
Not much to share when you sit around camp for almost 24 hours.
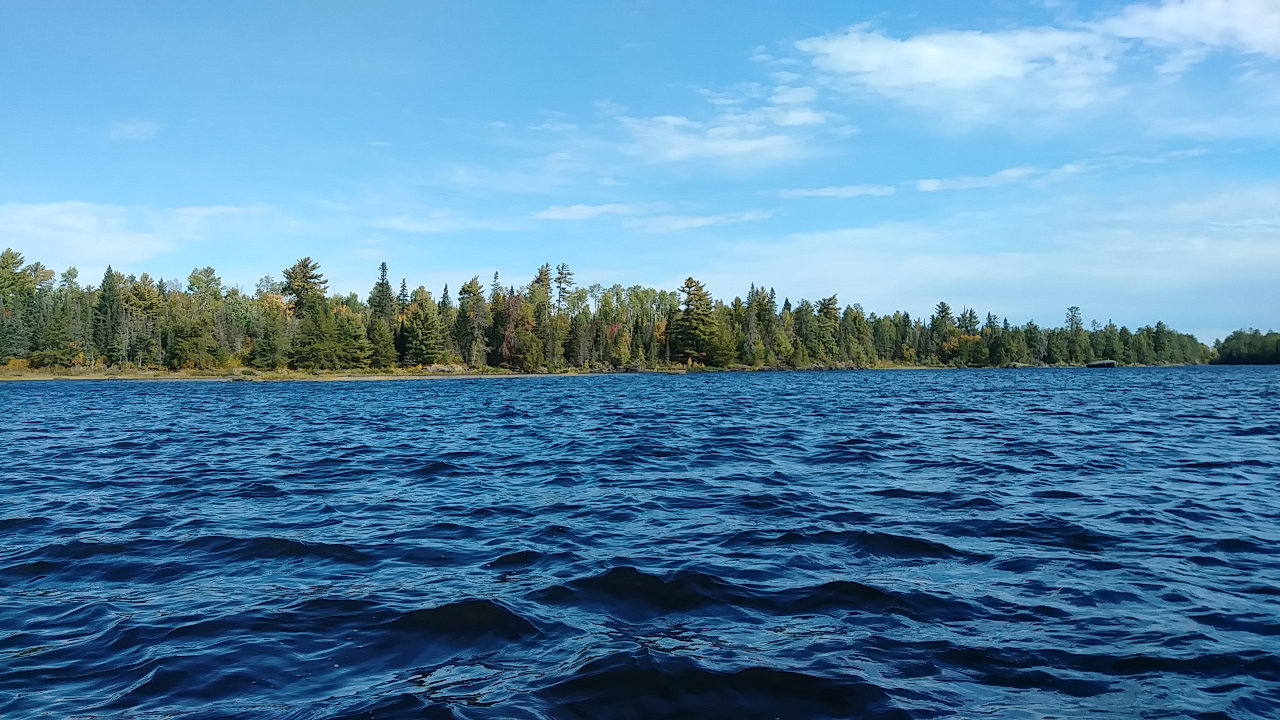

Since we only traveled a few miles yesterday, we either have two fairly short days left or we paddle in farther today and have a very long day out on Thursday. When the rain let up this morning, the wind did not. We will be paddling into the wind to get out, so we chose to go with the two shorter days. But, leave it to us to make a short day as long as possible. :-)
Today's water was not the glass-smooth water of the first day, but it was still beautiful. We left camp and pushed south into the wind to cross Gabbro Lake and use the protection of its southern shoreline for our journey west into Little Gabbro. After the rainstorm of yesterday, it seemed many more loons and eagles were out today. We saw a couple dozen of each on our entire trip.
Whether we're slow learners, or maybe to prove we could do it, today's map showed two waterways out of Little Gabbro...
OK, on a tangent now - Every lake or river I've ever been on has many small creeks, streams, rivers flowing INTO it, but only ONE flowing out. That's the way things work - water flows downhill, concentrating into larger and larger flows. In the Boundary Waters, it does not work that way! These water bodies are all depressions created when the last glaciers ripped through here around 17,000 years ago and gouged out the softer rocks and then water filled them later. That means that when there's enough water, there may be multiple waterways flowing out of a lake that rejoin somewhere far downstream. One might be more navigable than the other, or not, depending on the current available water. Pretty weird, I think.
...Anyway, one of our choices today has a 120 rod portage while the other has an 8 rod and a 12 rod portage. Well, I'd much rather do the two short ones, and maybe we'll get lucky and be able to just navigate through those short ones. After all, they are downstream portages, so we don't have to paddle against the current. We went downriver about a quarter mile to the first portage. There, we found an old wooden dam with big metal spikes mostly blocking the river. The portage around was short and easy.
Another 150 feet downstream, we encountered a short stretch of fast rapids with a zigzag through some big boulders - not marked as a portage on maps. If they were aluminum rental canoes, I would have gone through but these light, borrowed, kevlar canoes might get a few significant scratches from kissing the rocks. So, we scouted for a way through the dense woods. Intertwined brush and many fallen logs meant a very slow portage with a good chance of injury or gouging a canoe on broken branches. Another dead-end for us.
Back to the canoes, and this time we get to retrace our path Upstream - not nearly as fun as down. Some furtive paddling and a couple rock scrapes and we were back to the dam portage. After that, some more aggressive paddling got us to Little Gabbro, around a point, and to the 120 rod portage! Whew! No big deal, we had extra time today so this 90 minutes was just another adventure.

A easy couple miles on the South Kawishiwi River got us to our final 60-rod portage of the day over a beaver dam into Clear Lake. Most of our portages had rocky landings, but this one was nice, thick mud at the put-in point. We paddle from the south to the northwest side of the lake and found an open campsite near our last portage. We could have easily paddled all the way out today, but we're in no hurry.
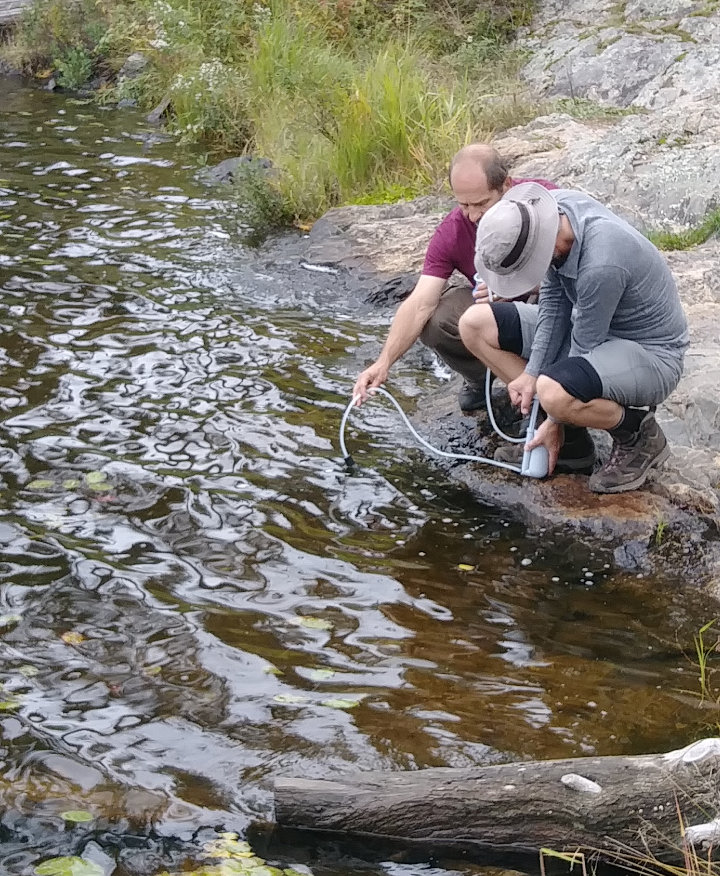
At camp, we gathered wood, filtered water, and set up tents. Another beautiful view to the south across the lake with a couple loons and eagles around. I did see a moose track in the portage trail, but that was the only sign of any larger animals around.
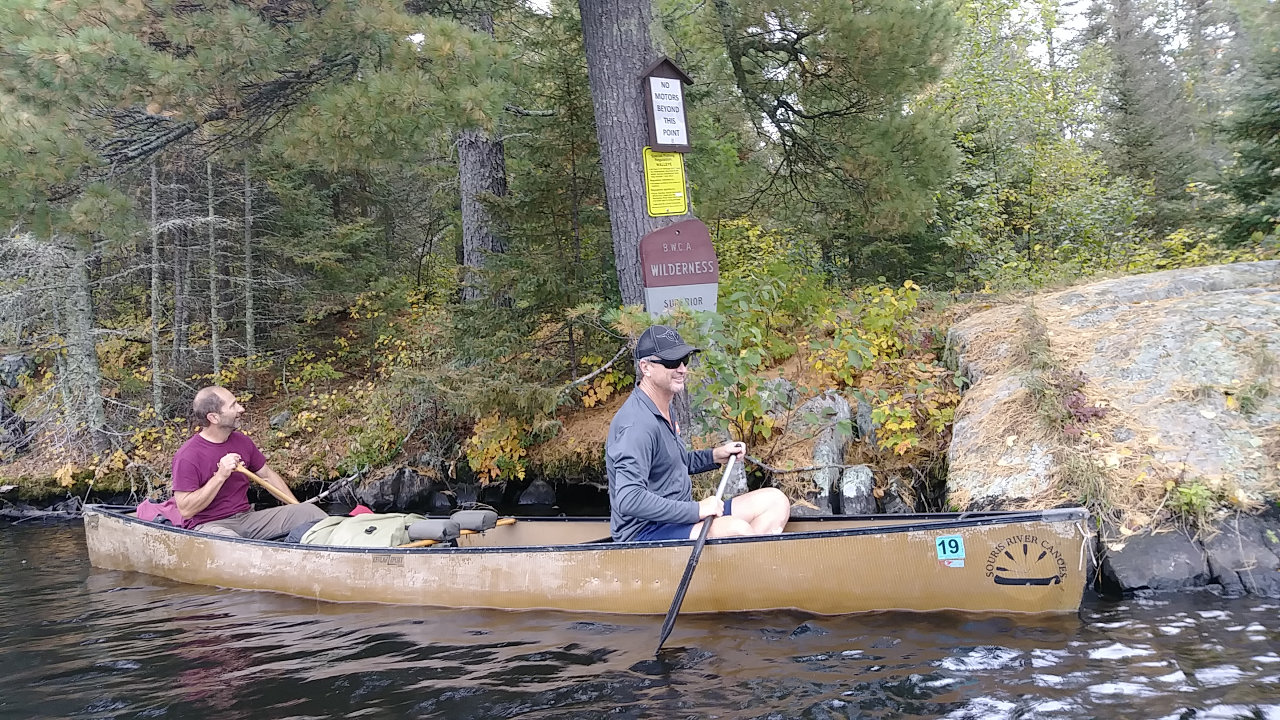

I finally slept pretty well and we had a mellow morning breaking camp. It took 5 minutes to reach the 175-rod portage and then we had 2 hours of smooth, easy paddling back to the cabin. It looked like the fall colors had improved quite a bit in just three days and the cool, dry weather was great for canoeing.
We piled gear in the boat, closed up the cabin, motored over to the boatlaunch and our canoeing trek was finished.
We did add on a 1-mile hike to see Kawishiwi Falls by Ely - cool waterfall with interpretive signs describing the logging operations and current electricity generating dam on the river. After that, we stopped at Gator's Grilled Cheese Emporium in Ely for lunch - fun place with a model train that runs around the ceiling.
I do think September is the best time for outdoor recreation in Minnesota - low humidity, no bugs, fewer people, and colorful trees. This trip was a great introduction to the BWCA and I look forward to coming back next year.
Posted: 09/22/2019
10/07/2019
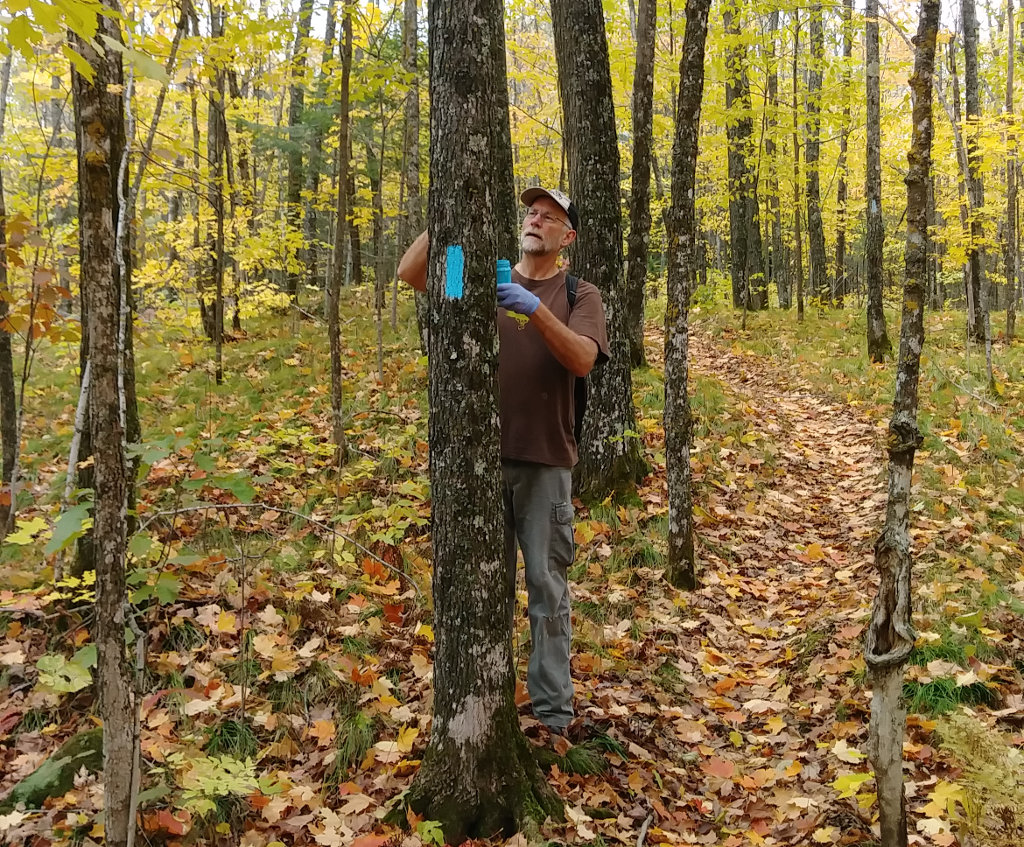
 We had a wonderful weekend doing trail volunteer work on the Superior Hiking Trail this weekend. We painted blazes on about 17 miles of trail as our part of the #BlueBlazeBlitz that saw pairs of volunteers blazing the majority of the 300+ trail miles along the north shore of Lake Superior.
The trail was completely blazed in 2006-2007 by two people contracted by the SHT Association. At that time, the standard of a vertical blue blaze measuring 2-inch by 6-inch and positioned about 6 feet from the ground every 1/10th mile was set. Over the past dozen years, those blazes have faded, or the trees they were on have fallen. On my thru-hike, I joked that the SHTA should use a paint that wouldn't kill the trees since I saw so many on the ground. :-)
Our blazes in 2019 are still blue, and about the size of a dollar bill, but we were instructed to place them about every 100 yards, so they are about half the distance apart as the originals.
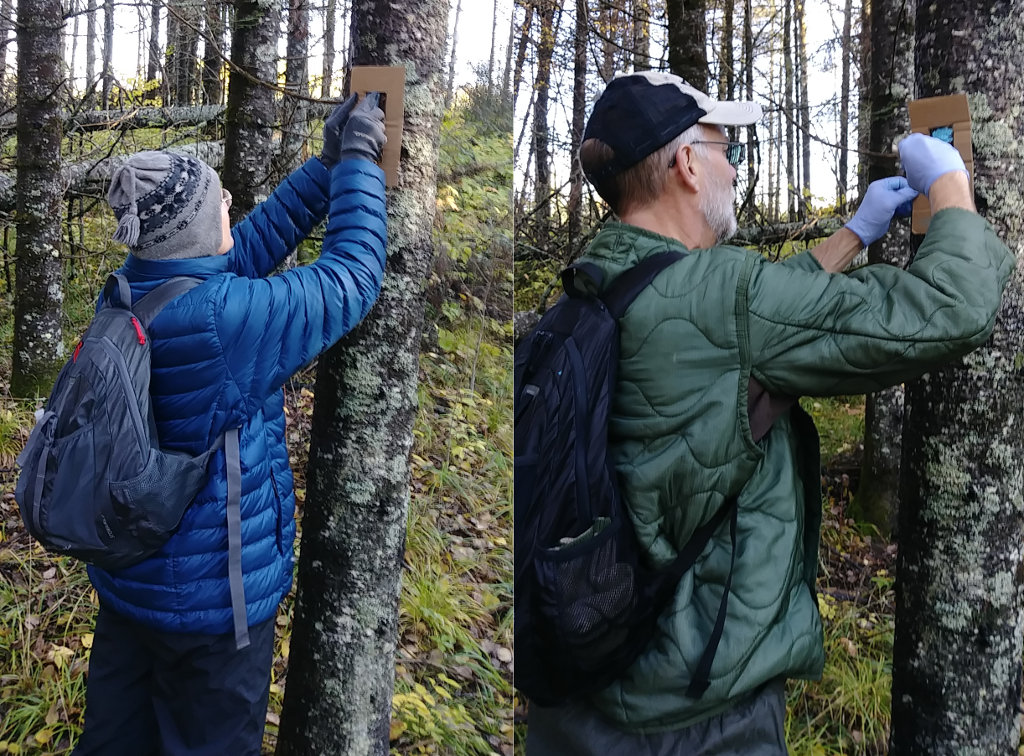
 The process is pretty simple.
Count 100 steps and find a tree for a blaze. Clean an area 6 feet up. Paint the blaze. Repeat 20 times every mile. But, there are some things to learn to make 'good' blazes.
- A Good Tree is large enough to fit a blaze on, not a spindly sapling. Birch and White Pine should be avoided because their bark peels or flakes and won't hold the blaze long. A tree that is visible from far down the trail works well, rather than one just around a corner, or covered by brush.
- Scraping off lichen, moss, and debris to create a smooth canvas makes for a better blaze. We were given a template and scraper to define the blaze location.
- Using a small amount of paint and brushing up from the bottom reduces newbie drips.
- If there's an old blaze in the general area that would work, just repainting it is the thing to do.
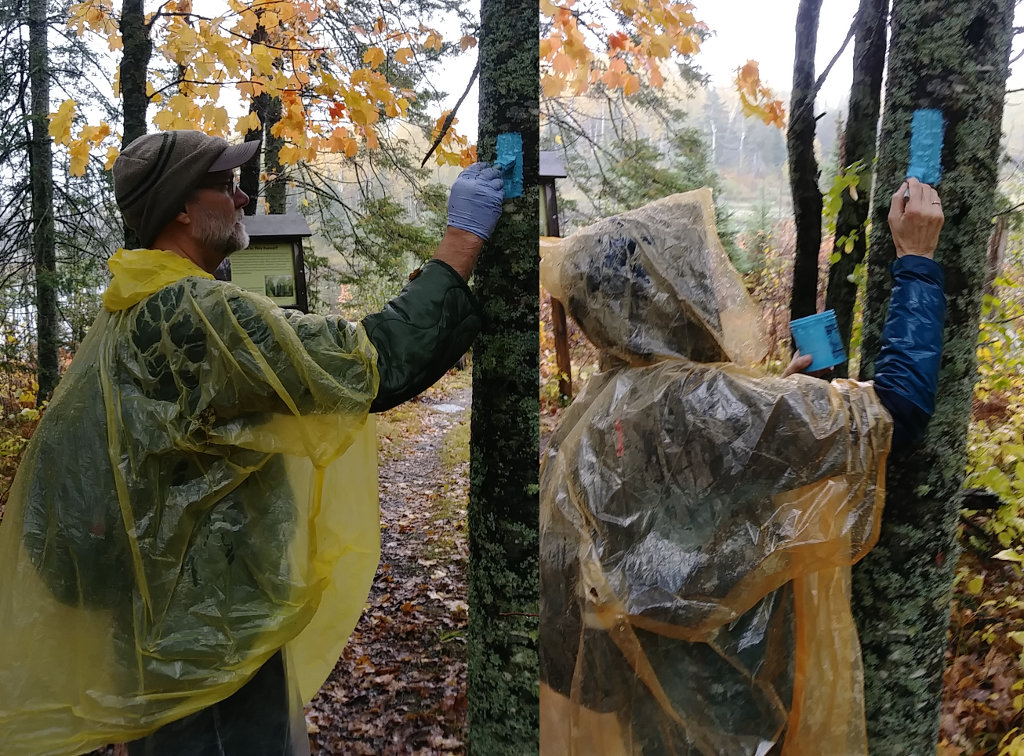
 For our volunteering, we blazed on both Saturday and Sunday. Our longest assigned section was on Saturday and it rained the entire day, non-stop. But, we were told the blazing would go on 'rain or shine', so we successfully covered the 5 miles out and 5 miles back in about 7 hours. After we finished, we learned that some groups chose to not blaze due to the rain, so now we hope our blazes hold up. We did meet another blazer leaving the trail and she had done her section - Good Job!
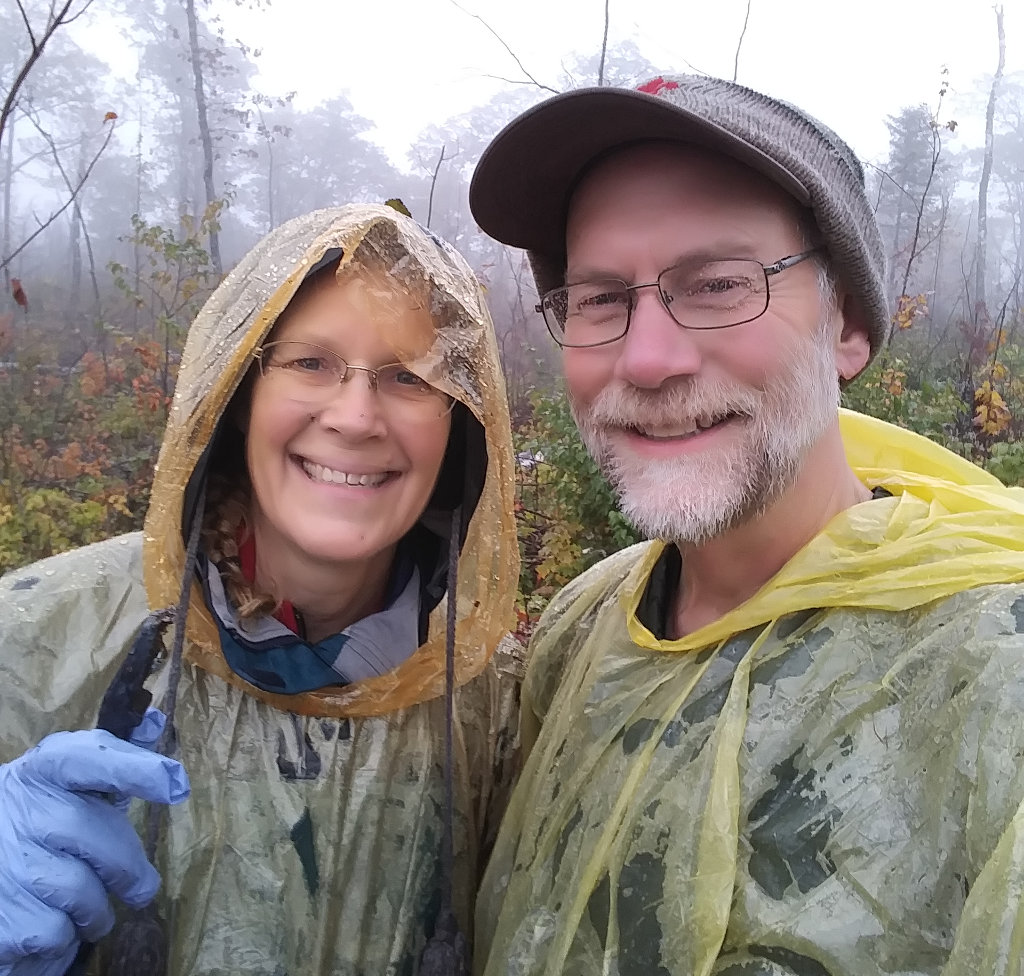
You can see we are wet under our disposable rain ponchos. Most of that was from perspiration being trapped and we were plenty warm the entire time. The only time I cooled off was when we stopped for a quick lunch in a very convenient snowmobile shelter along the trail. As long as we were walking along, it was comfortable - wet, windy, and cool, but still comfortable.
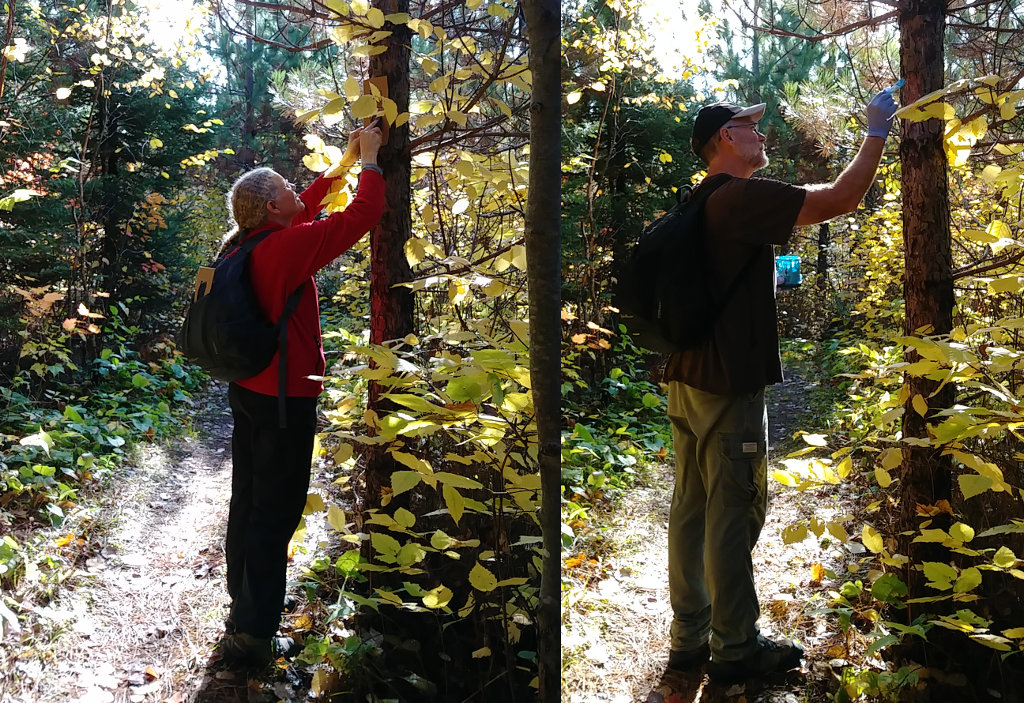
 Sunday's hike was so much more fun! The sun was out and it was a perfect fall day. Our second section was 7 miles round-trip and the blazes were much easier to paint without rainwater to deal with.
We tromped through a lot of water left over from the storm, but stayed dry overall. A nice lunch at the Big Bend campsite at our halfway point was our only rest in the 5 hour hike.
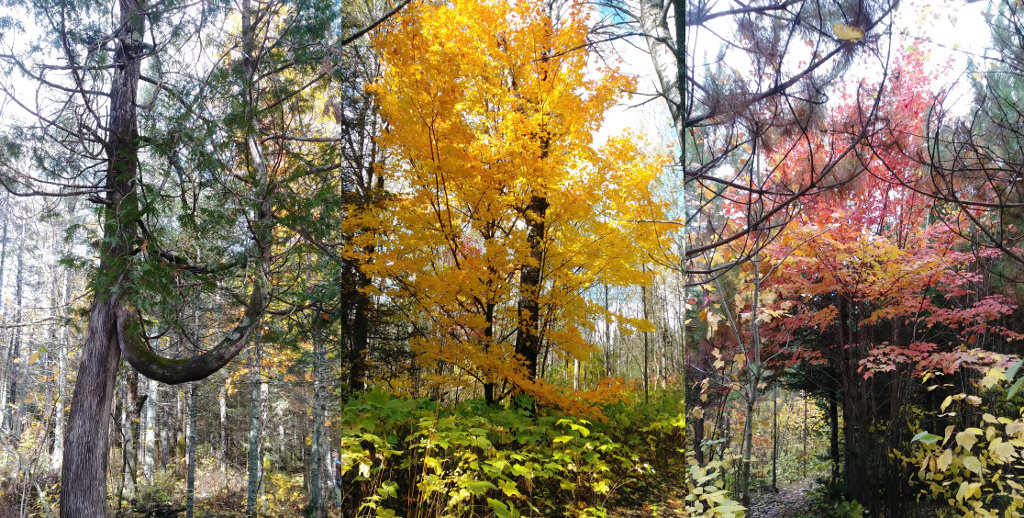
 It was nice to be out in the woods at this time of year. Lots of colors changing, cool temps, and no bugs. These were just a few of the beautiful trees we passed. My favorite part was walking through a maple forest with a canopy of orange and red lit by sunshine.
If you take advantage of hiking on trails, please consider contributing to their maintenance. The SHT is volunteer maintained, as are many trails across the country. It takes many hours of commitment by many people to keep trails open and available for you.
 Hike On
Posted: 10/07/2019
10/20/2019
It's hard to be a Hiking Dude if you can't navigate your way through the wilds. So, I spent my Saturday morning with a great group of Women Who Hike helping them hone their map and compass skills. The morning started a little drizzly but turned into a beautiful fall day to spend out in nature.
We met at a local nature center and spent almost two hours learning what a compass does (and does not do), how to take a bearing, orient a map, read topographic features, find direction without a compass, and following directions for specific distances. I thought it was a pretty packed morning and I really enjoyed meeting some new friends that I hope to see out on the trails.
Much of the information we covered comes from Compass Dude and there is a lot more detailed compass knowledge there, including some activities to try.
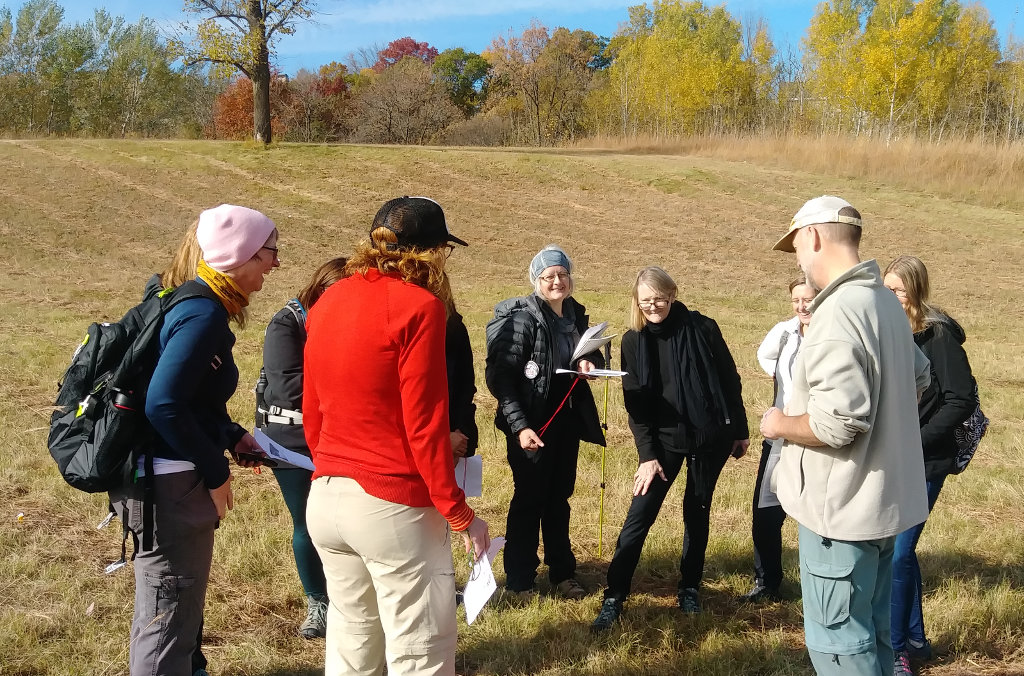

Once everyone was comfortable using their compasses, we played a compass game for about 15 minutes. They all said it was helpful in driving home the skills of following a bearing and estimating distance. You can print the Compass Game if interested. The winning pair of women each received a 'compass' merit badge.
It was nice that the sun came out to help with telling direction without a compass. We showed the Shadow Stick method, Moon method, and Wristwatch method because GPS devices can run out of electricity and compasses can break on rocks. Being able to estimate directions with no tools might be important some day.
If you're a woman looking to start hiking, or looking for some friends to hike with, check out the Women Who Hike website or Facebook page. They have chapters in every state and tend to be a very supportive, helpful group.
Hike On!
Posted: 10/20/2019
10/29/2019

Always ready to experiment and learn about better, cheaper, lighter, or just plain different ways to do things, I got NorthSole to let me give their new insoles a try. My only compensation is receiving their Bundle Pack at no charge to test.
NorthSole is a Minnetonka, MN company so I'm really interested in seeing what a local company offers and see if it matches up to big, national brand products.
Features:
Aftermarket insoles range from $10 to over $100 and are marketed to perform a wide range tasks, from providing cushion to correcting foot problems.
These are NOT corrective inserts for any foot structural problems, arch support, plantar fasciitis, or supination/ovepronation challenges. These insoles are to provide comfort and a more enjoyable time on trail.
Northsoles are non-contoured so they provide benefits in minimalist no-drop shoes. This means they have no arch support or heel raise. This allows your foot to work they way it should rather than rely on external support. Some people need additional support, but I feel a medical or physical therapy professional should be consulted before modifying your foot support.
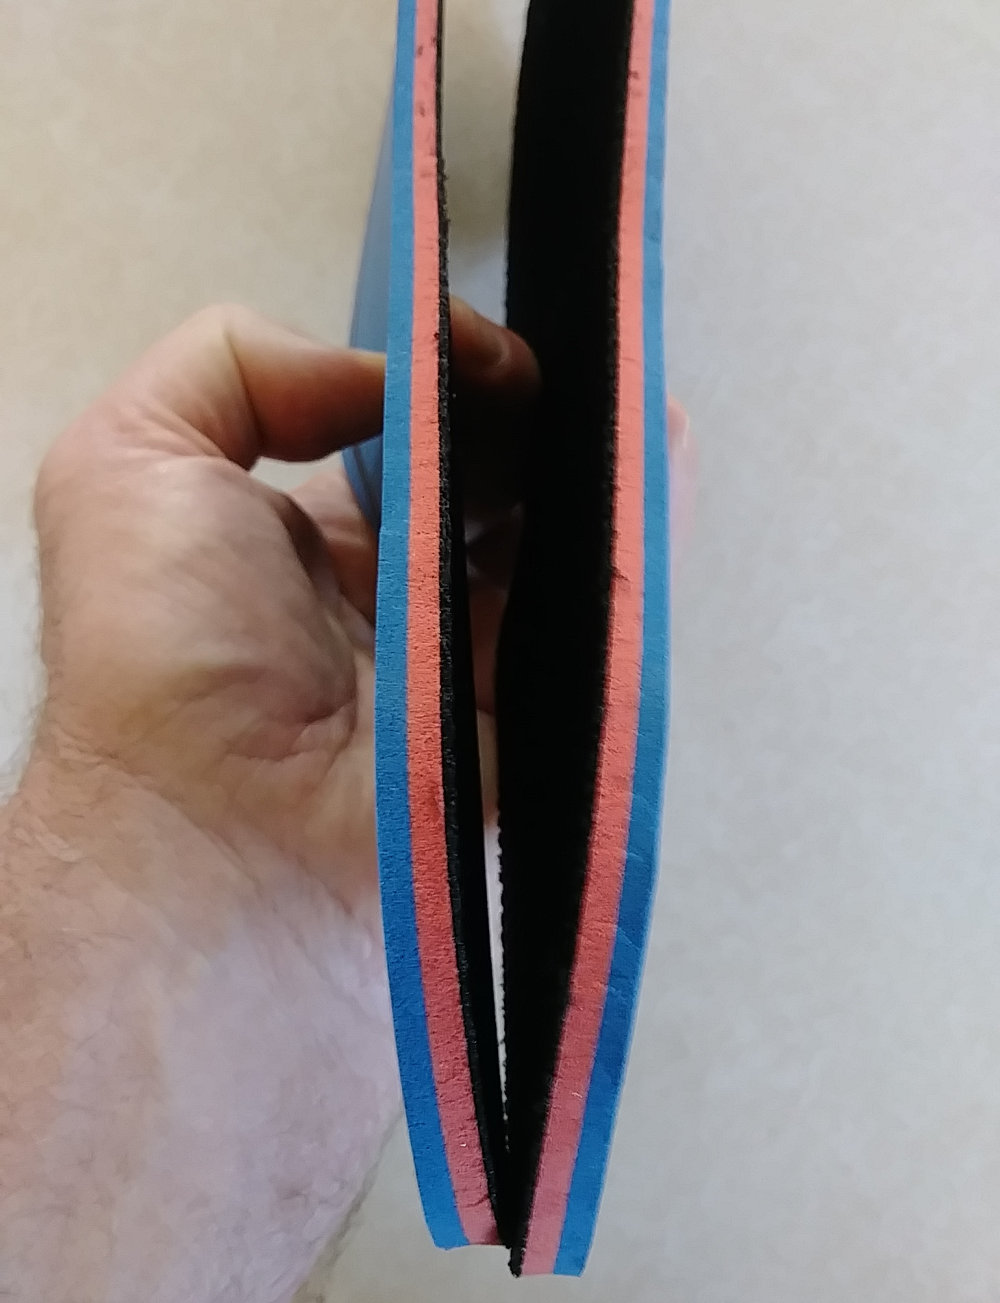
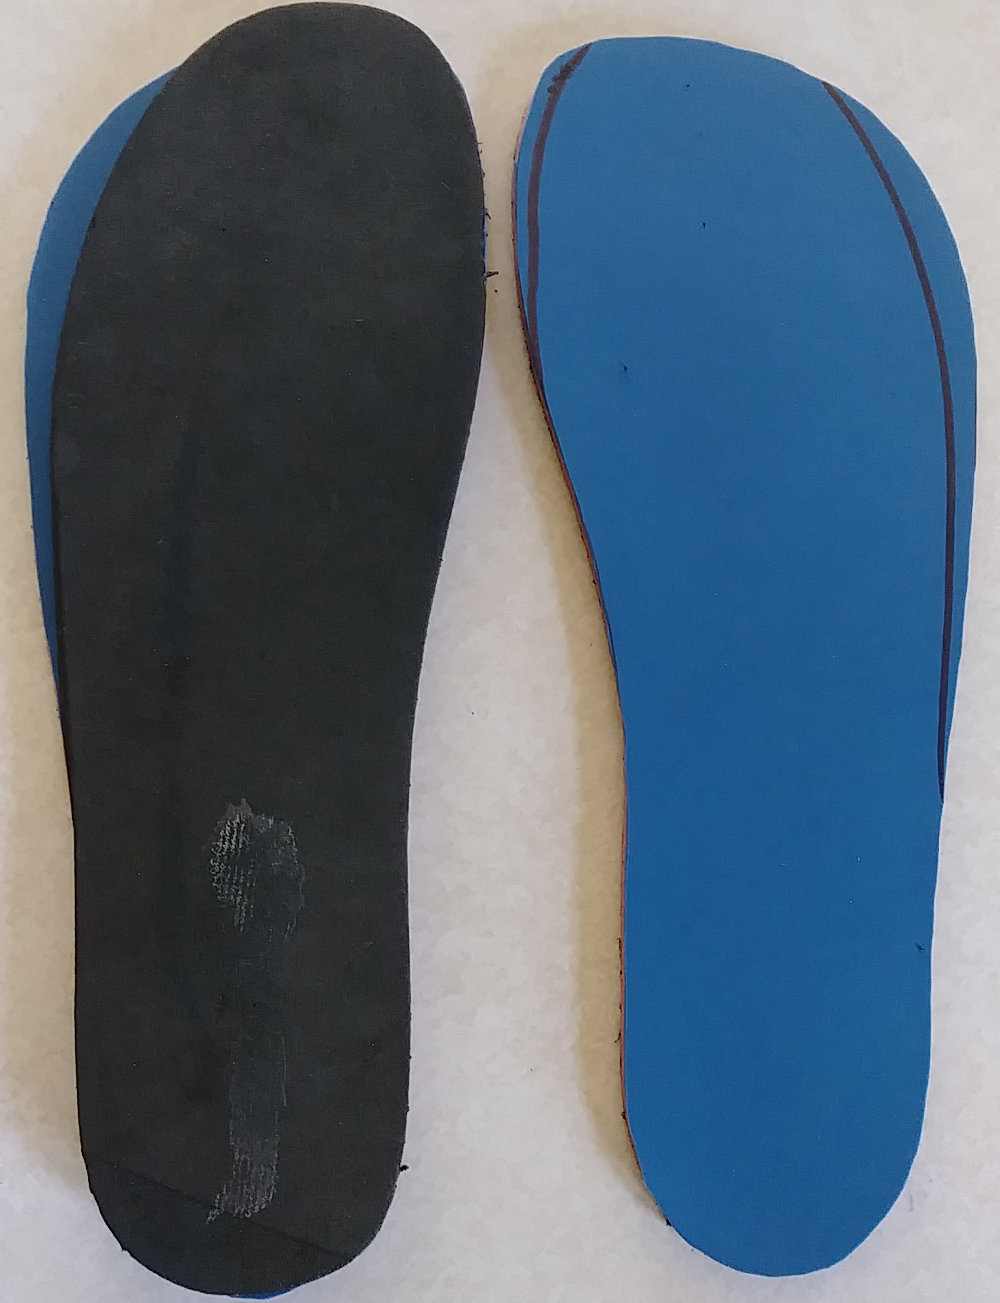
The insoles are made of three colorful layers. A black top layer gives your feet a bit of moisture wicking, grip, and softness. It is bound to a soft pink center layer that minimizes pressure points by forming to your foot. The bottom firm blue layer is mainly for shock reduction and durability. When you squeeze the northsoles, you can see the blue layer compresses much less than the pink.
Care:
Remove the Northsoles to air out and dry both the insole and shoe. Handwash occasionally to get rid of dirt and salt build-up.

My Experience:
I believe there is a trade off between cushioning and effort. Walking on the beach is an example.
Dry sand is very comfortable and absorbs any shock from stepping, but it takes much more effort to walk through than does wet sand. Wet sand is packed and firm. You can run on it easily but there is more jarring to your legs.
Insoles are similar. A thick cushion absorbs impact and requires more energy to walk. But, the extra comfort may be worth that loss in efficiency. Barefoot directly on the ground would be most efficient, but also too uncomfortable for most people to endure.
So, I like enough cushion to be comfortable, but thin enough to be efficient. Being able to feel the ground contour through my shoes is also a plus in my book - that's why I seldom wear thick-soled hiking boots.
I've now worn these Northsoles on my morning hikes and jogs for the past 3 weeks, more than 80 miles so far. They're a little dirty, but there's no visible wear so I expect they should last at least 500 miles.
For a bit more experimenting, I put my old factory insoles back in yesterday to see how they felt. After my 6 mile morning hike, some of my toes felt sore - not skin tender, but more like muscle sore. It was 31 degrees, so it could have been the cold. So, this morning with the temperature 28 degrees, I put the NorthSoles back in. After another 6 miles, my feet and toes felt fine. From that, I'll say the NorthSoles make my feet feel better.
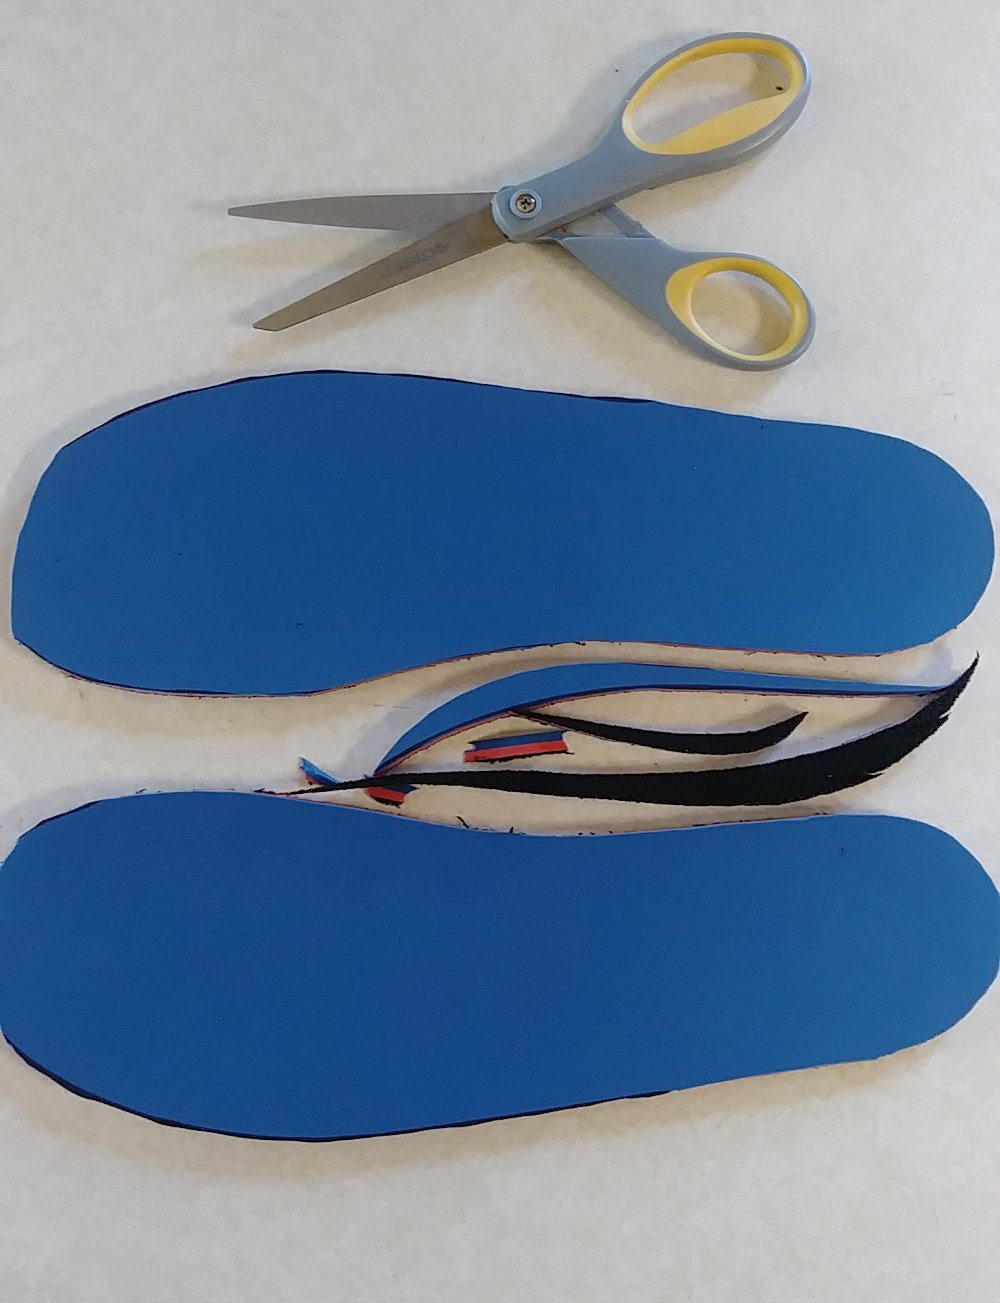

The NorthSoles were simple to start using. I slipped out the insoles from my shoes, traced their silhouette on the NorthSoles, cut them out, and slipped the NorthSoles into my shoes. Easy peasy. They fit fine and felt fine.
No complaints. But, they do cost $30 for a pair of 6mm, $25 for 3mm, or $50 for a 2-pack of the 6mm and 3mm. Prices include shipping in USA.
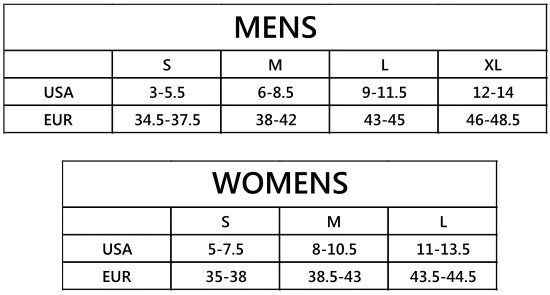
They come in S, M, L, and XL sizes that you trim to match your factory insole size. My size 13 factory insole just barely fit on their XL insole, so you might consider ordering a size up. But, when I let John at Northsole know, he said they'd be increasing the sizes a bit.
My factory insoles weighed 1.2 ounces for the pair (but they're junk). The 3mm NorthSoles weigh 2.0 ounces. The 6mm Northsoles weigh 3.3 ounces. I'm adding about 1 ounce per shoe by using the thicker pair. An ounce is less than 10% of most hiking shoes, but it's still extra weight. It's the old comfort vs. weight decision and, in this case, I think the comfort is definitely worth the weight.
Maybe they'd make a good stocking stuffer for someone you know - go to NorthSole to purchase direct from John in Minnesota.
Now, don't get me started about 'ankle support' from hiking boots over lightweight shoes - that's for another post.
Hike On!
Posted: 10/29/2019
11/18/2019

Kelly and I would love to have you visit with us on Sunday at our two presentations of treks we did this year. See Info about our talks, but here's what's what:
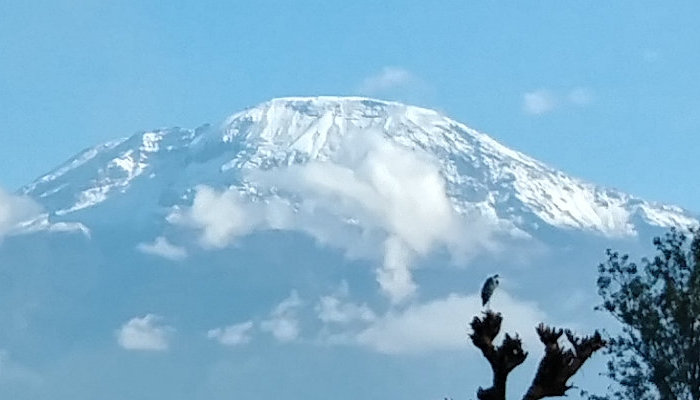
Climbing Kili: Sunday, Nov. 24, 10:30am in UofM Hanson Hall room 104
Find out what happens when 21 flatlanders from Minnesota (plus 1 from Australia) climb the highest mountain in Africa.
Paul and Kelly share how they prepared for, summited, and thoroughly enjoyed Mt. Kilimanjaro using the Lemosho Route, and offer up tips and advice on how to maximize your chances to do the same.
Free Tip: 'Porter Dodging' is a mandatory skill!
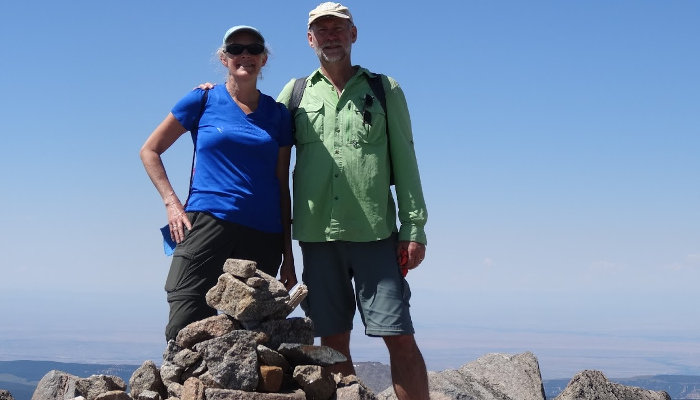
Cloud Peak Wilderness: Sunday, Nov. 24, 1:00pm in UofM Hanson Hall room 104
Looking to get away from trail crowds and above the trees? Wyoming wilderness has beautiful trails and BIG mountains only a day's drive from MN. Whether you want to summit a 13K+ peak, catch a hundred trout, or whirl around in an alpine meadow like Julie Andrews, the Cloud Peak Wilderness is perfect!
Kelly and Paul share highlights of their 6-day backpacking adventure and how to plan your own trek.
You should also check out All the Midwest Mountaineering Expo presentations to find others you'd like to attend.
Hike On!
Posted: 11/18/2019
01/02/2020
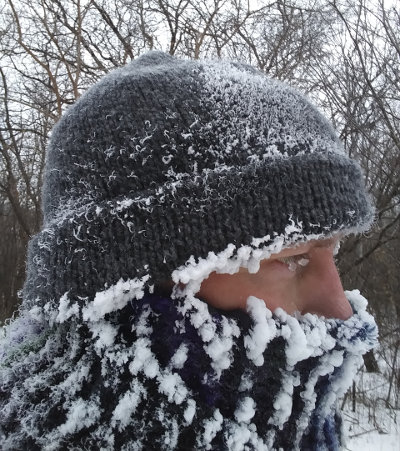
Whether you call them resolutions, goals, or dreams, it's good to occasionally plan what you would like to accomplish. Your plan can include short, mid, and long-term objectives - some big and some not so much.
In 2020, I hope to have a few adventures and produce something of value before the year is complete. I'll share my plan with you and hopefully have them all checked off in 12 months.
- Do 6 Hiking Adventures - I don't have any very long treks this year, but will do these:
- Florida Beaches - three days of hiking around Marco Island
- Two Appalachian Trail Trips - in May and July, but not a thru-hike
- Cloud Peak Wilderness - another week long backpacking trip in the mountains with some fishing and introducing newbies to backpacking
- Kekekabic Trail - probably a yo-yo of this Minnesota wilderness trail, about 85 miles total
- Border Route Trail - yo-yo hike of this other Minnesota wilderness trail, 120 miles
- Walk 1500 Miles - I'll do 25-30 miles a week on local trails, plus these other trips should reach the goal.
- Write 2 Hiking Books - I've started a book about the Superior Hiking Trail that I will finish, and I've been asked by a publisher to write a book about the Appalachian Trail.
- Do 2 Trail Work Trips - volunteer trail maintenance to keep the trails accessible to other hikers. Trail work is a great way to learn a trail, get exercise, meet fun people, and give back.
- Do 2 Hiking Presentations - Passing on knowledge and experiences to others is a good thing. Midwest Mountaineering puts on an Expo each spring and fall. I presented to about 100 people this past fall and hope to do it again.
In the next few posts, I'll tell you about a couple other exciting (to me anyway) things happening in my hiking world this year. It looks to be a fun, busy year ahead.
What about you? I'd love to hear about any hikes, treks, or adventures you plan to tackle this year...
Hike On!
Posted: 01/02/2020
01/15/2020
Sometimes best intentions don't turn out so well.
This morning, I hiked 7.5 miles around the island, including a nice, long walk up the beach at low tide. My plan was to keep an eye out for trash and pick up what I could find. To be prepared, I grabbed a plastic grocery bag and stuffed it in my pocket.
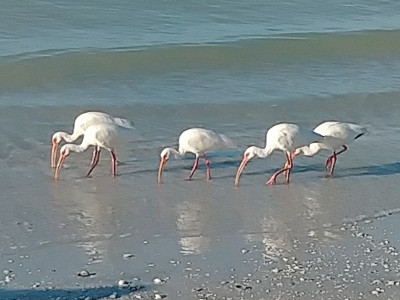
The hike was wonderful with water birds like these, some pelicans diving for fish, some big white fish doing big leaps with a couple fishermen trying to catch them, a couple joggers, lots of shell collectors, and hardly any trash at all.
I did manage to find an old rusty bottle cap and put it in my trash bag. Then, I stuffed the bag back in my pocket. When we reached the north end of the beach, there was a garbage can, so I figured I would deposit that one bit of litter.
When I reached in my pocket - no bag! I checked all my pockets - nothing. Somewhere along the beach, it had fallen out unnoticed.
With all the walkers on the beach, I'm very surprised someone didn't holler at me when it dropped. But, I'm sure someone picked it up. So, not only did I not find any trash to pick up (good thing), I actually made the place worse by unknowing dropping litter. Super Fail! Now, I have search harder for more trash to make up for today. Oh well!
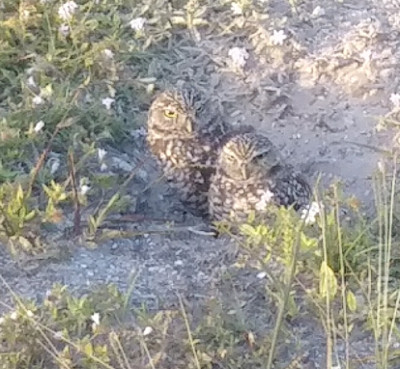
Other than that, today's hike was great. Saw these burrowing owls again today, as well as dozens of other kinds of birds, from little brown chirpers up to big osprey, with ducks, cormorans, and gulls thrown in.
We did get the start of a couple blisters since quite a bit of walking on sidewalks is required to reach any trails or sand.
You can track my hike progress to see my route.
Hike On
Posted: 01/15/2020
01/29/2020
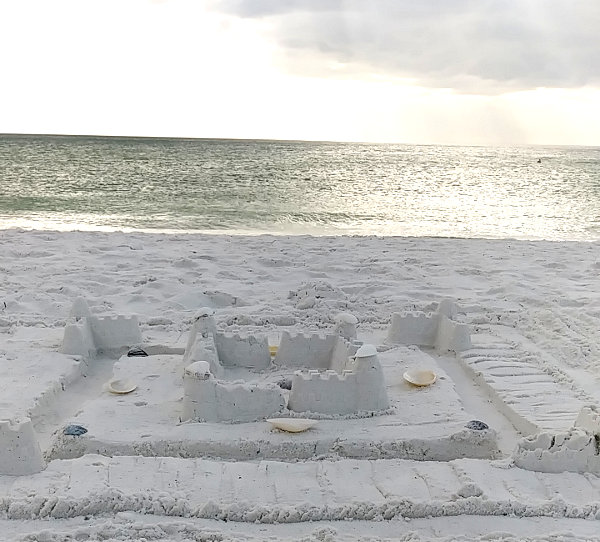
Enjoyed a wonderful short week on Marco Island in Florida! It was a nice treat to escape the frigid Great White North for a few days, but now I'm back to my daily hikes all bundled up from the frosty wind chills.
I got to hike every day in Florida, walking 4 miles the afternoon we landed and finishing with 14 miles on the last day. With a few bicycle rides thrown in, I got plenty of movement to work off the succulent seafood dinners I was forced to endure. :-)
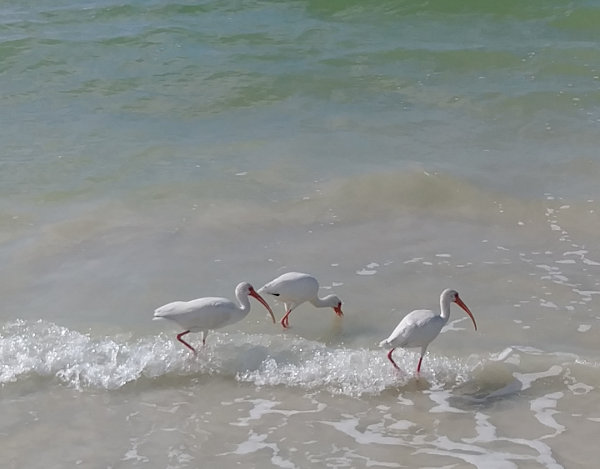
The Marco Island beaches are beautiful and they get a ton of people since there are many huge hotels lining the beach for almost 3 miles. I was expecting hoping to walk the beach and clean up some trash at least a couple days. To my surprise, the beach was nearly spotless! Maybe it's because the average age is over 60, but folks really do a great job of cleaning up after themselves here. So, I got to enjoy the osprey, pelicans, and many other sea birds along the beach. The sand, water, and weather were all perfect for the entire time.
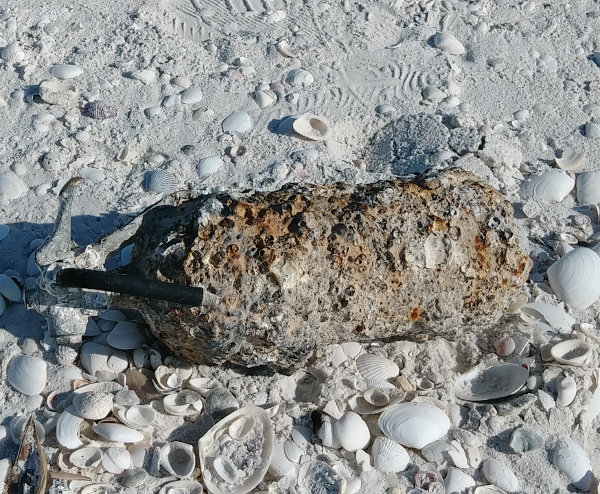
I did manage to find some trash on the far northern end of the beach where fewer people explore. Just a few plastic cups and bottles, but also this very cool, barnacle covered, tank. The handle and fixtures were brass, but the tank had rust, so I'm not sure exactly what it was, but it weighed over 20 pounds and I carried it over 2 miles off the beach.
I found plenty more normal trash along the pathways and parks in town and filled a couple bags.
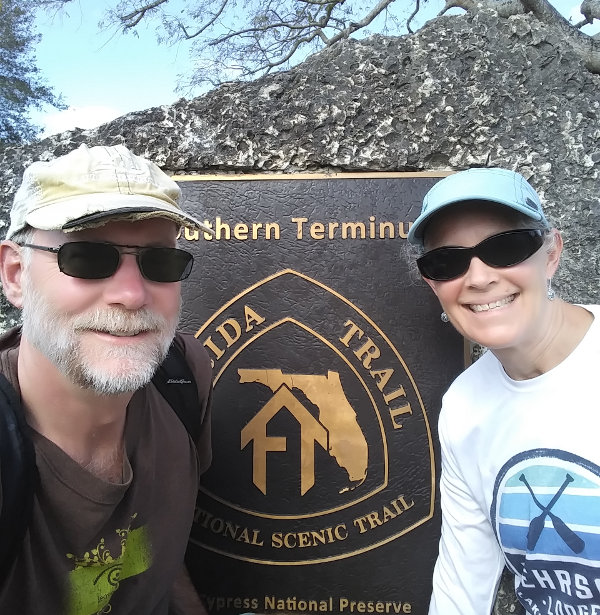
As a special hike, we headed east to the southern terminus of the Florida Trail at the Oasis Visitor Center in the Everglades. From this point, the trail heads north up the spine of Florida and then cuts west to the far tip of the panhandle, ending about 1200 miles from here. I hiked about 400 miles of it a few years ago. That was an extremely wet year, with water to our knees, but this year the trail is clear and dry.
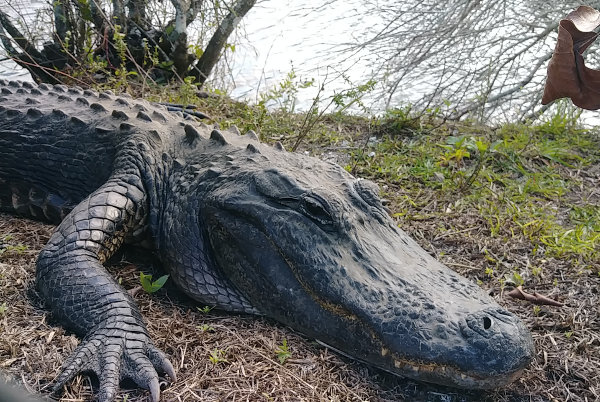
Along our 8-mile out and back trek, we saw no wildlife but did run into 11 other hikers. None were doing a thru=hike, but a few were heading out for a couple days. When we got back to the visitor center, we did come across this alligator with no worries in the world.
Hike On!
Posted: 01/29/2020
02/04/2020

Last year, my fellow hiker, scouter, blogger, and all-around good person named Super Jen or Wandering Pine, participated in the third year of a trash collecting program put on by Granite Gear. Granite Gear is based in Two Harbors, MN and sells outdoors gear. They are also aware of our responsibility as adventurers in the outdoors to take care of all our natural places. To that end, they created The Grounds Keepers to help enable and motivate folks to leave it better through removing trash found in the wilds, and have removed over 10,000 pounds of trash in its first 3 years.
Anyway, Granite Gear is continuing the Ground Keepers in 2020 and I've been asked to join the team! Well, actually, I asked to join, but they accepted me!
As a Grounds Keeper, I'm committed to hike at least 300 miles of trails, pick up whatever trash I find and can carry (not old car chassis), and report back monthly. Gosh, I do that anyway as a Leave No Trace educator, so it's a perfect fit for me.
I expect to hike over 1,000 miles on local trails near home throughout the year, plus these anticipated trips should give me plenty of trail miles:
- Florida - Done - While visiting the in-laws in January, I hiked about 50 miles on beaches and trails, collecting 21 pounds of trash, mostly one big hunk of marine waste on the beach.
- Two Appalachian Trail Trips - in May and July, we'll be visiting the south and north ends of the A.T. for a book I'm writing. I expect plenty of opportunities to clean up.
- Cloud Peak Wilderness - a week of wilderness backpacking where most trash will be around old campsites and probably quite rare.
- Kekekabic Trail - a remote, 43 mile Minnesota trail with little traffic so I might need to hunt hard for trash.
- Border Route Trail - another Minnesota wilderness trail, 65 miles long and hopefully clean.
My personal goal is to remove an average of 1 pound of trash each day - that would be 365 pounds by year's end. We'll see how I do. Oh, and that does not count my own trash I generate on my trips.
Super Jen is also a repeat member of the 2020 team. You can see the entire 30 person 2020 Grounds Keepers team - they're a motley crew for sure.
A slogan of this program is Leave It Better, and I want to share my thought about that slogan. Generally, people say 'Sure, it makes sense to leave it better,' but from my experiences, 'Better' means something different to different people. Someone might feel that cutting some logs and building a bench makes a remote campsite 'better'. Someone might feel stacking rocks, weaving branches, or arranging found bits of nature into artwork is 'better'. Someone might feel marking a shorter route than the worn trail is 'better'.
So, I really like that the goal of Grounds Keepers is to remove human trash - it's a specific, tangible, measurable activity that is not a general feeling for us all to interpret. We are removing things that were put there by humans and serve no purpose - makes sense to me.
These are the socially responsible companies sponsoring the 2020 Grounds Keepers program, and the bling they provided each of us. Later this year, I'll share how well these items worked for me:
-

Ultralight Virga 2 backpack to carry my home on the trail. Plus, a couple stuff sacks and a scale to weigh the trash I find.
-

Nice pair of TR1 trail shoes so I can cover more miles, and I guess find more trash.
-

Lightweight inflatable sleeping pad. Need a good night's sleep to lug all that trash.
-

Eight backpacking meals. These will be new for me to try since my long hike nutrition tends to be poor.
-

Metal water bottle. I'm looking forward to sharing before and after photos of it at the end of the year. Member of 1% for the Planet.
-

Kula Cloth - my wife is very happy that this was provided.
-

Camp mug and a big bag of sustainably sourced coffee to get us started each morning. Well, I hope they don't mind me using the mug for cocoa and my wife loves the coffee. They contribute proceeds to outdoors volunteer efforts.
-

Earthy green 'Grounds Keepers' t-shirt made from old plastic bottles - I'll be wearing it on trail, so look for me! They've diverted over 8 million bottles into new clothing, so far.
-

Lightweight, super bright headlamp for finding more trash after the sun sets.
Hike On!
Posted: 02/04/2020
02/28/2020
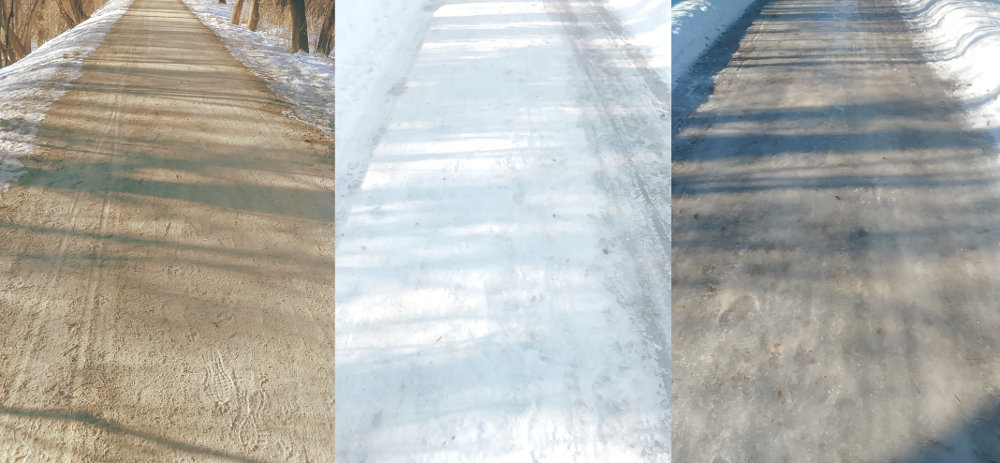
It's treacherous on the trails this time of year, for sure. We're in the midst of days warming up but nights still being freezing cold. This freeze - thaw - freeze - thaw daily cycle creates dangerous terrain on trails, paths, and sidewalks. Now, my friend Bren in Alabama can ignore this post (Hi, Bren!), but this bit of advice might help keep the rest of you upright and out of the doctor's office.
I noticed that:
- During the spring, summer, and fall, trails can be wet and muddy, or dry and dusty, but the risk of slipping is slim when the trail is tan.
- During deep winter, all trails are white - completely covered with snow and not very slippery. The snow makes going tougher, but actually slipping, falling, and getting hurt is not a big concern.
- It's the early spring or late winter that is especially slippery and risky to be out walking. Daytime sun melts snow enough to flow water over the trail, but not enough to dry it out. Once the sun gets low enough for the trail to be in shade, the cold air and subterranean ice work to freeze the new water into a shiney, smooth, slick surface of gray ice suitable for iceskating.
If you're like me, you can't sit at home and not hike just because the trail is a bit menacing. We go out and we take our chances, probably pussyfooting along not really enjoying the walk. Well, today I realized that I've developed an easy-to-remember method for picking my safest way along a trail this time of year. I'm calling it the TWiG Safety method.
TWiG is how to remember the relative safety of the different colors of trail you may need to walk on. It goes like this:
- Tan - dirt, gravel, leaves are all tan or brown and tend to have friction and are the safest.
- White - snow is the next best. It can be packed and slick, but usually has some grit to it.
- Gray - the most dangerous because it is ice and probably very slick.
So, while briskly hiking down the trail, I scan ahead to see what colors are there. All Tan and I'm good to go, some White and I avoid it, but as Gray shows up I use the white snow and avoid the ice. If there's no option but gray ice, then I slow down and take no chances by slow stepping as needed.
Just Remember TWiG - Tan, White, Gray for safety and your hikes will be safer and more enjoyable.
Hike On!
Older Posts Newer Posts
Find more Hiking Resources at www.HikingDude.com


Follow Me
Recent Comments