
Hiking Dude Blog
2025 - Aug Jul
2024 2023 2022 2021 2020 2019 2018 2017 2016 2015 2014 2013 2012 2011
08/18/2022
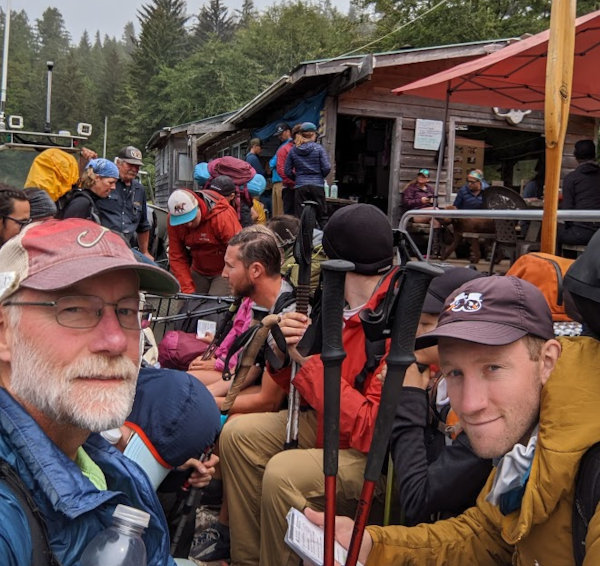
My long hike of the Pacific Northwest Trail was the most isolated, as we met only a handful of other hikers over 1,000 miles. The West Coast Trail is definitely NOT isolated in that way! Of all the trails I've hiked, the WCT easily had us encountering the most hikers each day, even more than the Appalachian Trail.
Not many people actually hike long distances. The 2,200-mile Appalachian Trail only sees around 4,000 hikers attempting thru hikes each year, and the 1,200-mile PNT has more like 70 annual thru hike attempts. The 50-mile WCT gets from 5,000 to 7,000 thru hikers each year. So, from a hiker per mile per day perspective, the WCT is VERY CROWDED!
On any given day during the hiking season, there will be up to 25 people starting from both the north and south ends, and 20 from the middle going north or south. The day you start, there will be about 30 people starting to hike towards you. 30 people started the day before, and 30 the day before that. So, you should expect to cross paths with about 30 people each day, and that is about what we experienced.
We met a group of 8 men, a family of 5, many couples and threesomes, and a few solo hikers - all going in the opposite direction. It seemed that we always met them either in the middle of a muddy bog, or halfway up or down a series of ladders. Of course, this makes sense since these are choke points that take extra time and effort to get past.
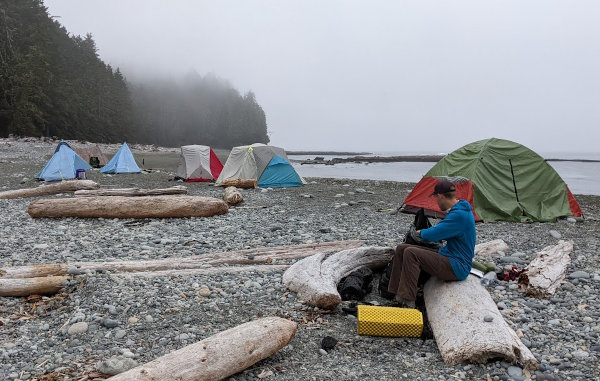
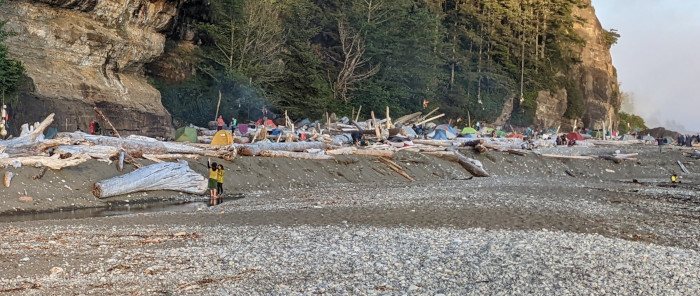
Even more so than on-the-trail, you'll notice the people at campsites. Since nights are spent at designated sites on the beach, those 30 people fill up the areas with a couple dozen tents. When you're used to plopping your tent down on any flat spot out in the wilderness, this is a big change.
We tended to start hiking early in the morning which meant we were often one of the first groups to arrive at campsites. Rather than taking a prime spot with easy access to the bear boxes, outhouses, water source, and trailhead, we set our shelters up far away from where we envisioned the majority of others would like to camp. This is just trail etiquette to allow those that may of had a hard day hiking to find a nice place.
We also preferred to be apart from the noise and activity around the many campfires that were built each night. For the most part, it worked out well, but I expect we would not win any 'life of the party' award.
Of the 100+ people we interacted with on the trail, there were none that were anything but friendly and considerate. Maybe it's a Canadian thing, but I got no 'entitled', 'weird', or 'sketchy' vibes that sometime crop up on other popular trails. We did meet a few folks that made the trek special...
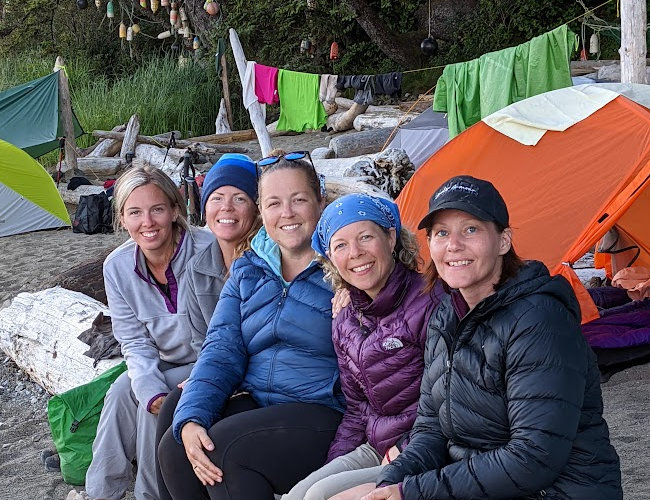
The ladies above (Erin, Candice, Amanda, Shannon, Ericka) followed the same itinerary as us. They did not all hike together through the day, but every afternoon or evening they eventually arrived at camp. Over the days, it was enjoyable to hear about their adventures, including getting lost, bushwhacking, and falling in mud. Pretty much every other obstacle you may hear about this trail seemed to happen to one or another of them at some point, but they persevered and fared as well as most.
One hiking pair that rode the shuttle bus with us was a father and young son. They were excited to hike, but after our boat ride with them across the Gordon River, we never saw them again. We got word on the second day that the dad had a boot blow out on the first day so they had to turn around and leave - hopefully, he fixed it and did a reboot (get it?).
Others from that original group would leap frog with us over the next days. One Canadian fellow had hiked the trail a couple times and shared a lot of information from his past experiences.
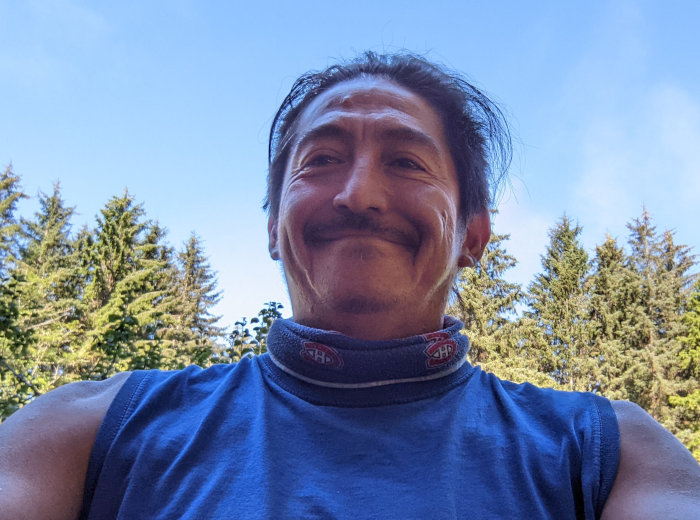
Upon reaching the northern terminus early in the day, we were greeted by a Trail Guardian, someone that maintains the trail, helps hikers, and shares local culture. My wife asked him if he'd take our group photo which he eagerly did, and surreptitiously got a couple of himself in as well. This is Kevin, whom I later learned is pretty well-known on the trail since he's been working on it for over 23 years now.
This year, Kevin has been sharing salmon with hikers that arrive at the terminus on Thursday afternoons - we missed it. He is also part of a crew responsible for the northern 25KM of the trail - there are 3 such crews, breaking the trail into three 25KM sections. It was a joy to chat with him for quite some time while he sharpened his chainsaw.
There were more women than men hiking the WCT during our time on trail. The last person we met on trail was at about kilometer 3, and she was a spitfire just heading south all by herself. All smiles, enthusiasm, and energy, with a small, light gear setup. I have no doubt she cruised down to the Gordon River without a care.
I noticed the diversity of hikers, too, and it was refreshing. On the long trails I've hiked, the typical hiker is a lean white male. The WCT is exceptionally different from that with a wide range of skin colors, body sizes, ages, and even languages. I heard English, French, Japanese, and Spanish (I think).
It seemed to me that the general 'vibe' on the WCT is more easy going than on longer trails. There was not a drive to cover many miles. Taking time to experience the widely ranging trail conditions and varying scenery was a nice luxury. Having a few hours to lounge around after hiking a few miles each day gave it more the feel of camping than hiking. I suppose the shorter trail length and commitment of just a week rather than a month or more had a lot to do with this.
I'll share what our camp life was like on the WCT in a couple days...
08/30/2022
Not long after leaving the crabshack on the ferry boat across the Nitinat Narrow to continue our northbound hike up the West Coast Trail, Kelly slipped on a very muddy uphill step. She landed right on a hiking pole and SNAP! the carbon fiber shattered.
Not long before that, I had slipped on a root and my ankle landed on my aluminum pole, bending it so it would not longer collapse. So, aluminum poles bend and fiber poles break.
Between Tsusiat Falls and Michigan Creek campsites, the West Coast Trail crosses the Kanawa River. This is a proper river with plenty of depth, width, and current - not like a little creek you can wade through. Fortunately, it also has a wonderful cable car to carry hikers across.
We sent two of us across with packs, then a 3rd with two packs, then Kelly and I with our 3 hiking poles and the last pack (and her broken one stashed away in the pack). It all went well until the very end.
This video shows our crossing...
Open video in Separate View
So, aluminum poles sink and fiber poles float.
Things like this happen all the time on the trail. We found (and carried out) broken poles, tips, and baskets, a shoe, clothing, and quite a lot of other dropped things, but very little trash like wrapper pieces on the trail. Some people might just leave the 'lost' items in the river, but that doesn't seem right and we really needed the poles to put up our tarp tent.
You can read more about our Kanawa crossing and our whole hike in my West Coast Trail Journal.
But, seriously, I prefer aluminum hiking poles over carbon fiber, and here's why:
- Aluminum is much less expensive (like $20 vs $100).
- Aluminum can take much more abuse before breaking, and has a longer lifespan of rough use.
- Bent aluminum can often be bent back to use a bit longer.
- Aluminum is not as sensitive to extreme cold and heat - especially becoming brittle in extreme cold.
- Aluminum can be recycled if the pole does become unusable.
If you decide to give hiking poles a try, take some time to learn to use them before going on a long hike. Some things to consider:
- Use the wriststrap correctly. Put your hand in from the bottom so your hand encircles both the wriststrap and the grip. This saves a lot of hand and wrist fatigue.
- Remove rubber tip guards and baskets. This reduces weight and prevents them from being lost on trail - I've lost count of the tips I've found along the way.
- Figure out your cadence between feet and poles. Typically, the pole on the left should touch the ground forward at about the same time as the right foot.
Hike On!
Posted: 08/30/2022
09/08/2022
More Miles = More Smiles is typically how a long hike goes. As long as there's daylight, the feet are moving and the next beautiful view is anticipated ahead on the trail. There is very little time spent sitting around a campsite - basically make dinner and head to bed for an early start on the next day.
As I mentioned earlier, the West Coast Trail is not a typical long distance trail. At only about 50 miles, it's a bit longer than most backpacking trips, but much shorter than most long trails (which tend to be at least hundreds of miles). This means, unless you are fastpacking or trying for an FKT, you tend to have shorter hiking days and more time in camp.

I'd like to share what our In Camp time was like on our trip, and hope it provides some insight and ideas for you planning a future West Coast Trail hike.
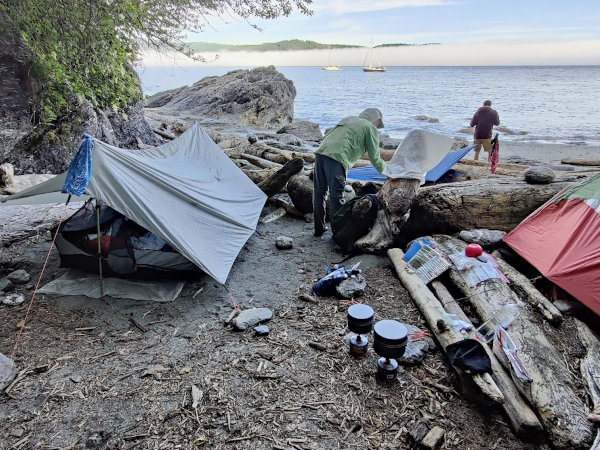
With a 5 kilometer hike from Gordon River to Thrasher Cove on our first day, even with a very late 11:15am start time after our mandatory orientation, we got to camp before 4:30pm. This would actually be our latest camp arrival time for the whole trip. Being in the 2nd group of 10 people ferried across the river, the campsite was already fairly crowded when we arrived even though we passed a few groups on the way. The photo above is of our first setup and it shows most of the important parts of our camp life.
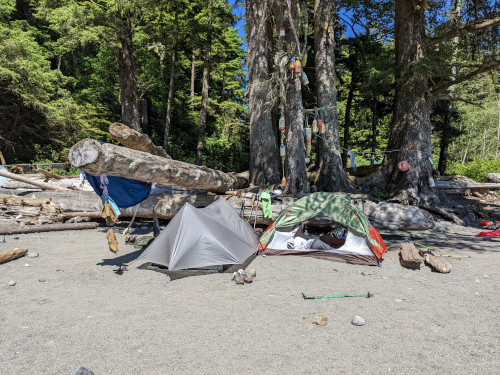
Our Shelters - We had three different shelter styles. One person slept in a bivy sack with a silnylon tarp above him to keep off the heavy morning dew. Another two had a stand-alone tent with poles and rain fly. My wife and I had a tarp with a bug nest underneath.
All three shelters worked just fine, but a few things about them:
- the bivy takes up very little space and can be laid down between logs or rocks, or anyplace you can find.
- dome tents with poles can be pitched anywhere and really need no stakes, so sand is no problem.
- a tarp that requires separate poles needs stakes which can be a nuisance in soft sand. There were always drift logs or rocks available to help with the guylines, so it was not a problem.
- Morning dew was heavy many days. Having a rag, sponge, or bandana to sop most of the water off your shelter is a good idea.

Our Water - When I thru-hiked the Arizona Trail, finding enough water was an ongoing concern. The West Coast Trail has water everywhere! Since the trail follows the shoreline of Vancouver Island, hikers are constantly crossing small streams carrying water down from the small mountain range to the ocean. I never carried more than my single .6 liter bottle full of water, and every campsite is situated on a major river or creek.
We used two Sawyer Squeeze filters to treat all our water and they worked very well. At each camp, someone would take our three 2-liter dirty water bags to the water source, fill them, and carry them back to our campsite. Then, anyone that wanted water could attach the Squeeze filter to a bag and fill their water bottle from that. We would use the rest for dinner.
After dinner, someone would repeat the water source trip to get water for the next morning. By filling water bottles at night, while you have free time, the water can cool off more in the cold air overnight and time is saved in the morning.
Typically, we'd have a water refill and rest break once during the morning at some stream we passed. All the water sources were fine, but we were probably overly cautious at one...

At Walbran Creek, the historic water source seems to be a trickling waterfall on the east side of the creek a few hundred yards upstream from the camping area. Unfortunately, there has been a landslide there blocking access to the source. So, most people were just gathering water out of the lagoon that you can see in the background above. You can also see someone standing in the water just behind us. People were swimming, bathing, washing dishes, and I presume peeing in that water. So, we gathered all our water bottles into a large mesh bag along with our water filter and headed farther upstream. When we hit the landslide blockage, we swam across to the other side. About a quarter mile farther upstream, the lagoon ended and the stream had riffles and obvious flowage so we gathered our water there. Working our way back downstream with about 20 pounds of water over very slippery underwater rocks was quite an adventure, but at least we got good, clean water.
Also, at Tsusiat Falls camp area, I'd recommend getting water directly from the falls rather than from the outflow of the pool below it since many people bathe there. But, if no one has been in the water for some time, like early in the morning, I suppose any crud as been washed downstream.
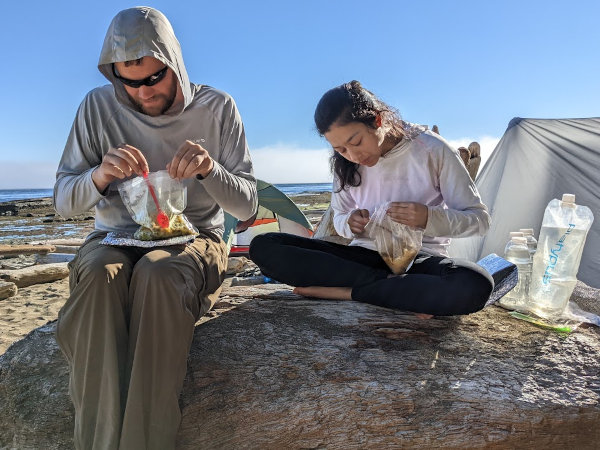
Our Food - We really enjoyed how well our dinners worked out! We kepy things Super Simple!
Earlier this summer, on a backpacking trip in Wyoming, my buddy had made his own freeze-dried meals and they looked great. So, we purchased dried ingredients from Mother Earth Products (the best buys we could find online) and put together our own. Actually, my wife did pretty much all of it. She also purchased a tiny, inexpensive vacuum sealer and reusable bags. She added all the ingredients for one meal to a bag, closed it, and vacuumed the air out - presto! just like those $$$$ meals.
Our meals were:
- Chicken Tater Trasherole - chicken, mashed potatoes, hash browns, milk, onion, garlic, ranch dip
- Health Bowl - rice, lentils, almonds, cranberries, vegetable bouillon
- Pesto Veggie Pasta - ramen noodles, TVP, mushrooms, pesto mix, parmesan cheese, mixed vegetables
- Lentil Chili (my FAV!) - lentils, tvp, corn, peas, chili seasoning
- Adobo Chicken - chicken, rice, bouillon, garlic, pepper, soy sauce, vinegar
- Chicken Curry Rice - chicken, rice, raisins, apples, onion, curry, allspice, cinnamon, toasted nuts
The only cooking was boiling water and adding it to the individual bags.
Each person could choose which meal sounded good to them each night.
Clean up was just pouring a bit of hot water into the food bag, swishing it around, and drinking it. We took all the bags home and have washed them out to use on our next hike (we leave in a week).
We had simple non-cook food for breakfast, lunch, and snacks - cocoa, coffee, protein bars, granola bars, home-dried fruit, sausage and crackers, Austin-brand cracker sandwiches, M&Ms, trail mix, and the ever-popular Sour Patch Kids.
One super food item that I'd highly recommend is Pringles in a cardboard can (not a plastic can)! Here's why:
- Pringles are calorie dense at 150 cal/oz.
- They taste great with all that salt and crunch.
- They don't get crushed in a backpack.
- It's easy to share a can. We ate a can each day between the five of us.
- Put the lid on an empty can and squeeze the can quickly - it POPs the lid off for endless entertainment.
- The can makes an awesome garbage can when empty. You can pack wrappers and trash in it and it Will Not Break. I packed all my trash for the six days into a can and had room left.
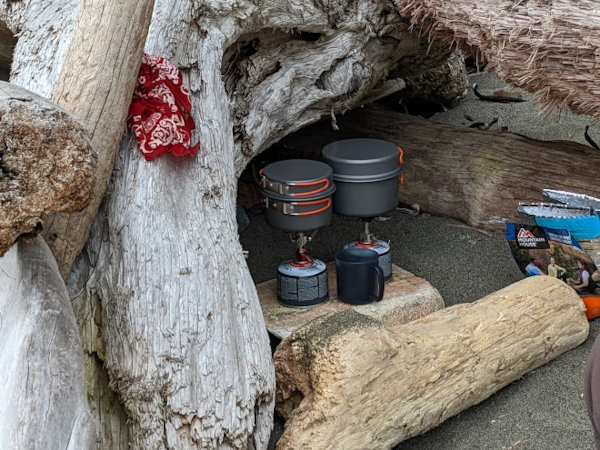
In the photo above, you can see our cooking set up. The constant wind on the ocean meant we used wind blocks to save fuel. We had two canister stoves just so we would have boiling water for everyone at the same time - one stove would have been fine. You also might notice a Mountain House meal - one of us picked that up in a hiker box at the Crab Shack on Nitinat Narrows, so check there for free food when you hike through.
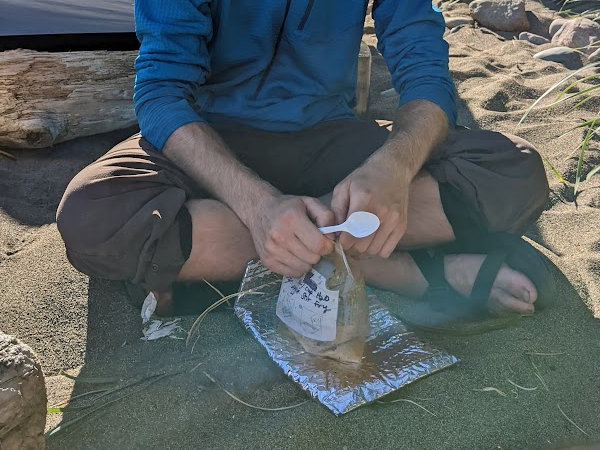
Once hot water was added to the meal pouches, we closed them and set them into individual Cozies that I made from insulating wrap. In less than 15 minutes, they were ready to eat and still very hot. These cozies are simple, cheap, and easy to make.
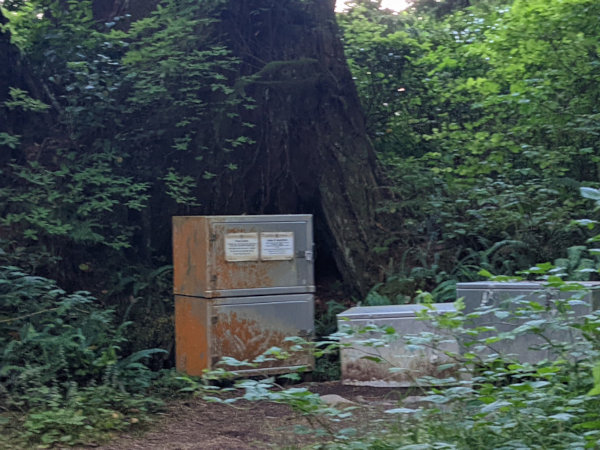
House Rules - If you are used to wild camping in the wilderness, or established camping in a park, the West Coast Trail has a few unique characteristics that puts it somewhere between the two. Reading the official paraphernalia from Parcs Canada will give you all the rules and guidelines, but some of the things I noticed were:
- Food Storage - We had a bear walk onto the beach out of the forest about 20 yards from our tent. Many other campers reported bear sightings. For this valid reason, every campsite has a group of bear containers in which campers should store their food, garbage, and smellables over night. The cans get packed full, so your crackers will probably get crushed. We also saw tracks of smaller rodents often on the beaches, and many mornings showed tiny mouse tracks completely covering every inch of wet sand in our camping area.
- Beach Camping - When you are right on the ocean's edge, things work a bit differently than inland...
- Tides - make sure your campsite is high enough that the incoming tide doesn't reach you. The high tide line is usually easy to see since the sand above it is covered with debris.
- Sand Bugs - There were no mosquitoes, flies, or ticks, but the sand is filled with tiny insects eating the washed up plant life. We got no bites from them, but maybe?
- Wet Sand - The sand at many camps is very fine and soft. When dry, it feels nice, but it gets into any crack, crevice, or open zipper. When wet, like from dew every morning, it sticks to everything. So, step carefully and wipe off lower legs and feet before going to bed and putting on shoes. And, keep things closed up and covered.
- Shelters - I mentioned before that you'll need to figure some way to anchor your tent using rocks or driftwood.
- Night Life - There are dozens of people packed into small sections of beach every night so courtesy is important.
- Campfires - I'm not used to having campfires, but there were a handful up and down the beach. Most areas were denuded of small driftwood for fires and people walked a long distance to scavenge wood. The brochures instructed to keep fires below the high tide line, but that rarely happened. Some beaches were covered in chunks of blackened wood and coal bits.
- Noise - The sounds of the ocean drown out most camper noise, but it's still nice to quiet down when the sun sets. We only had one instance of youth playing loudly next to our tents while we were trying to get to sleep and it didn't last long.
- Sleeping - I typically get up during the night when camping, but I slept straight through every night on the WCT. So, I didn't get to see any stars or night scenery. I think the soft sand makes for a very comfortable bed.
- Sewer - The guidelines say to bathe and wash dishes in the ocean or river mouths emptying into it. In other words, the ocean is the sewer out here. This is atypical to most Leave No Trace principles, but I guess dilution is a solution to pollution. Every evening, we walked down to the ocean edge to brush our teeth and spit into the waves. It was kinda fun. Fortunately, we had no dishes to wash with our meals.
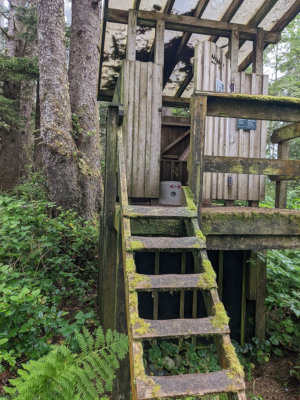
- Toilets - No need to dig catholes on the West Coast Trail! The campsites have composting toilets - with yet more ladders to climb. You climb up, go inside, close the door, do your business, and then toss a handful of wood chips down the hole. That last part is important to make them work!
Since so many people all use the same door handle and ladders, washing your hands and using some alcohol sanitizer afterward is a very good idea.
It's ok to just swing by a campsite and use the toilet during the day, too.
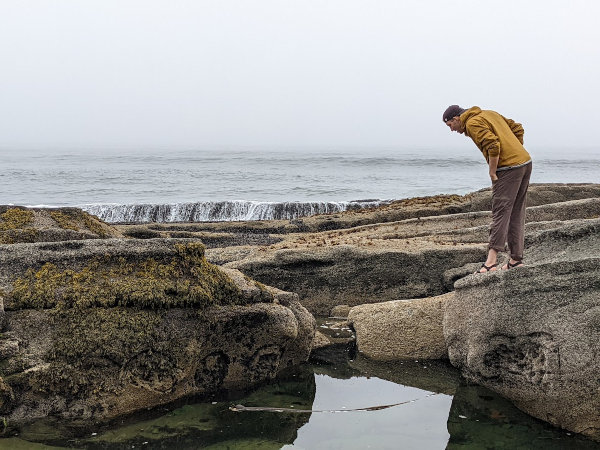
Free Time - Being 2 hours behind our normal time, we woke up pretty early and were on the trail between 6 and 7 each morning. Some of this was also because we had to match the tides to do all the beach hiking we could. This meant we arrived at most camps around 1pm with our latest time being 4:20pm. All the free time is unusual for a long distance hiker since daylight is normally used for hiking.
We got to explore pretty much all the area around the camps. The tide pools and creeks were interesting, and the view out over the ocean was always changing. We saw some whales, otters, boats, and birds.
I spent a little time carving a buoy that was found on the beach and left at Michigan Creek. I also balanced a few long logs across other logs just for something to pass the time. Setting up camp, drying clothes, making meals, and resting took up the rest of the time.
Read the day-by-day of our adventure in my West Coast Trail Journal
Posted: 09/08/2022
09/20/2022
I find the few days right before a backpacking trip to be very exciting. Trying to make sure I have everything I really need, but not extra weight I don't need on this trip. Wondering if I really have enough food, or if I should add another handful of Sour Patch Kids. Checking that I can actually access the maps I think I downloaded to my phone even when it's in airplane mode. And, on and on.
Tomorrow, we'll be Up North to hike our 100 miles on the North Country Trail for 2022 and get a patch! We're going to hike the Border Route Trail from the west trailhead on Gunflint Trail road to the east trailhead on Otter Lake Road. This hike is about 65 miles and just happens to end right where the Superior Hiking Trail starts. Isn't that convenient?
Instead of stopping there, we're going to hike about another 50 miles down the SHT to Grand Marais, MN. That way, we can hop in our car and drive home at whatever time on whatever day we happen to finish without needing a shuttle at the end.
Most of the first 4 days will be in the Boundary Waters wilderness with no phone coverage, but I'll have my Spot along. If you'd like to make sure we're still moving, check out this real-time map - I hope it works. Once we hit the SHT, I might be able to drop a note now and then, but we'll see.We were planning on doing this last week, but starting into a 100% chance of rain for 2 days seemed kind of silly. The forecast is looking much better now and the fall colors should be well under way. And, there's a group of people I know doing a SHT thru-hike NorthBound that will be close to Grand Marais when we get there. If things fall into place, we might find them on trail to say 'Hi'.
Our packs with 10 days of food and expected temps right down to freezing are just about 30 pounds so I'm excited to start eating some of that weight off. When we finish, I'll tell you more about the new dinner meals we've been making and enjoying this season. So far, they've been most excellent!
Posted: 09/20/2022
09/22/2022
Posted: 09/22/2022
09/28/2022
Posted: 09/28/2022
10/07/2022
Anyway, it was a great trip with a lot of solitude in the first half and lots of people the second half.
Please read my Border Route Trail Info page, or jump right to the BRT Journal page.
Hike On!
Posted: 10/07/2022
10/11/2022
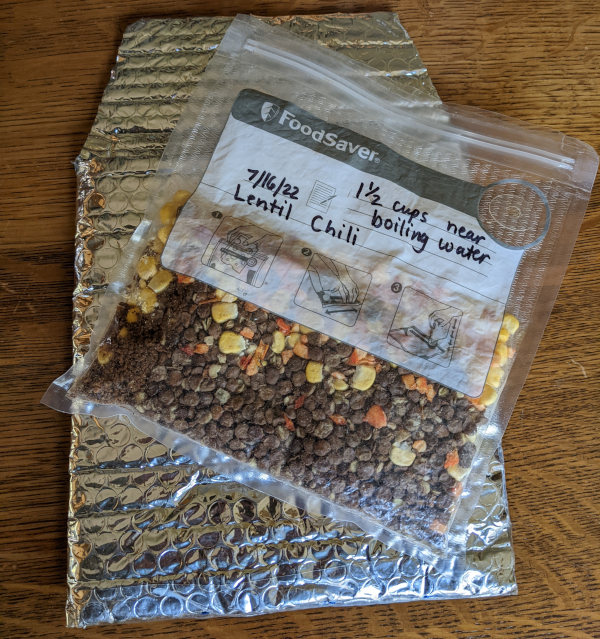
With my new multi-day hiking partner (my wife) preferring hot dinner meals and insisting on hot coffee in the morning, I'm resigned to carrying a stove again. That means a pot, windscreen, and fuel, too. The fuel is heavy so I want to be as efficient with it as I can.
We're just boiling water and adding it to dehydrated food, so the two points of efficiency are preventing the flame heat from escaping and then preventing the heat in the water from escaping.
A super light aluminum foil windscreen helps with the first. It prevents wind from blowing the heat away and lets it reach the water better.
To prevent lose of heat from the water, we're using new cozies. Rather than pouring the dried food into the water in the pot and letting it rehydrate while simmering for 15 minutes, a food cozy rehydrates the food and keeps it hot without using extra fuel. Plus, it means no clean up of the pot is needed. And, if you just eat out of the bags, the only dirty item is your spoon. (We take our food bags home dirty, wash them, and use them multiple times.)
Once the water is boiling, we turn off the stove, pour the hot water into the food bag that is inside the food cozy, stir it up, and let it sit for 15 minutes.
Even at near freezing temps, the rehydrated food is still too hot to eat. But, you could put the cozies together and wrap in another insulating layer such as a shirt, stocking hat, or sleeping bag - even better, hold it against your body under your clothes!
These food cozies are very easy and inexpensive to make. I've shared the steps with photos for our New, Improved Food Cozy and hope you have fun making your own.
PS: On our recent Border Route Trail hike, we took two 100 gram canisters and had about 35 grams left in one at the end. I think we used more fuel than necessary, so I'm working on a better windscreen design. Also, one larger canister has a better fuel to packaging ratio and that would save some pack weight.
Hike On!
Posted: 10/11/2022
10/31/2022

How well do you eat on the trail?
Are you a Grazer, nibbling on bits of snacks from a bag as you hike along all day? Or, a Three Square Meals kind of guy, taking the time to prepare a real breakfast, lunch, and dinner each day? Most likely, you're somewhere in between with a quick, hot breakfast, simple lunch, snacks through the day, and finishing with a cooked meal at camp.
For the past ten years, I've mostly been a Grazer, not wanting to sacrifice miles to stop and make meals. I tend to keep moving as long as the sun is up. Now that my wife has joined me, we've decided to take the time to heat water for coffee or cocoa in the morning and make hot meals for dinner. I must admit that taking the extra time is definitely worth the couple miles of trail missed.
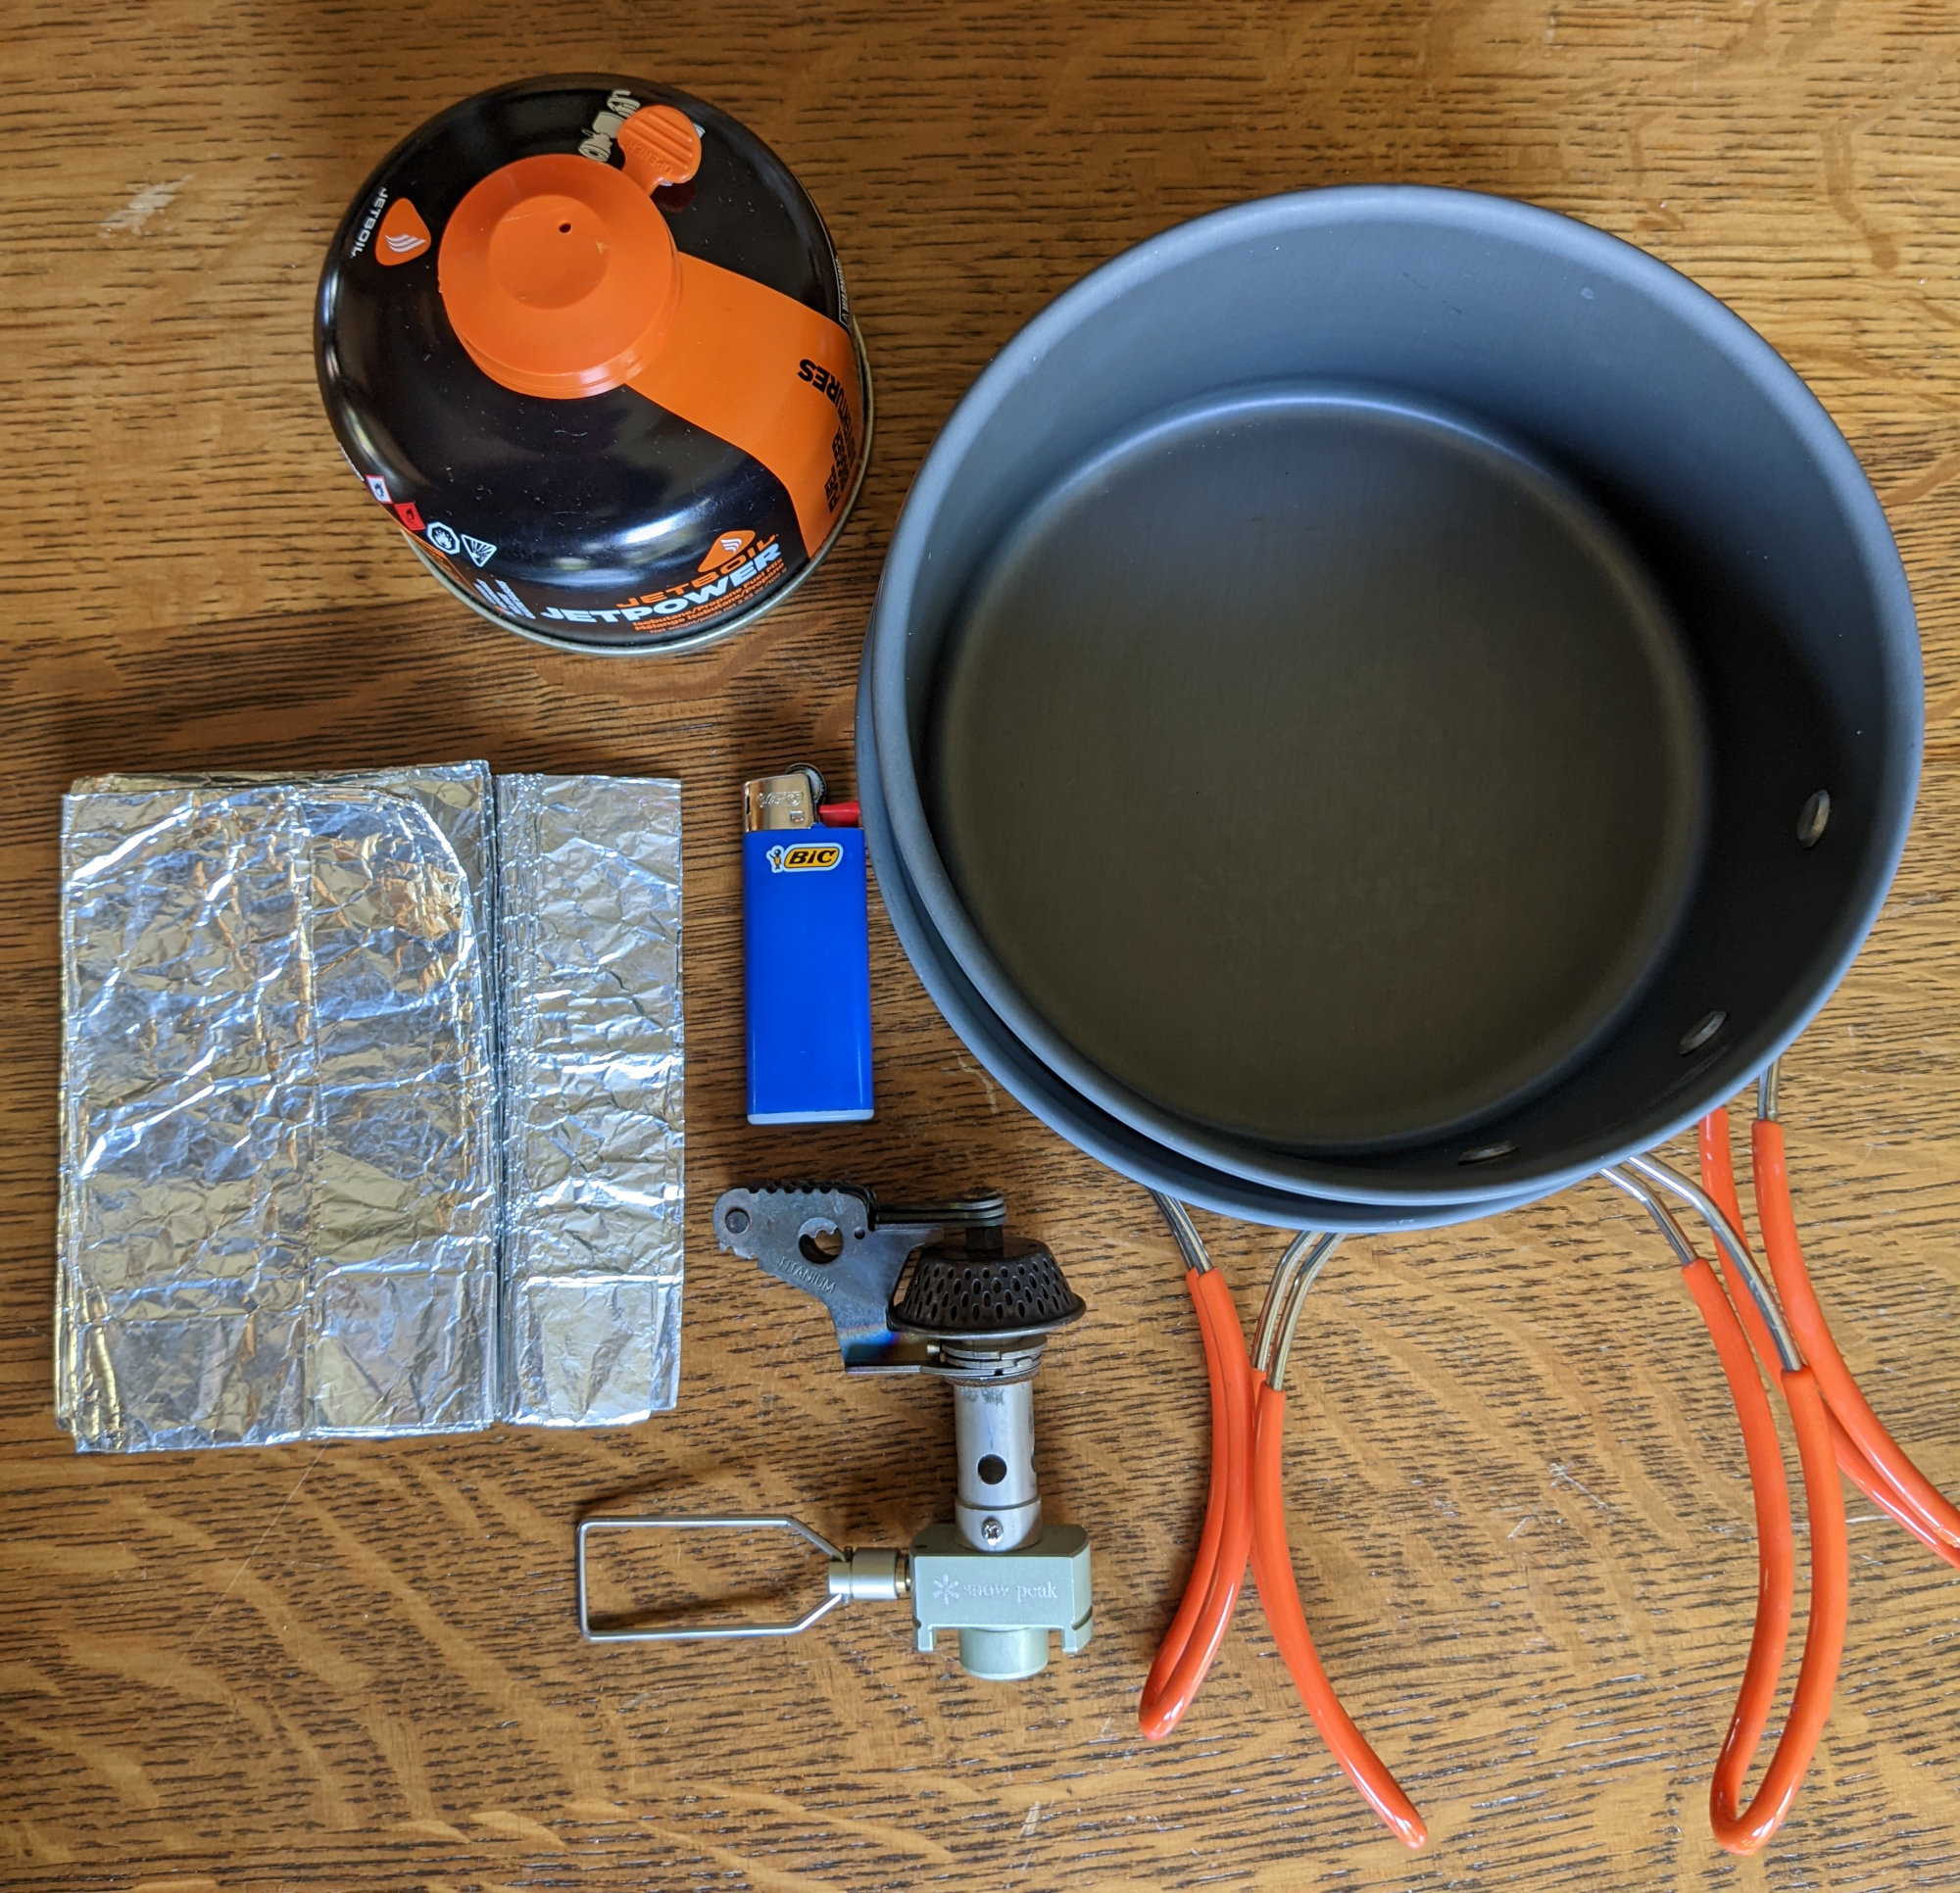
Resigned to the extra effort of carrying the food, stove, fuel, and cook kit, I still want to be as efficient as possible with our food system. So, I came up with these goals to meet with whatever meals we decide to use:
- hot meals - this rules out no-cook and cold-soak styles. We want the warm feeling of hot food.
- variety of flavors - not the same meal day after day. One big bag of ramen noodles isn't good enough.
- healthy - use minimally processed ingredients as much as possible.
- minimize cooking effort and time - we'd like to be able to prep, eat, and clean up in 30 minutes or less.
- minimize trash and clean-up - this mostly means we'd like to only boil water in our pot and eat the food out of the bag it is cooked in.
- minimize fuel use - long simmering times kill fuel. Just quickly heat water and rehydrate is better.
- minimize cost - prepackaged meals are easy, but expensive.
- minimize chemicals, preservatives, and packaging - simply dried ingredients rather than highly salted and chemically preserved would be better.
- minimize carried food weight - the higher calories per ounce, the better.
Just Buy Them
It's easy to purchase meals from Alpine Aire, Backpacker's Pantry, Good To Go, Mountain House, Peak Refuel, RightOnTrek, and other brands. You get hot meals quickly with little trash. Unfortunately, there is often a lot of salt and chemicals, the flavor is defined for you, and the cost is high.
Researching a few brands showed that Mountain House averages about 43 calories/$1.00 and 122 calories/oz. while Good To Go averages about 50 calories/$1.00 and 107 calories/oz. The others are in the general ballpark.
We hoped to do better.

MYOM - Make Your Own Meals
To save cost, get a custom fitted item, and have a sense of accomplishment, some hikers do MYOG (Make Your Own Gear). I've made quilts, shelters, packs, and other things. It's great.
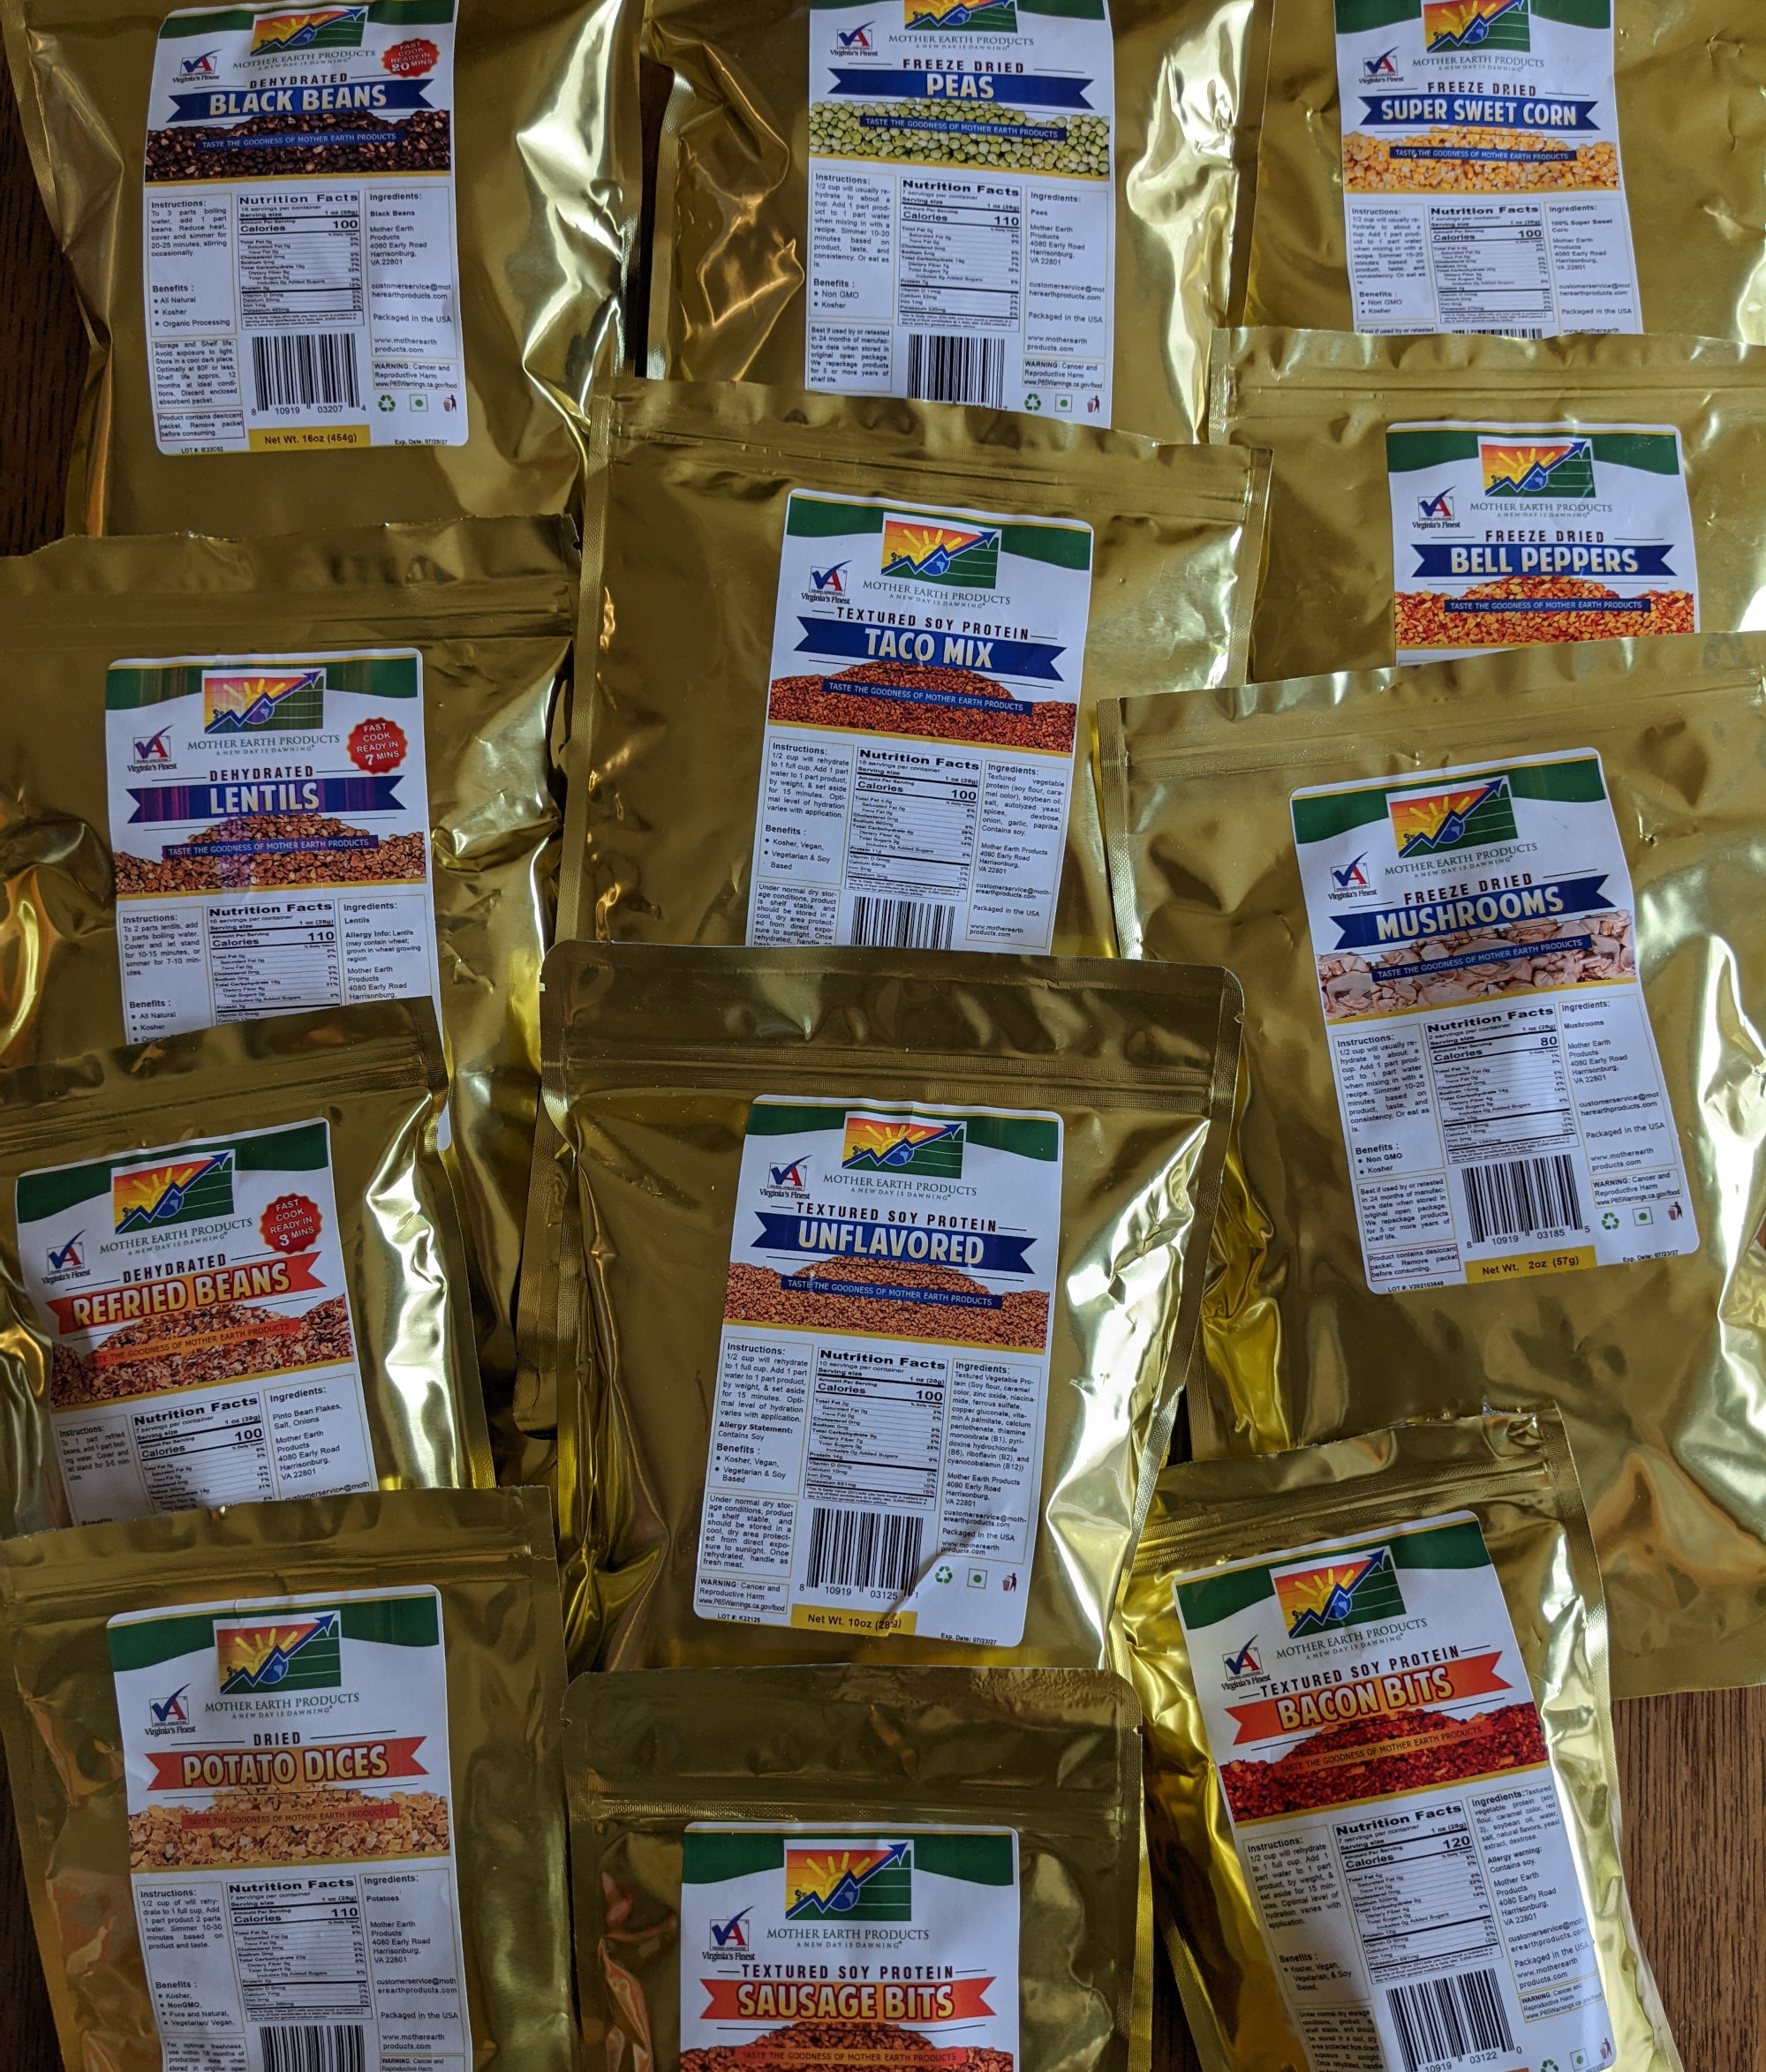
For the same reasons of saving cost and getting the exact food we want, we decided to Make our Own Meals. A meal typically includes a carbohydrate base, protein source, vegetables, and spices. It turns out that a lot of the ingredients can be easily found at regular grocery stores, but dried and freeze-dried items can be bought online in bulk for less cost.
After checking out quite a few freeze-dried sources, I settled on Mother Earth Products as the best spot with a wider range of product at a lower price than others. We've now made nearly 100 meals using their ingredients and are very pleased with the results.
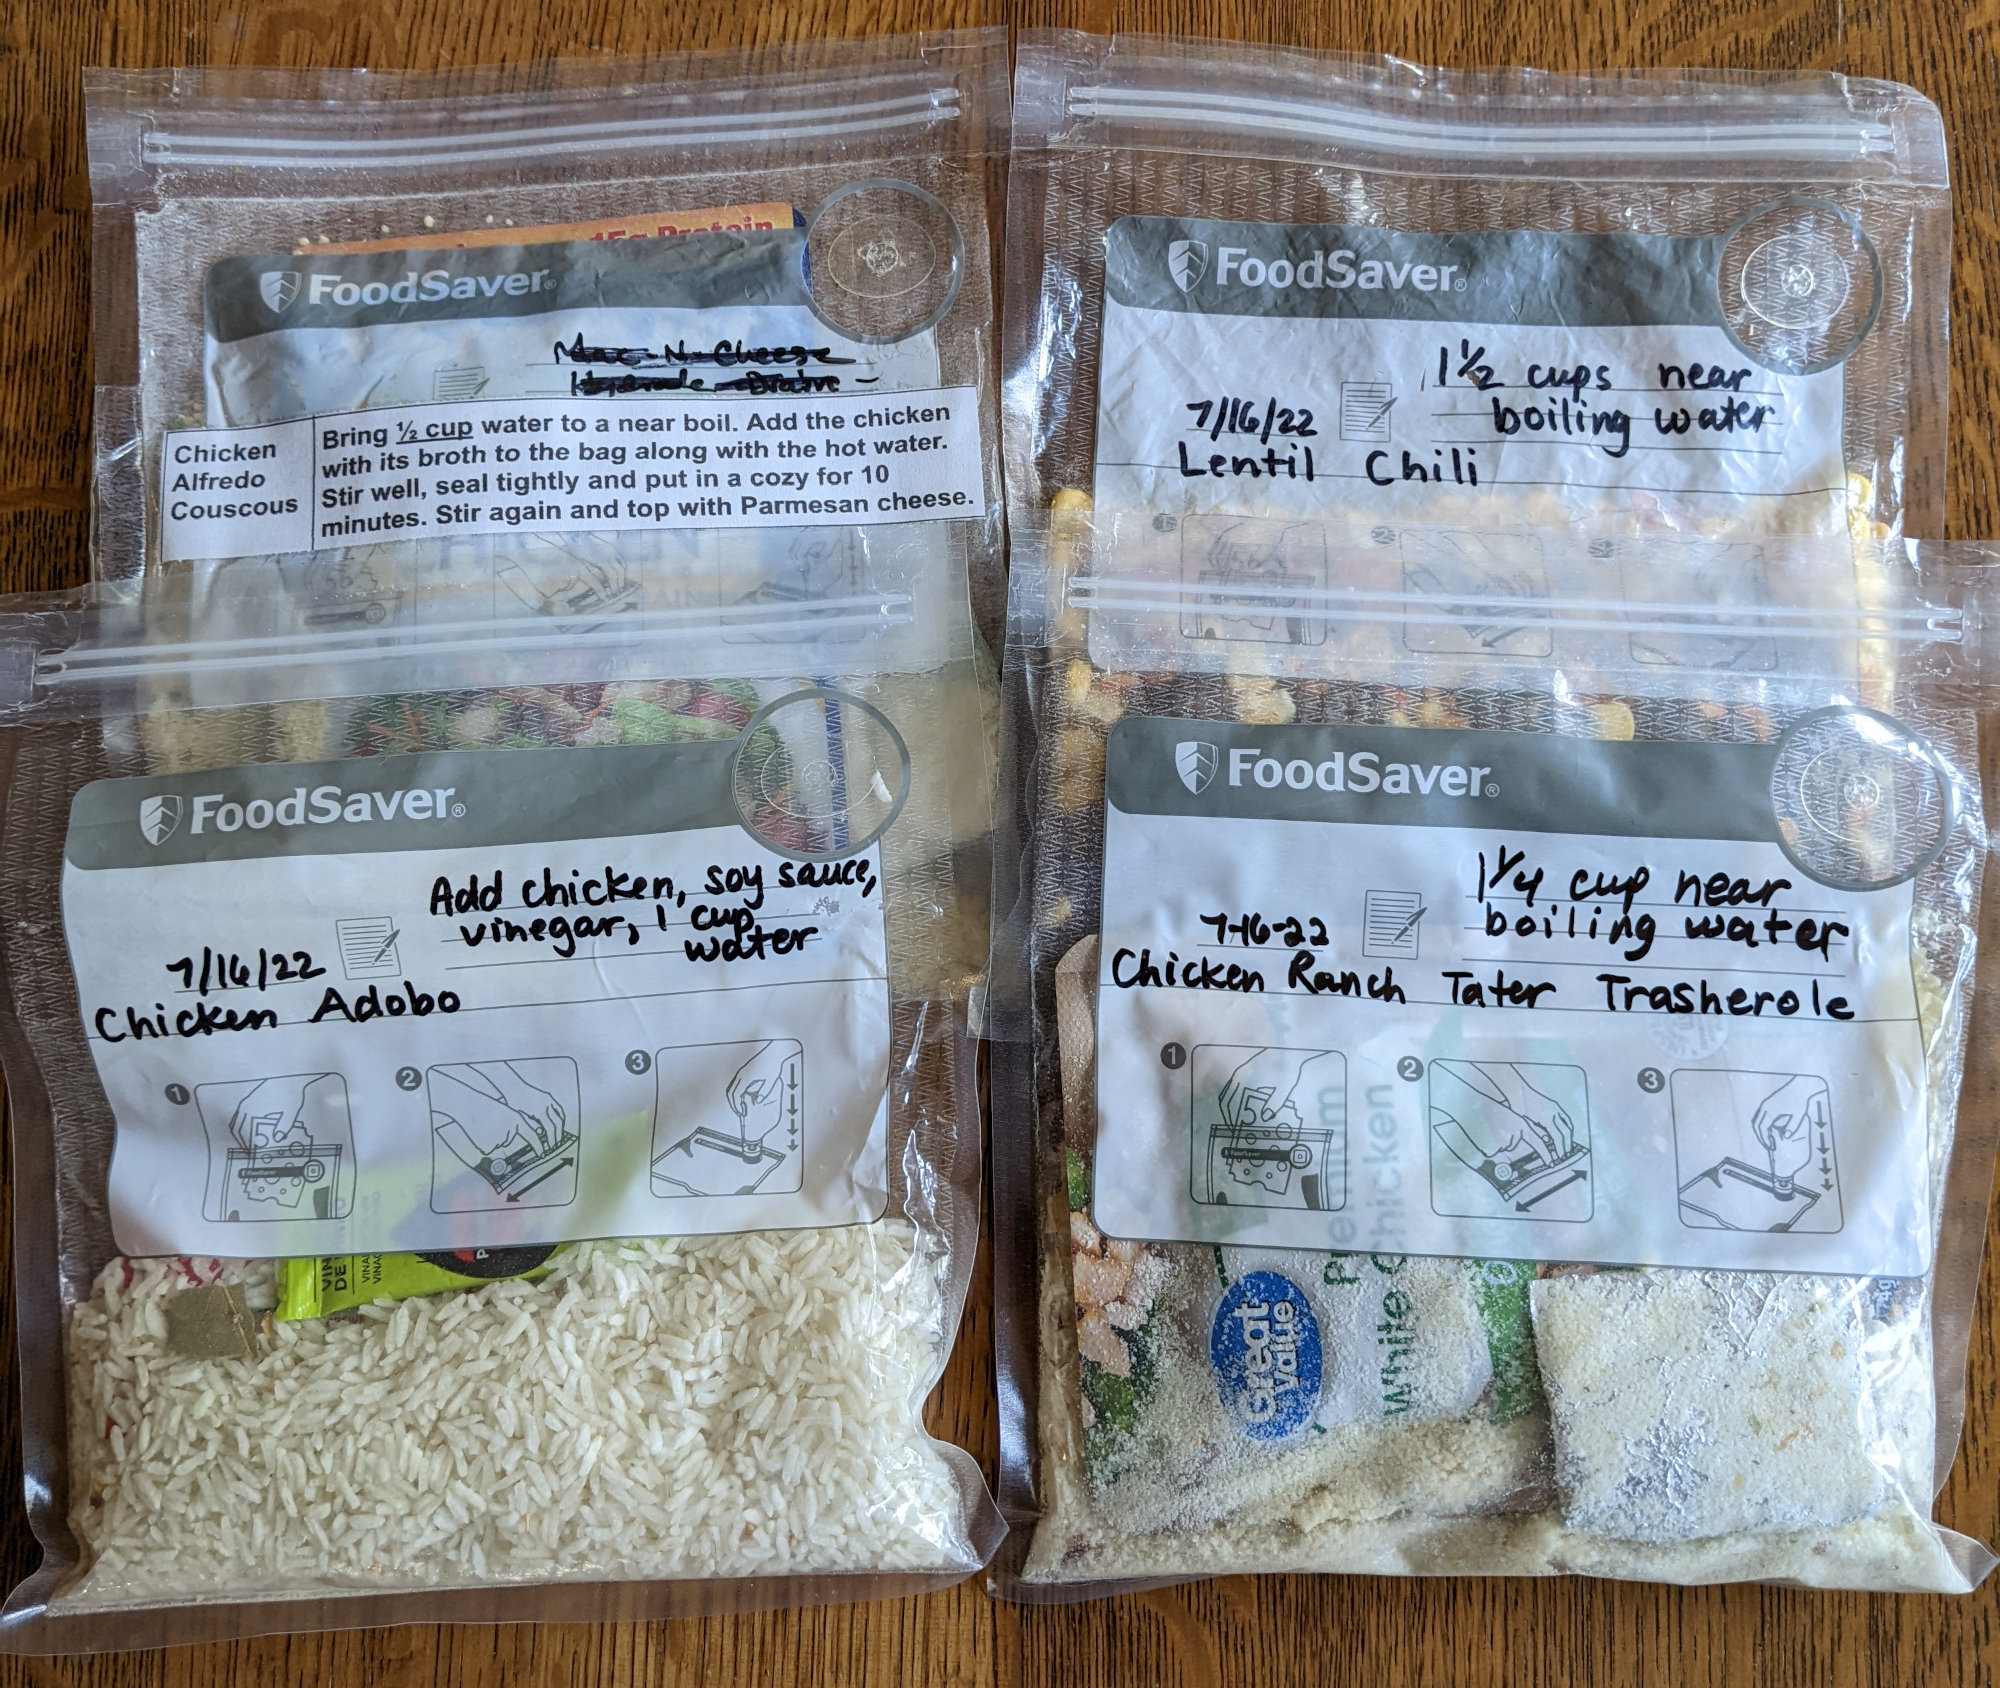
Creating a Meal
I believe a MEAL needs to provide nutrition and calories, taste good, and fill my stomache. A bowl of rice might fill me up, but doesn't provide much nutrition or taste. So, with a broad selection of ingredients, it's up to you to combine them into meals that sound good to you. Here's how we did it: (and all of these are dried or freeze-dried items)
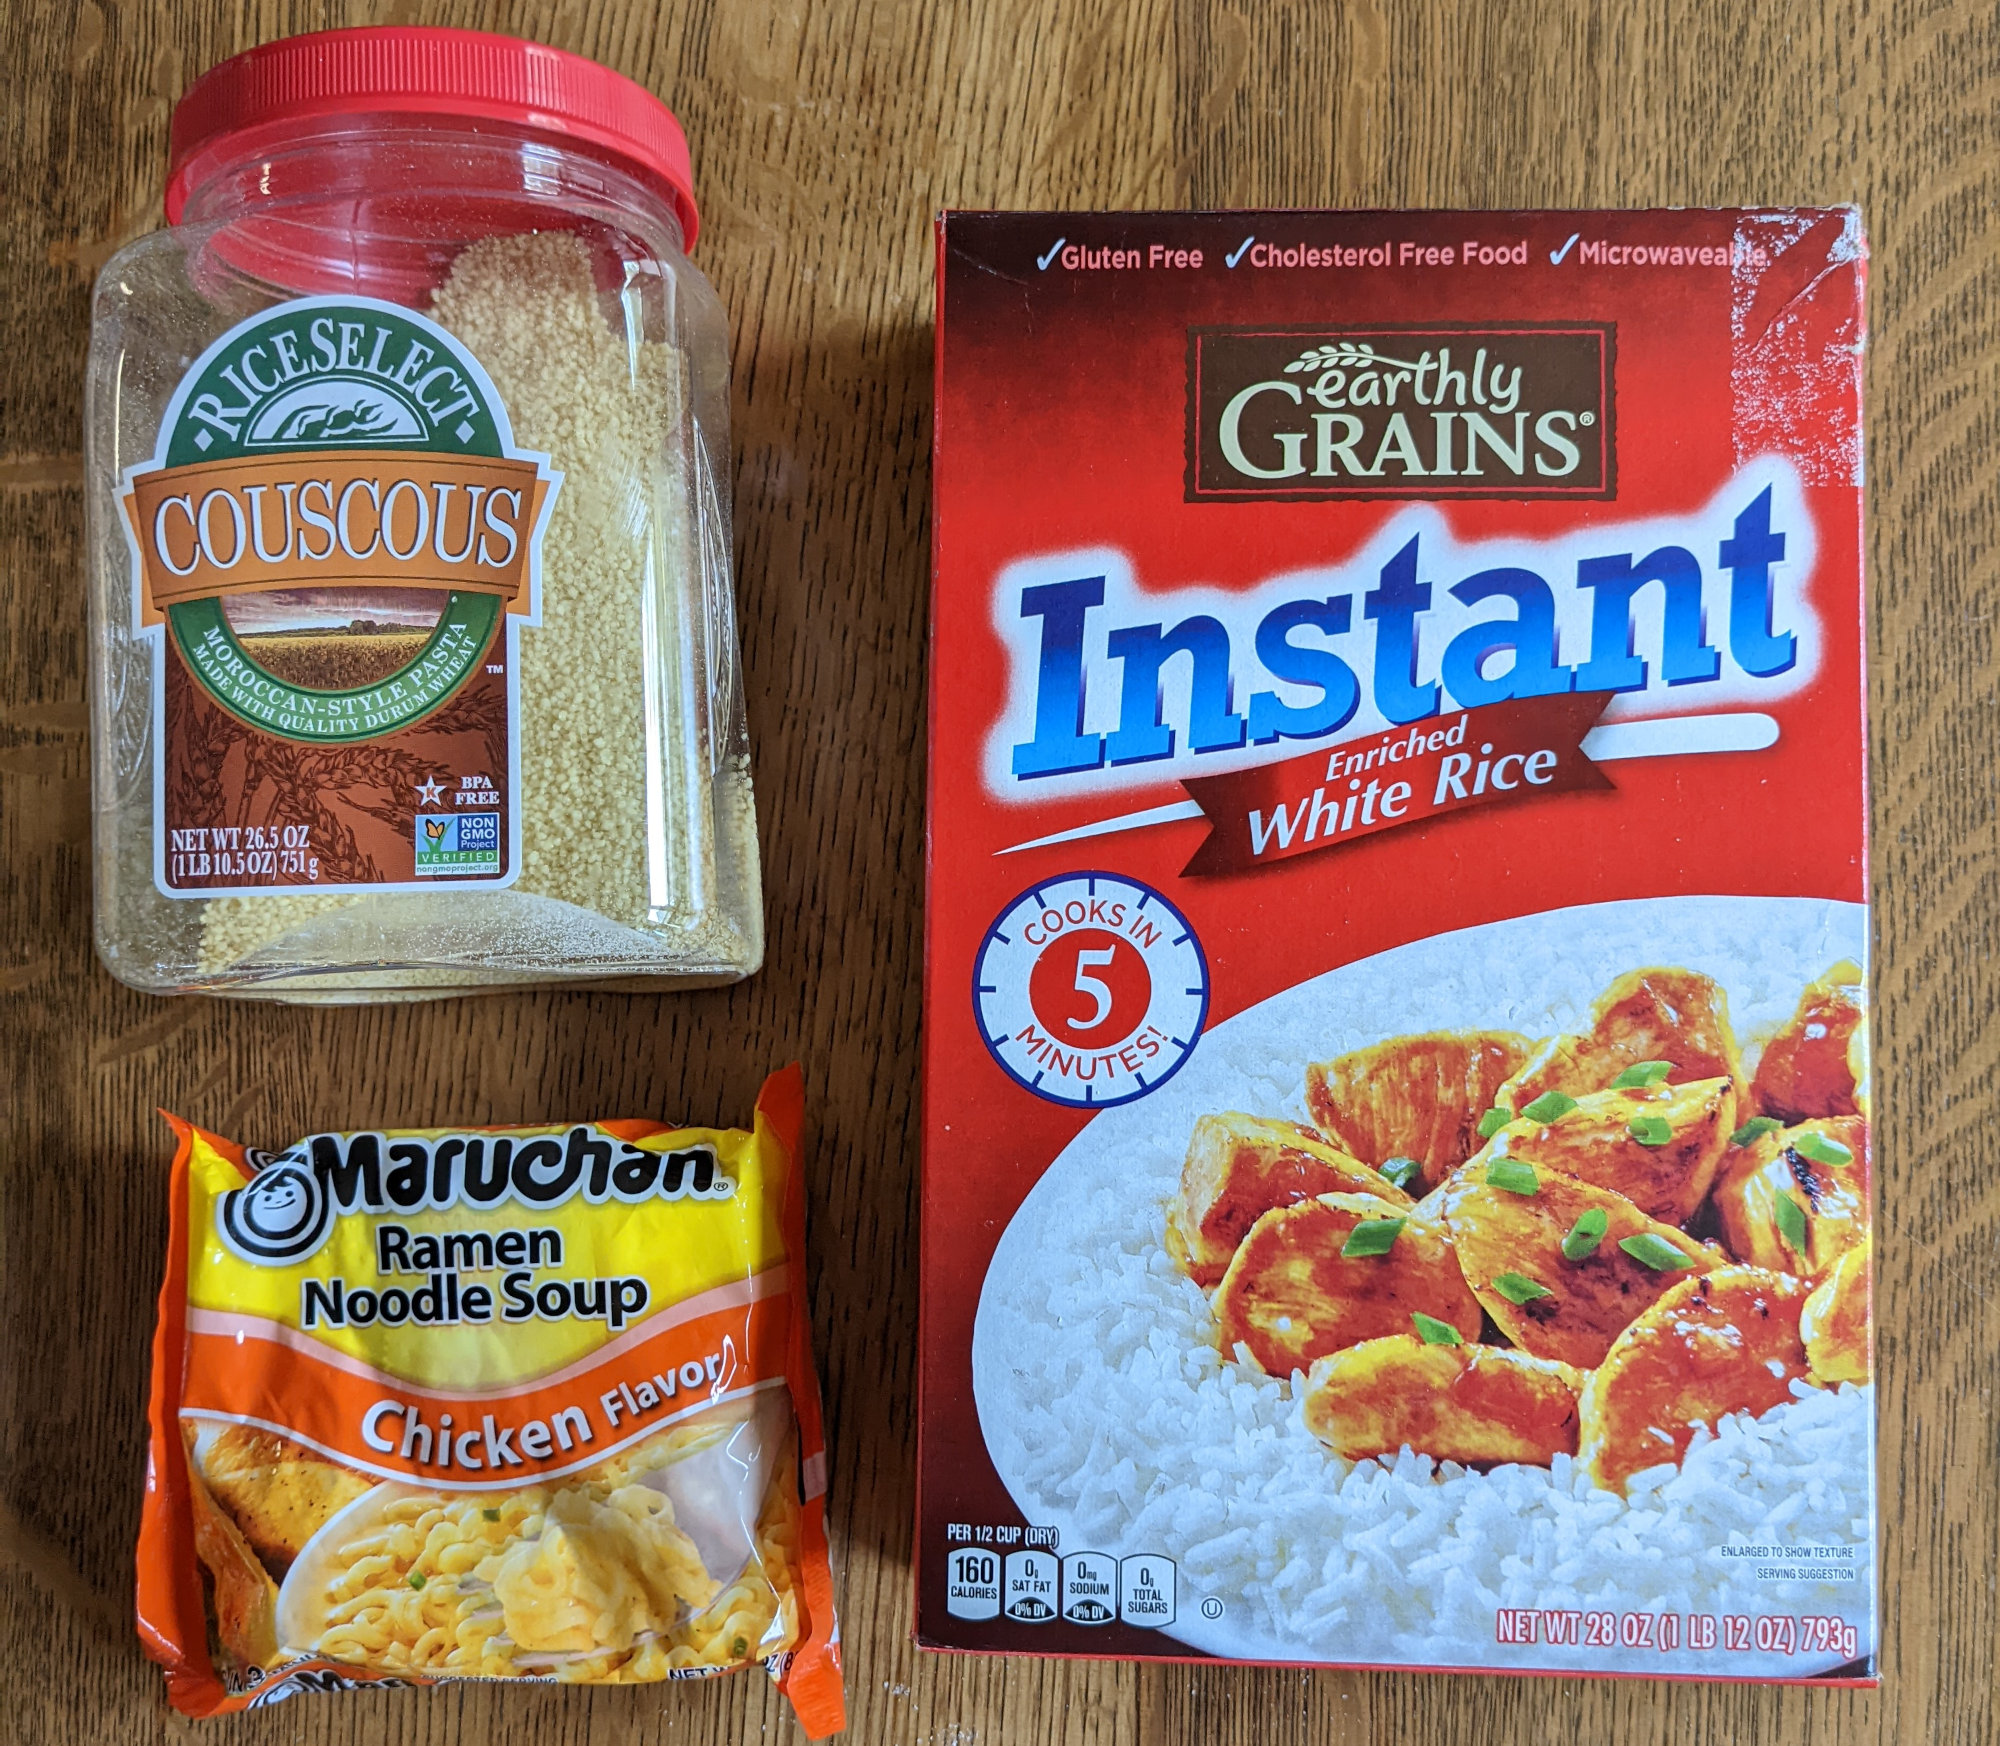
- Start with a BASE. This gives the general texture and form to the meal, and is typically a carbohydrate.
- instant rice
- ramen noodles
- mashed potatoes
- couscous
- lentils
- refried beans
- split peas
- stuffing mix
- Add a PROTEIN. Drying cooked ground beef works well, but we are using textured plant-based protein. The main plant protein sources are soy, wheat, or pea - we used soy. Mother Earth offers protein crumbles in various flavors:
- taco
- beef
- chicken
- unflavored
- Add VEGETABLES. Here is where you start setting the color and look of the meal, as well as flavor
- corn
- peas
- bell peppers
- onions
- carrots
- mushrooms
- black beans
- Add SPICE. Make things as bland or snappy as you like. Maybe just salt and pepper in a potato, chicken, corn, and pea meal, but plenty of taco seasoning in a ramen, beef, bell pepper soup. Absolutely anything out of your spice rack is fair game, including garlic, cumin, chili powder, cayenne pepper, dry ranch dressing, and so on.
Assembly and Packaging
When combining the ingredients, it may not look like enough for a meal since everything is dry. When hot water is added, you might be surprised at how filling that tiny, light bit of food becomes.
So, check the calorie information and serving size for each ingredient. Typically, a serving size for freeze-dried ingredients is 1 ounce (28 grams) and the carbohydrate base is twice that much. And, in general, there are about 100 calories per ounce.
Using an accurate postal scale really helps since the volume of some items changes more than others when dried. A typical meal includes two servings of the base, one serving of protein, and a half serving or so of each vegetable.
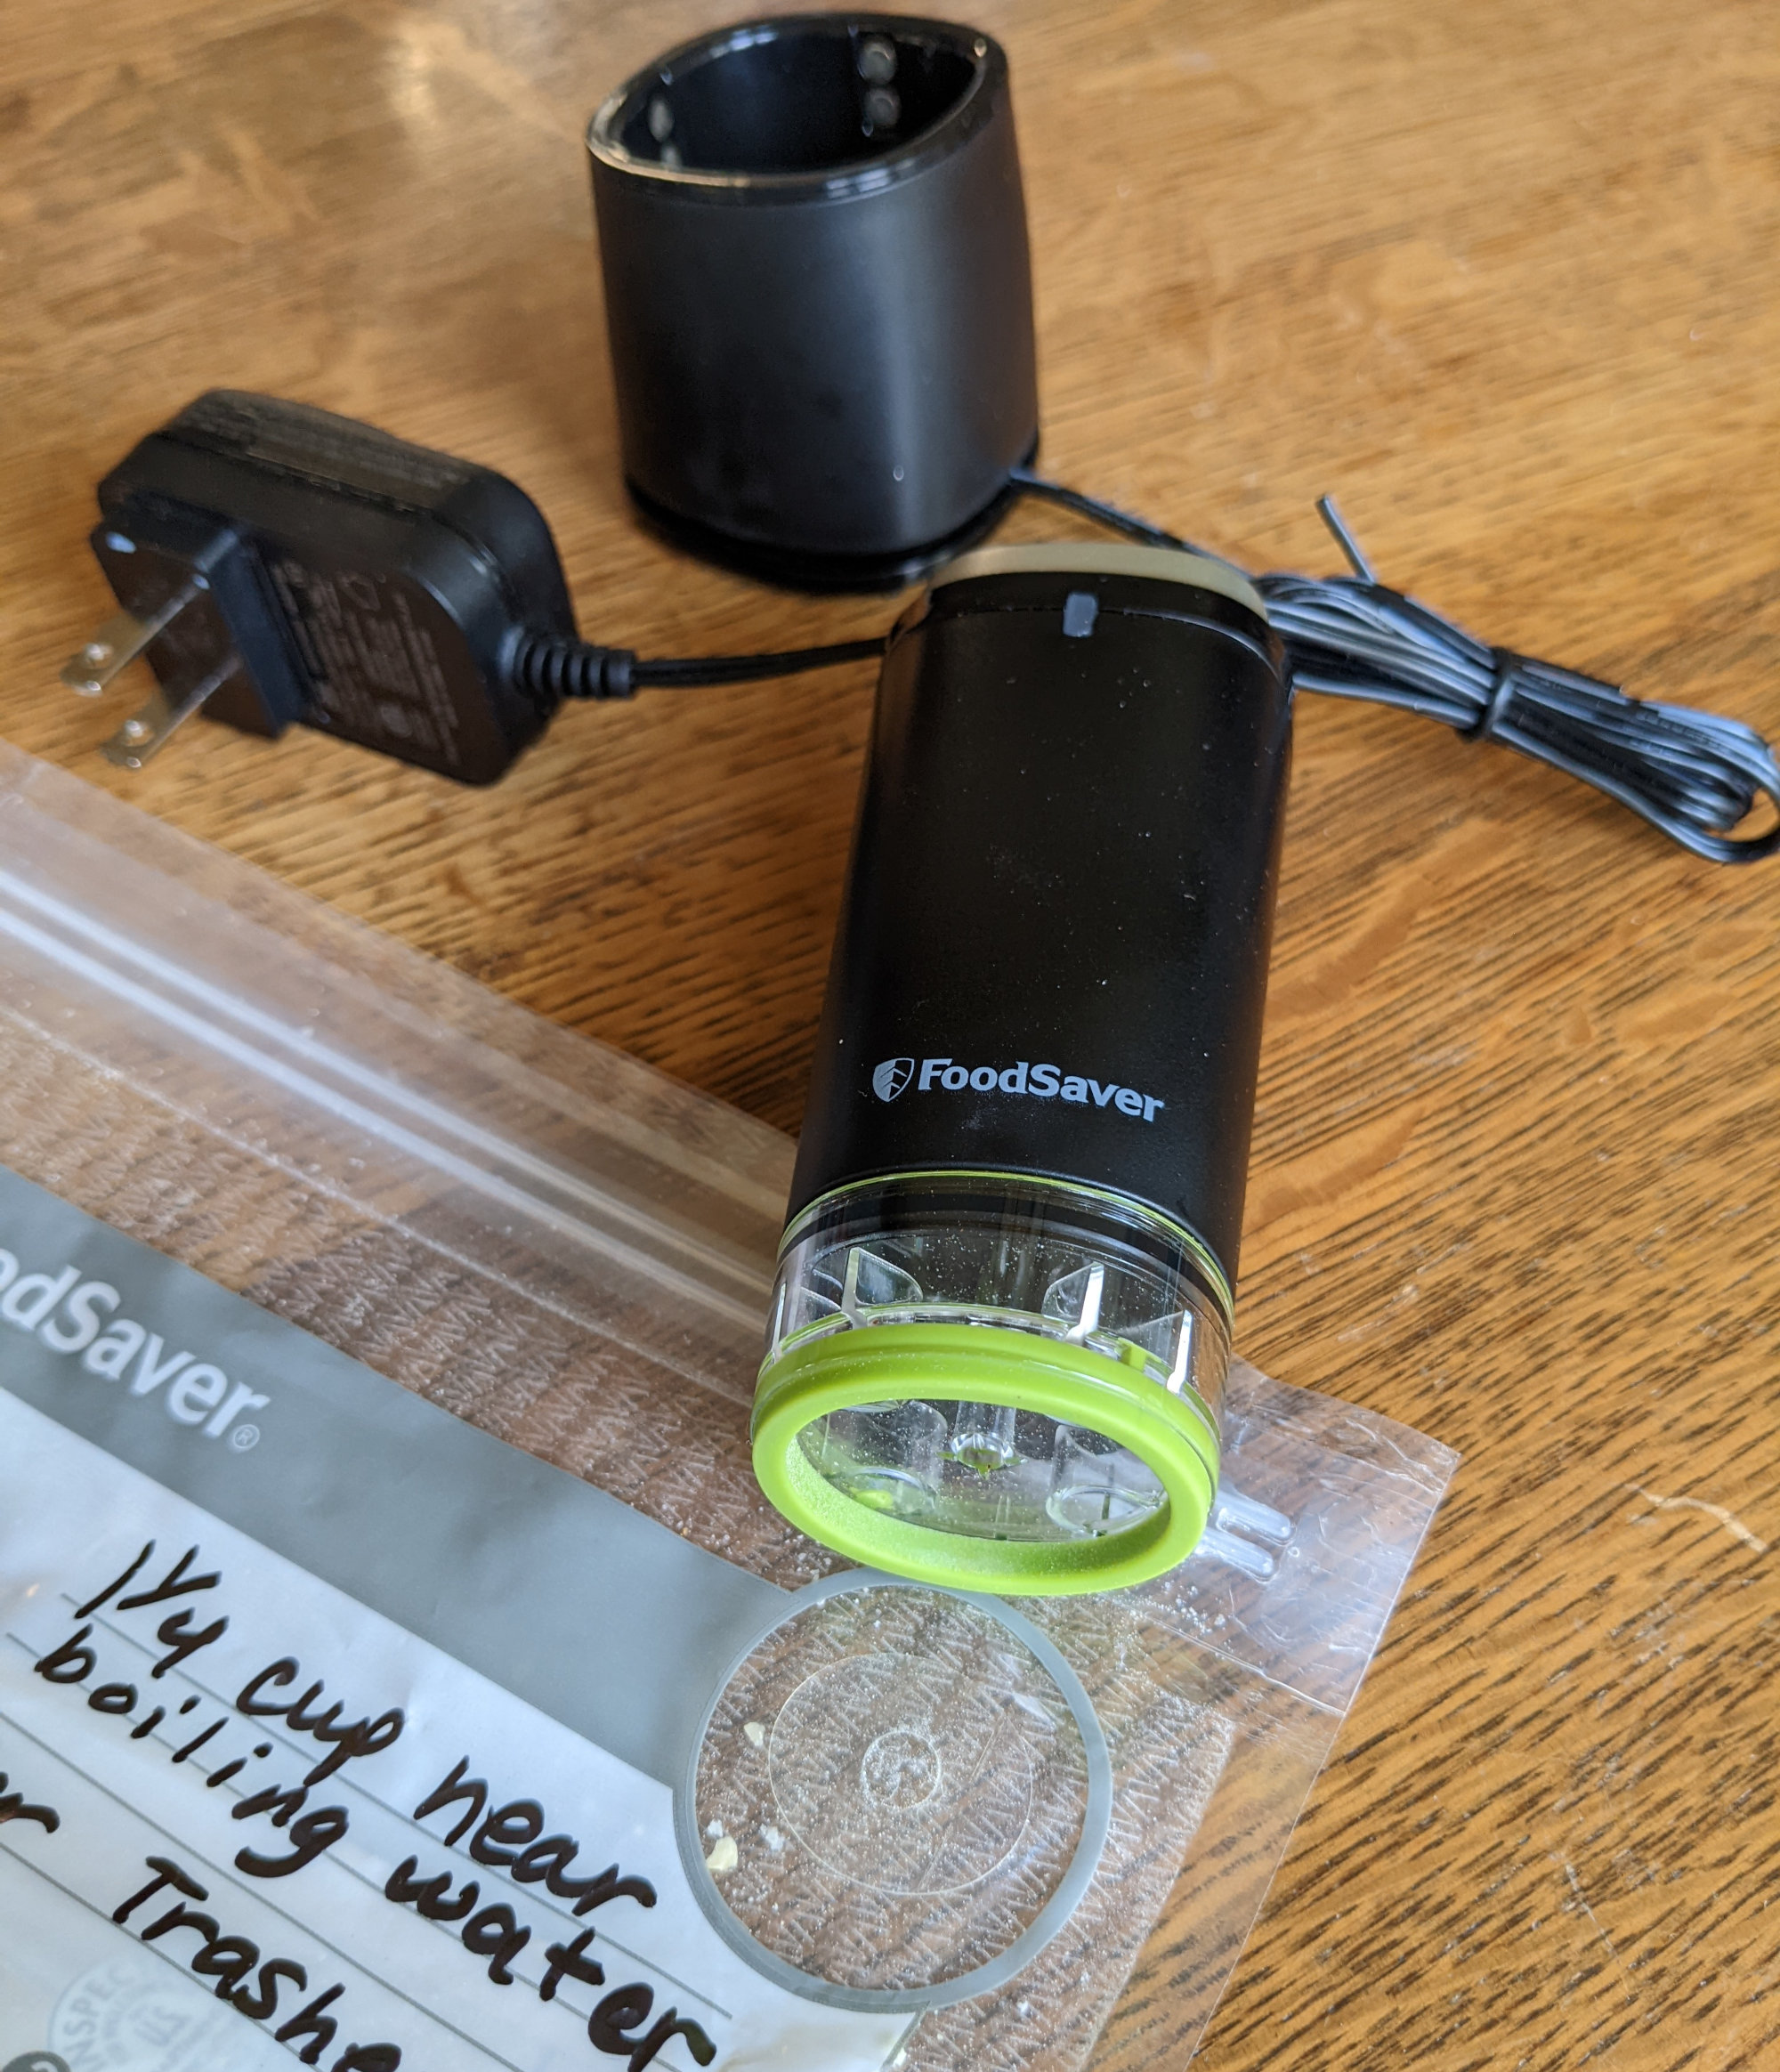
You could pour your dry ingredients into zip-loc baggies and use them to cook in, and I bet it would work fine. But, my wife found this very cool Foodsaver vacuum device. It is soooo fun!
Ingredients get placed in special zip-loc bags that also have a vacuum circle. After sealing the zip-loc part, the device is pressed on the circle and it sucks out all the air and lets none back in. So cool!
This reduces the space each bag takes up and it must help with storage time by removing the oxygen and whateve moisture is in the extra air. Even using a sealing device like this, I wouldn't assemble meals more than a month before using them. Once dried items are removed from their sealed manufacturer's container they start degrading.
Instructions
- Measure individual ingredients
- Pour ingredient into foodsaver bag
- Add any required single-serving packs needed (soy sauce, chicken, tuna, ...)
- Seal the zip-loc strip
- Vacuum out the air
- Put a piece of packing tape on bag, write the meal name, amount of water needed, and any other instructions on the tape
- Put another piece of tape over the writing so it doesn't smear
How Much Fuel?
Well, it doesn't get much easier than boiling water, but we can be efficient about even that simple task.
Each meal needs about 1.25 cups of water, but some are more or less.
Your stove needs a certain amount of fuel to boil 1 cup of water. You really should know what that is before heading out on an adventure.
Figure out how much fuel you need to carry from:
- How many ounces of fuel (F) are needed to boil a cup of water on your stove?
- How many people (P) are in your group?
- How many days (D) will you be on trail cooking?
- How many cups (C) of water need to be boiled for a meal? (typically 1.25 cups)
Ounces of Fuel Needed = F * P * D * C
This is fuel needed only for these meals. You may need more to heat water for breakfasts, washing, and whatever other needs you have.
Cooking
The real beauty of these meals the filling flavor you get with minimal cooking effort. It takes less than 30 minutes from opening your backpack to eating hot food.
- Set up your stove - anything from a tiny alcohol popcan stove to a two-burner propane stove works just since we're just heating water.
- Measure the appropriate amount of water into your cook pot. You can scratch measurement lines into your metal pot, or mark them on a water bottle, to eliminate the need for another container.
- Light the stove and place your pot of water on top, with a lid on it.
- While the water is heating, open any single serving packets in your meal bad and dump their contents into the bag.
- Set your meal bag in your cozy.
- If you are using potable, treated water, it's ready as soon as small bubbles rise from the bottom. If you use raw water, wait until it is a full, rolling boil, but there's no need to boil it for minutes.
- Pour the appropriate water into your food bag.
- Remove most of the air as you seal the bag's zip-loc.
- Shake, massage, stir, or knead the bag to mix the water well.
- Close the bag inside your cozy and wait. Place multiple cozies close together to retain heat. Wrap cozies in another insulating layer such as a fleece or t-shirt if the air temperature is cold. If you are cooking for 2 or 3 people, consider making a cozy that is a bit larger to hold 3 meal bags to really eliminate heat loss and reduce weight.
- Shake the cozies at about 5 minutes, and again at 10 minutes.
- By 15 minutes, the food should be completely rehydrated and still very hot. Eat it right out of the bag in the cozy so it stays warmer longer.
If you prefer, you can heat water, then dump ingredients from a meal bag into your pot, stir and simmer. This creates dishwashing, but you might prefer eating out of pot instead of bag. You can have individual bowls to serve the meal into if that sounds more civilized than eating out of a bag or pot, and you don't mind the extra cleaning.
To reduce weight even more, but also reduce flexibility, using a larger meal bag to hold 3 servings can work. All 3 people are forced to eat the same meal, but you have fewer plastic bags and more efficient heating. You'll want to have individual bowls to serve into if you do this.
Reusing
We've found these Foodsaver vacuum bags to be very sturdy and use them over and over.
- After eating, pour a little more warm water into the meal bag, swish it around, and drink it to clean out nearly all the food bits. Think of this as a second soup course.
- Roll the bag up and seal it closed.
- Keep all your dirty bags in a rolled up bundle with a rubber band and place that inside a quart sized zip-loc baggie to isolate it.
- Back at home, remove the taped on label, wash and dry the bags for the next use.
Limitations
This system works great on treks where you can carry all your food from the start. This would be any backpacking or long hike up to about 2 weeks. Longer than that, and people tend to resupply along the way. Then, what to do with the used bags is a challenge, with the food bits decaying inside them.
A Few Recipes
It's very easy to put together ingredients in whatever combinations sound good to you, but here are a few examples of meals that we've enjoyed. All the freeze-dried and TVP items were purchased from Mother Earth Products.
Just add about 1 1/4 cup hot water to each one.
Lentil Chili
- 2/3 C freeze-dried Lentils
- 1/2 C TVP Beef Crumbles
- 1/4 C freeze-dried Corn
- 1/4 C freeze-dried Peas
- 1 Tbsp Chili Seasoning
Chicken Curry Rice
- 1 C Instant Rice
- 1/2 C TVP Chicken crumbles
- 2 Tbsp Golden Raisins
- 2 Tbsp crushed dried Apples
- 2 tsp dried Onion
- 1 tsp Butter Powder
- 1 tsp Curry Powder
- 1/8 tsp ground Allspice
- 1/8 tsp ground Cinnamon
- 2 Tbsp crushed walnuts
Healthy Bowl
- 3/4 C Instant Rice
- 1/4 C freeze-dried Lentils
- 1/4 C diced Almonds
- 1/4 C dried Cranberries
- 1 tsp vegetable boullion
- 1/4 tsp tumeric powder
- 1 pinch salt
Pesto Veggie Pasta
- 1 pkg ramen noodles (not spices)
- 1/2 C TVP
- 1 Tbsp dry Pesto mix
- 2 Tbsp dried mushrooms
- 1/4 C dry, grated parmesan cheese
- 1/4 C freeze-dried mixed vegetables
11/15/2022

This Saturday, November 19, at 11:45am I'll be presenting about our West Coast Trail hike at the Midwest Mountaineering Outdoor Expo in Minneapolis.
It's just an hour and my wife will be there to fill in the important bits that I forget to mention.
There are many other interesting hour-long presentations throughout the weekend, so check 'em out!
Hike On!
Older Posts Newer Posts
Find more Hiking Resources at www.HikingDude.com


Follow Me
Recent Comments