
Hiking Dude Blog
2025 - Aug Jul
2024 2023 2022 2021 2020 2019 2018 2017 2016 2015 2014 2013 2012 2011
07/22/2019
Done Hiking Today
I finished hiking for today. You can check out my current location on the map and I'll post about my day when I am in coverage.
Leave Comment
Posted: 07/22/2019
Posted: 07/22/2019
07/24/2019
Done Hiking Today

I finished hiking for today. You can check out my current location on the map and I'll post about my day when I am in coverage.
Leave Comment
Posted: 07/24/2019
Posted: 07/24/2019
07/25/2019
Done Hiking Today

I finished hiking for today. You can check out my current location on the map and I'll post about my day when I am in coverage.
Leave Comment
Posted: 07/25/2019
Posted: 07/25/2019
07/26/2019
Done Hiking Today

I finished hiking for today. You can check out my current location on the map and I'll post about my day when I am in coverage.
Leave Comment
Posted: 07/26/2019
Posted: 07/26/2019
08/01/2019
Cloud Peak 2019
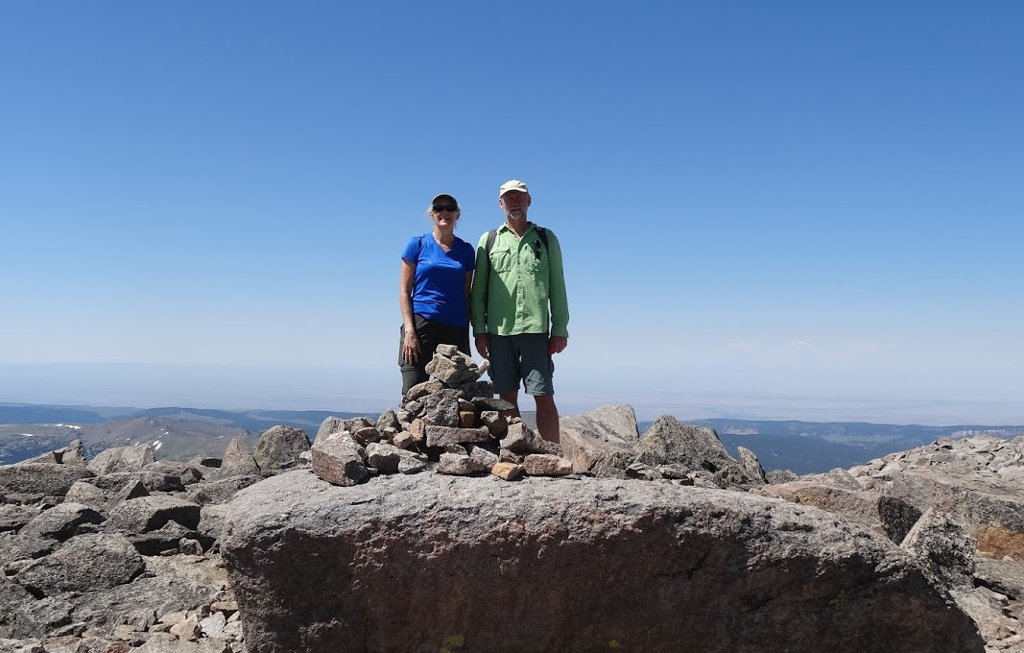

From the flat midwest, the Bighorn mountain range in Wyoming has the closest mountains that rise above tree line, providing challenging climbs and expansive views. Because of that, most people you encounter in the Cloud Peak Wilderness are from Minnesota or Wisconsin. I've led around a dozen groups on treks through these mountains and every trip has been a great experience. Weather really sets the tone for each adventure, with sunny skies or dreary rain drastically influencing the fun factor of each trip.
This past week, we had 30 participants from our church explore the mountains. We broke into 3 groups with each group choosing a separate route. Our group did not see the others for the 5 full days we were in the wilderness. By separating, we helped to minimize our impact on the environment and followed the rules in place for the area.
If you are entertaining the idea of trying a backpacking trip in the Cloud Peak Wilderness, I hope this journal of our trip will provide some helpful information. Feel free to ask me questions about gear, food, preparation, or concerns and I'll do my best to offer useful advice.
Map of our 'Arrowhead Route'
The red line is our route with green tents where we camped. You can zoom in on any part you want, or click the box icon in the upper-right to make it fullpage.
Pre-Trip
To get in shape for this long hike, I took advantage of a local park with hills. We (my wife and I) put on our packs and hiked a loop of about 3 miles that had us either going up or down hill most of the distance. We did this 3 times a week for a month before the trip. Most days when we didn't do this hike, I walked 6 miles in the morning on flat trails with no pack. This kept our legs in shape since our Mt. Kilimanjaro trek a few months ago.
As a group leader, I was responsible for distributing our group gear amongst the participants. To do this, I needed an idea of who was the strongest and balance the weights so our entire group could move along without a weaker hiker slowing everyone down. That is difficult if you've not hiked with your crew, so it's very important to have some practice hikes where you can evaluate the abilities of each person.
The church has a good collection of gear, but it is not extremely lightweight, and the food we take needs to appeal to the majority so it is heavier than what I tend to carry on my long treks. We had five dinner meals, each weighing 6 to 8 pounds, so each adult male got one to carry. I carried the last meal and the 6+ pound cooking kit so I knew that no one would have to carry more than my 13+ pounds of crew gear. Other crew gear includes: toilet kits, water filters, first aid kit, stoves and fuel, and lunch food.
Each person carried their own breakfast (oatmeal, cocoa, granola bars) and snacks (trail mix, candy bars, jerky, ...) but lunch was a shared large jar of Nutella, peanut butter, and summer sausage so someone had to carry those items. I explained to those people that they needed to encourage others to eat their item for lunch which would help to lighten their own load.
Besides crew gear, each person carried their own clothes, water, and sleeping items. Some (especially the newest folks) brought extras, such as chairs, extra shirts, many underwear, and other items that add weight and take space. As it was, I could not fit my heavy load into my DIY lightweight pack and had to revert back to my huge and heavy Jansport pack. It was ok since we were hiking few miles and a leisurely pace and it's a comfortable pack.
Day 0
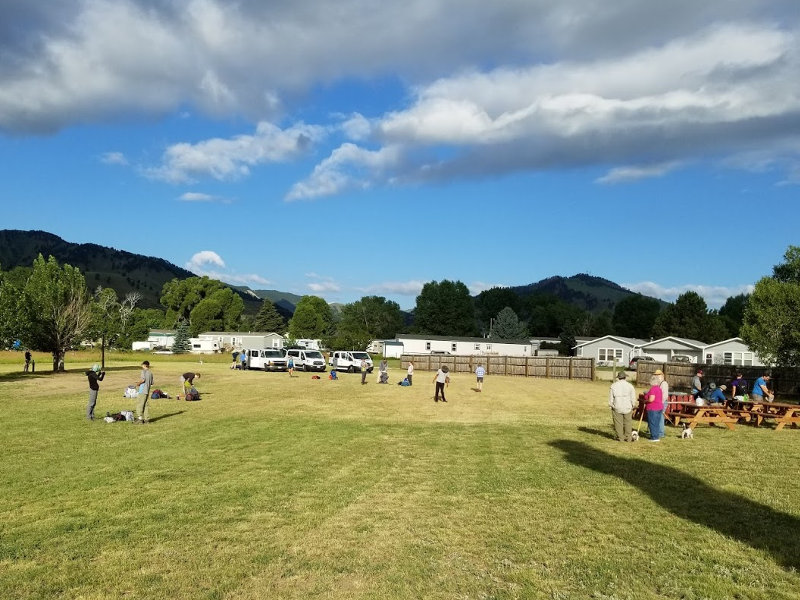

Everyone met at church at 6am on Saturday, July 20. Photos, prayers, hugs, and then we piled into the three rental vans for a long day of driving west.
Our pastor (who has done this trip over 30 times) drove his truck pulling a camper trailer so his family can extend the adventure when we all head home. About 2 hours into our drive, a huge, dark cloudbank pushed towards us from the northwest as we were driving southwest. The rain started and then the wind. As it changed from some drops to a downpour to a raging storm, I wondered how much force it takes to break a passenger side window.
We were driving about 30 mph and limping along to a big truck stop about 5 miles down the road when we saw headlights shining toward us on the righthand shoulder. It was the pastor's truck facing the wrong way, so we pulled over past it and stopped. Not me, but a more courageous fellow, hopped out and ran back to see what's going on. A few minutes later, he returned no less wet than if he had just climbed out of a swimming pool. We continued on to the truck stop while he told us what he found out.
The camper was caught by the wind and flipped over. This lifted the back of the truck off the ground and the wind spun the entire mess around 180 degrees. Thinking quickly, the pastor put it in 4-wheel drive to pull out of the way of traffic at the same time the wind caught camper and flipped it back upright. Very scary ordeal, but no injuries and damage only to the camper and hitch.
When we reached the truckstop, all of their electricity was out so we could get no gas. It was dark as night so people going in to use the bathroom all had cellphone flashlights on. Once all 4 vehicles arrived, phone calls were made, people settled down, and we drove to the next gas station to fill up.
As it turns out, that is the only thing that goes wrong all week. After this, the trip is practically perfect in every way!
The drive across South Dakota and into Wyoming was uninspiring. Of course, there are the usual places to pass - Mitchell, Chamberlain, 1880 Town, Wall Drug, coal mine - but we drove on to Buffalo, WY to camp. I do have a tradition when making this drive with a group - I say I'll buy ice cream for the first person to spy Devil's Tower and for the first to spy an antelope. It's something to do.
In Buffalo, we stayed at the Big Horn Mountains Campground hosted by Paul & Bev. They are a wonderful couple that always make us feel welcome and have stories upon stories to share. They are limiting their campground business though, so you might try the KOA or other campgrounds or hotels in town.
Day 1
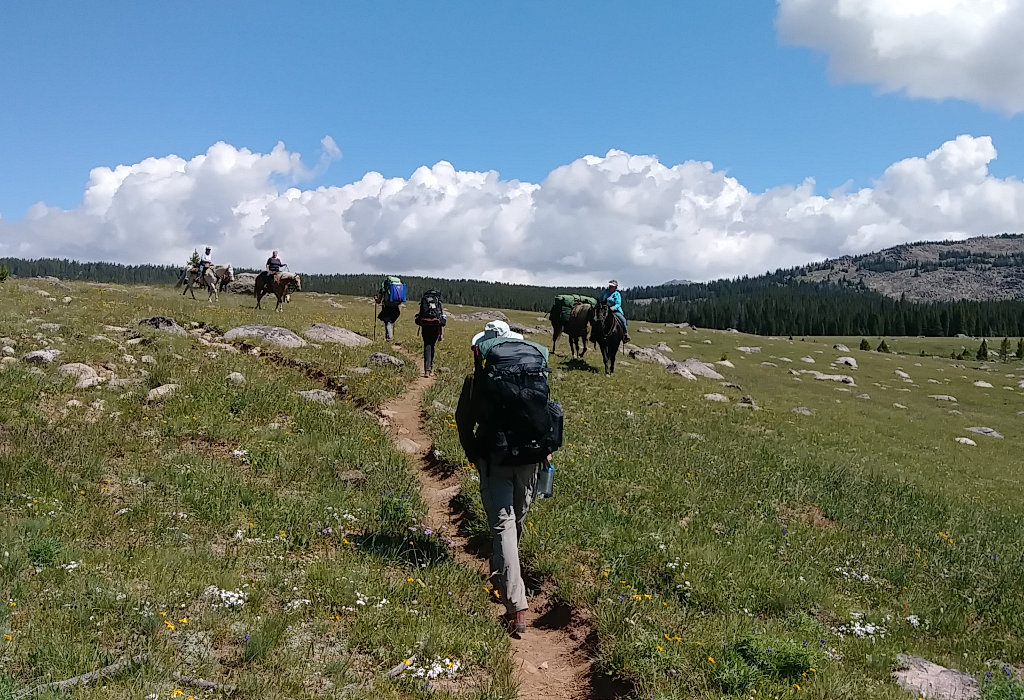

Hikers can enter the Cloud Peak area from east, south, west, or north and each of our three groups had a separate entry point. One would go in the east and come out the south, the other would enter and exit the south, and we would do a loop in and out the west. That meant we had an extra 2 hour drive before we could start hiking. I was very happy that everyone was up before 7am. After a could sugar cereal breakfast at the campground, we loaded up and headed to the trailhead.
Our entry point was Battle Park trailhead which is a popular horse area. A 15 mile bumpy dirt road kept us all awake that last 45 minutes. We arrived, used the outhouse, filled our bellies and bottles with free water from a pump, and hit the trail by 10:30am - I was hoping for noon at the earliest so I was extremely pleased with a gentle day ahead of us. I've hiked this part before and it's a nice introduction to the week ahead. With full water bottles and empty bowels, we saved on filtering water and digging a few extra catholes - I never pass up a toilet when out on a long hike.
We filled out a free but mandatory backpacking permit - forgetting this might cost you $200 - and started walking out on the extremely well-used trail into the woods. A bright, cool, wonderful day was a great way to enter the wilderness.
As expected, we took many short breaks as people adjusted their packs, got used to the walking, and finally started to realize what they had gotten themselves into. But, it's too late to turn back now.
We had our lunch of summer sausage, tortillas, nutella, and peanut butter on a big rock in a wide open meadow with great views all around, especially up into the snow-covered mountains to the east. We met our first group of horse and watched another group on a trail off in the distance. As much as possible, I sit, stand, and rest on rocks rather than grass out here. We also use them as tables and cooking areas since it's much easier to find dropped items and to clean up spills.
After lunch, we headed southeast across a large meadow and into woods towards Lily Lake. We could have taken a shortcut trail earlier and cut off about a mile of hiking, but we had such a short hike and a lot of time, I decided to let today's hike be a bit longer. Even so, it was less than 4 miles. To find the Lily Lake Cutoff trail, we had to cross open country. So, rather than a single-file line, we spread out, each of us taking our own route until we found the new trail. This minimizes the impact to any one part of the meadow. Once on the trail, we stayed on it to the lake.
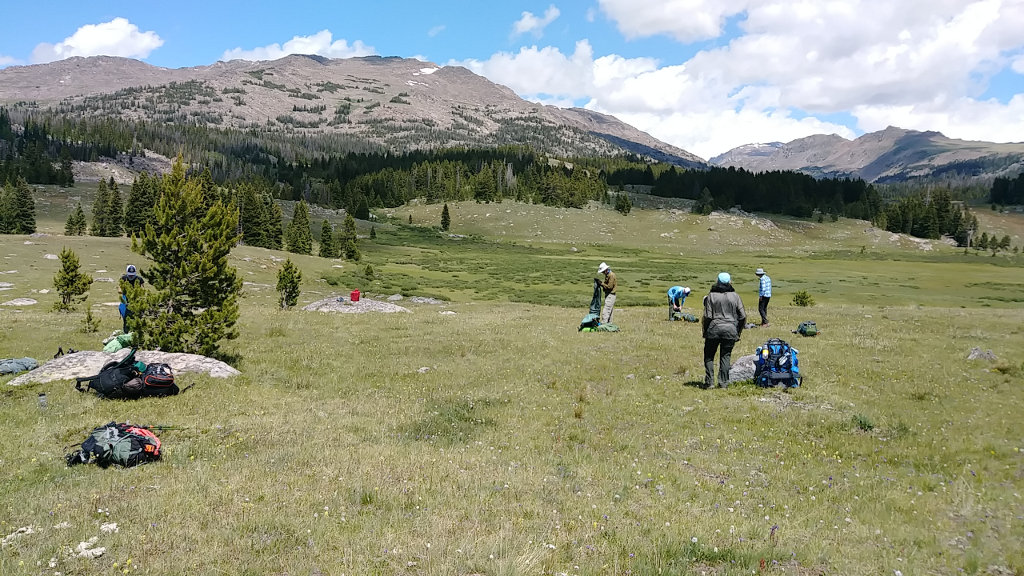

Circling around the west and south sides of the lake, we located a relatively flat, open area that was 225 feet from the lake (I counted the steps). The views of the lake, mountains, and clear blue sky were wonderful, but we had a little work to do before relaxing the rest of the afternoon and evening. Starting a routine, I pointed out where our cook area would be and where to set the toilet kits. Each person is responsible for unloading their group gear and putting it in the appropriate place, then setting up their tent wherever they want. Once that's done, we need water and a plan for dinner.
We made a simple plan for cooking and clean up. Whoever carried in the dinner meal would cook it with a partner. Whoever cooked last night would clean dishes this night. The person that carried in a meal gets to carry out the garbage of that meal. This means whoever carries in meal #1 has a lighter pack all week. It also means the meal carrier has incentive to encourage everyone to eat all the food so he has no heavy left-overs to carry out. This night's meal was Pesto Pasta with dehydrated chicken. Since I was carrying the last night's meal, I got to do dishes tonight.
As a wrap-up each evening, I decided to lay out a general plan for the next day of how far we have to hike, when we should get moving, and any particulars to expect along the way. We have short miles so I'm letting the group decide when to get up and hit the trail, as long as it isn't silly late. They chose to be on trail by 9am tomorrow - we'll see. The weather all day was clear, cool, and breezy. There were plenty of mosquitoes but we were all protected with either repellent or mesh covering.
Day 2
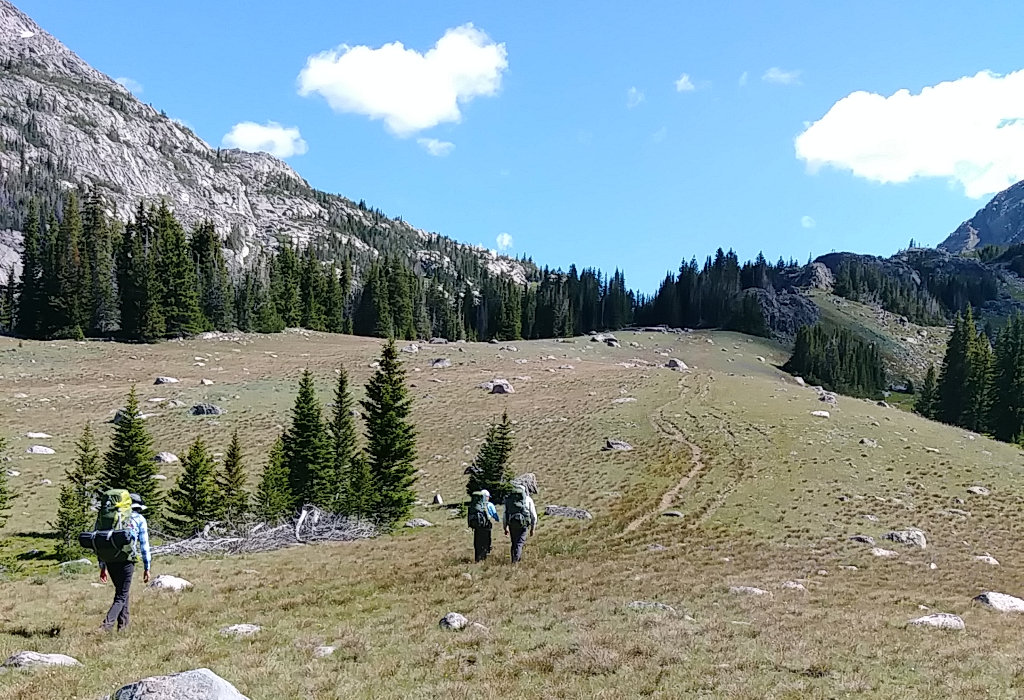

With sunrise coming at 5:45am and sunset holding off until 8:45pm, the days in the mountains are light for nearly 16 hours this time of year. A chilly morning was quickly warmed once the sun broke over the mountain range. We had breakfast, packed, and waited for a couple sleepy-heads as the sun dried condensation off our tents. We watched a couple dayhikers head up the trail and one group of six girls backpack out before we headed out - at 9:05 - right on time. Today was our longest mile day and is mostly uphill, but still should not be very strenuous. This stretch of trail was the only piece I've not hiked before so I was excited for something new.
The well-defined trail followed the Middle Paint Rock Creek along the southern slope of Elk Mountain, up over a pass into the Mistymoon high-use area. We had plenty of water so we hiked about 3 hours, being passed by a horse group, taking many short breaks, and having a couple stream crossings that we just hopped or stepped over. Near the top of the pass, we stopped for an hour for lunch at a small snow-fed lake with a big snowbank at the end of it. We filtered more water and relaxed as another horse group rode past. It's easy to enjoy the trip when there's really no hurry and the weather continues to be stellar.
After lunch, we crested the pass at 10,600 feet and dropped down near Mistymoon lake where I was surprised to see no tents nor hikers. We passed right through this 1/2 mile stretch because it now has special regulations - you need to pack out solid human waste. We no longer camp here since it is overused. Right now, this is only the Mistymoon drainage area but may be expanded as human recreation pressure increases.
We met two more groups of horse, but still no other hikers, as we climbed out last small rise for the day that opened into the Paint Rock Creek drainage at the base of Cloud Peak. Across the valley, I could see a few people standing in our hoped for camp spot. As we hiked closer, they began setting up tents - maybe because they saw us, maybe just a coincidence. Whatever, we needed to find a different spot.
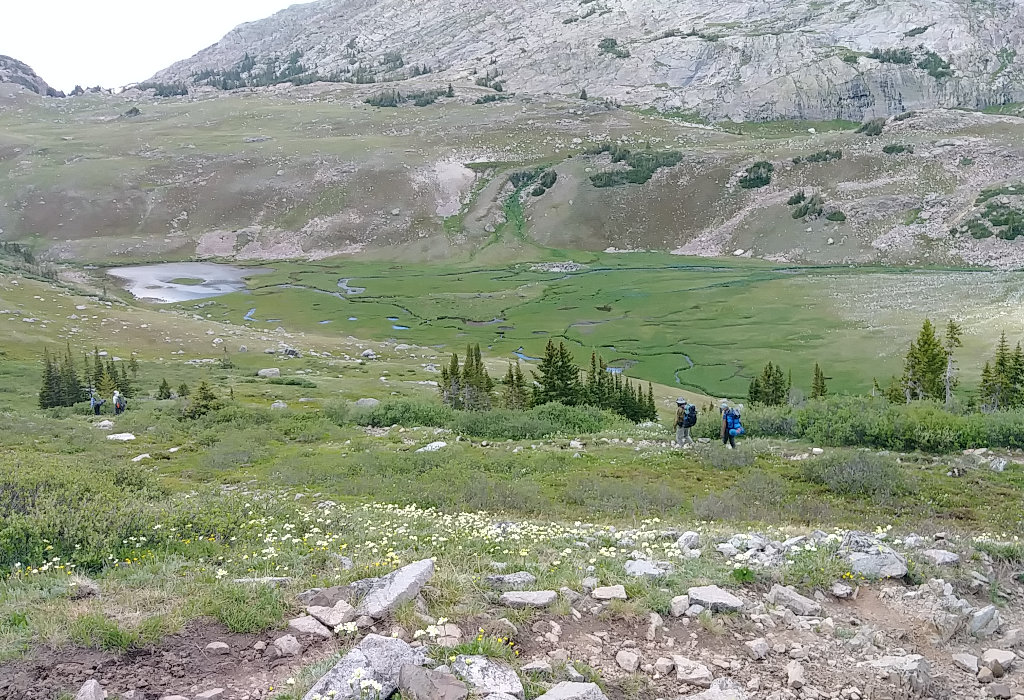

Most of the land here is covered with cantaloupe or watermelon sized rocks so usable tent spots take effort to find. As our group waited and rested, two of us scouted up the trail for spots. As it turns out, we found a beautiful place - much nicer than the original - with a great view of the valley and of Cloud Peak, and it would make tomorrow's climb about an hour shorter. The only problem was we had to cross a large creek and climb a short, steep trail. The water crossing and short climb took another 15 minutes and we were at our new home for the next two nights. Tomorrow would either be a climb to the Cloud Peak summit or resting around camp, whatever individuals wanted to do.
The only concern I have camping this high, at 10,400 feet, is exposure to lightning. It's just a fear I have, having been out in unprotected situations many times. There are high mountains around and a knob with trees on top close by, but tenting on open ground always concerns me.
This day was yet another nice sunny day with cool breeze, but thick clouds have built to the east and over the mountain. They could drift over us or dissipate, you never know. As long as we're moving, the mosquitoes aren't bad, but when the wind stops and we're sitting or standing around, they become a nuisance. Our mesh layer does a wonderful job of protecting us and I've only gotten a couple bites on my ankles and hands - my fault.
Dinner was Red Beans & Rice with dehydrated beef chunks. I've not had these dehydrated meats before but they are really pretty good and add more substance to the meal. We tend to carry way too much food on this trek. I've not even touched my breakfasts yet and have eaten just a few snacks. Next time, I'll leave even more at home.
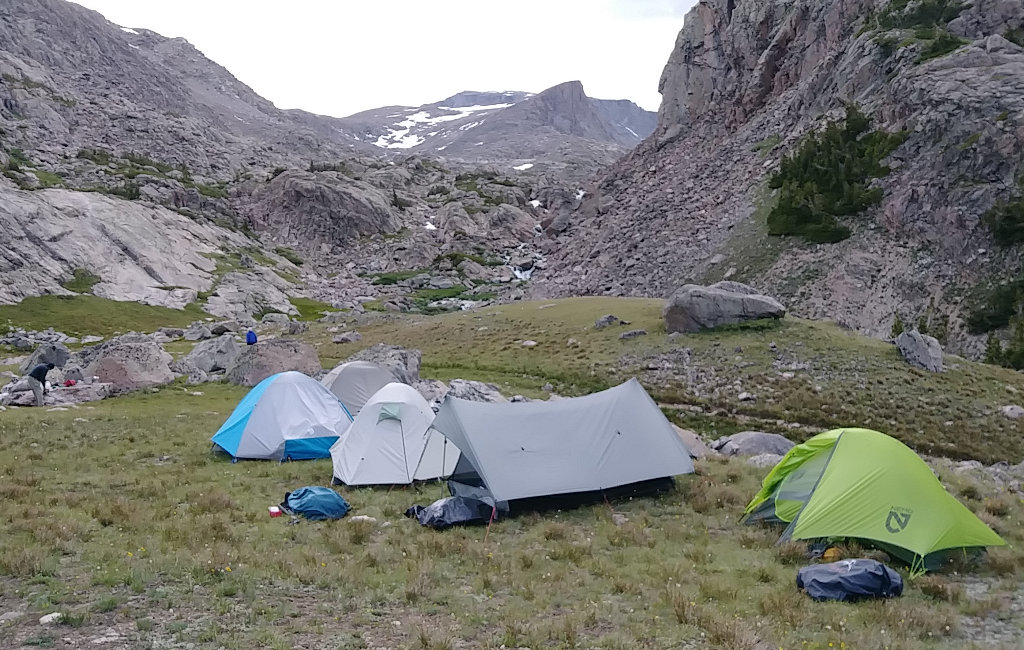

Most of the tents in our group blend in well with the grey rocks. I especially like our Bear Paw Wilderness Designs tarp and bug nest - the a-frame shaped one. It's the lightest, smallest shelter here and has worked well for two people for the past four years. So far, I've spent nearly 100 nights in it and it is still in great shape.
Day 3
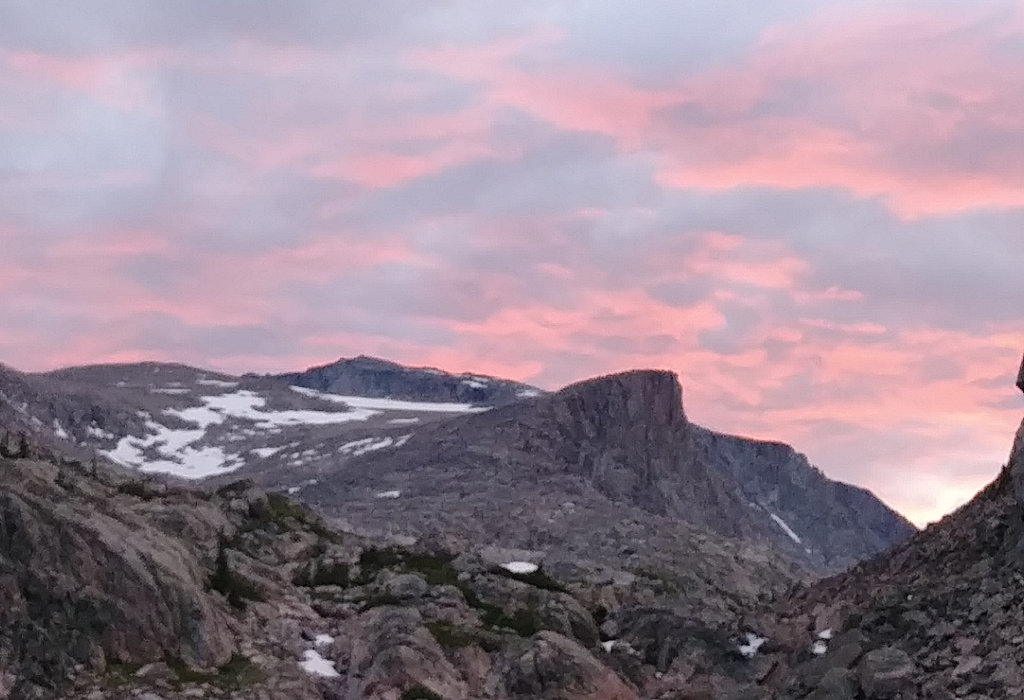

Last night, with the dark clouds, we decided to see what the weather looked like in the morning and use that to base our climbing decision. This beautiful sunrise made the decision very easy! Six of our group of ten got up at 5:20am, saw this, and got busy. I heated water while the others got their dayhike gear together. After a quick oatmeal and cocoa breakfast, filling water bottles, and securing our gear left at camp, we were heading upwards by 6:05am.
The few clouds burned off quickly but we got to hike in shade for the first 45 minutes or so. After that, the warm sun convinced us to shed layers quickly as we continued onward and upward. I've been up the mountain at least six times but the last was a few years ago. I think the mountain has changed since then.
This year has much more snow than any other. We avoided most of it because a step onto snow is often a step through snow, but a few spots were unavoidable. I did step through once and cracked my ankle on a hidden rock. The rocks are larger and the climb more rugged than I recall. With extra snow, I believe some of the preferred route was hidden, but we continued on. We were blessed with warm, dry rocks so footing was nice and safe. But, up here, just one misstep can result in a very serious situation.
As we climbed through 11,000 and 12,000 feet, a few of us experienced mild headaches but one climber started feeling the effects of altitude. We stayed hydrated, some took some acetaminophen or ibuprofen, snacked, slowed our pace, and kept going. At just above 12,000 feet, we were running low on water and were in the area I call the 'wheelchair ramp' - it appears from below as a nice, easy, gradual, bowl-shaped area. Here, we found a trickle of water and took a 20-minute break for snacks and filtering water. This is about the last place to find water up the mountain so skipping it can be troublesome.
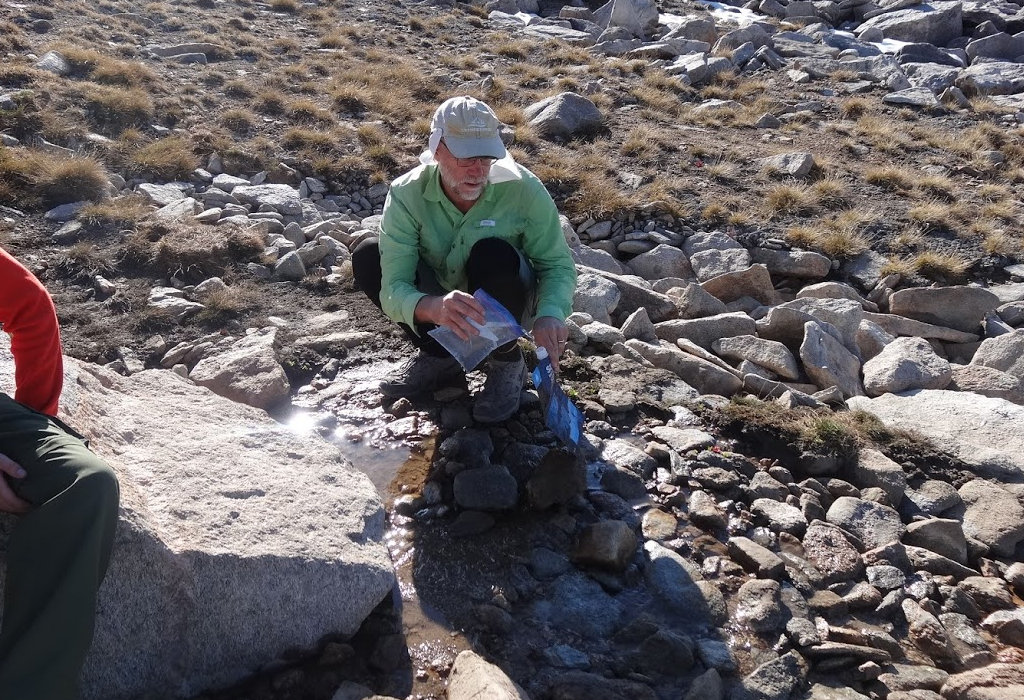

Our water filters worked great the entire week. We use Sawyer Squeeze filters which is what I've been using on all my long hikes since 2012. I actually have, and use, the same filter for the past 7 years and it doesn't fail. In camp, we hang the filters and let gravity force water through them slowly but out on the trail, we use the squeeze bags to go quickly. I use a zip-loc baggie to retrieve water from the smallest of trickles and then fill the dirty water bag from that. We backflush the filters with a little clean water at the end of each day to clear them of contaminants and ensure they are ready tomorrow.
After hopping over boulders and scrambling over snow, we reached the summit around 11:30am - a 5.5 hour climb. We were passed on the way up by one hiker who was doing the 24 mile round-trip from the West Tensleep trailhead to the summit in one day. HYOH!
While enjoying the views, a couple arrived and took pics of our entire gang. We worked up the courage to look over the vertical 1,200 foot drop straight down to Glacier Lake on the east face and even saw snow-capped mountains off to the southwest and west. Doing some research when I got home, it turns out these are the Wind River Range with Wyoming's high point of Gannet Peak to the southwest, and Yellowstone Nat'l Park to the west. This was the clearest, brightest day I've ever had on the summit. We could see mountains that were 140+ miles away!
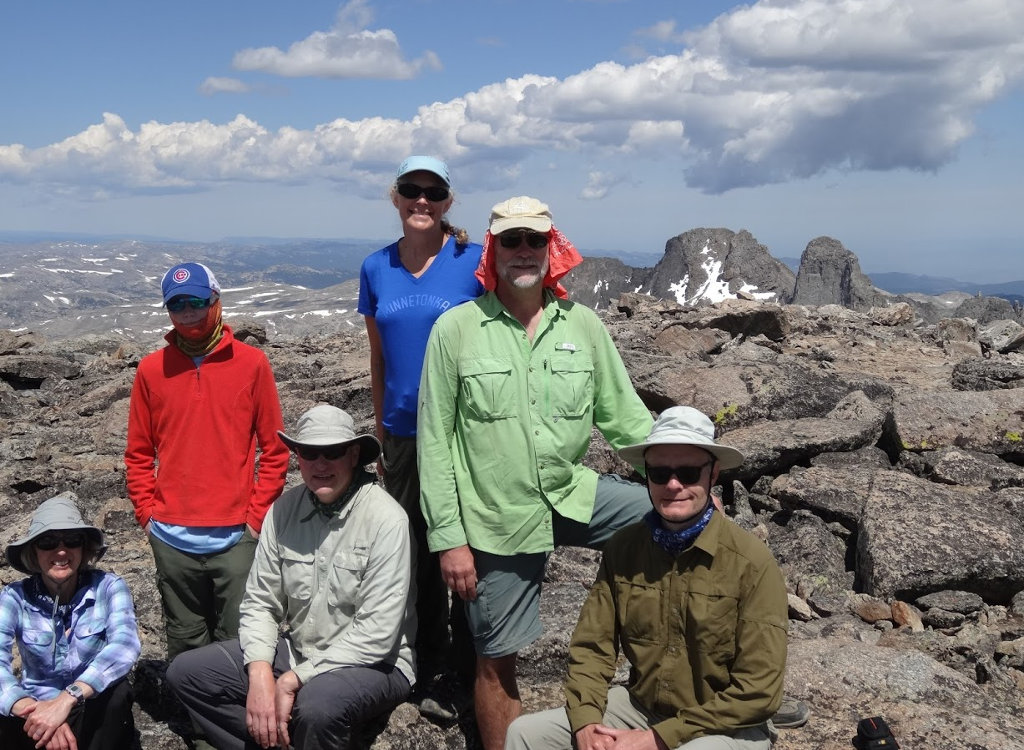

Clouds were beginning to build to the north and roll in, as they very often do, so we headed down around noon. There were other groups still going up, most notably a scout group that was moving very slowly and had a long way to go into the darkening clouds. As we descended and the clouds thickened, they continued to inch upward. We reached camp at 4:15pm and there was rain and lightning up on the mountain by then. I expect that scouts had an exciting hike down in the weather and especially on wet, slippery rocks.
During our dinner of Spaghetti and dehydrated ground beef, we got a couple raindrops and hailstones, but nothing big. The weather was threatening but stayed to the east, so yet another wonderful day! And, as they say, 'It's all downhill from here.'
Day 4
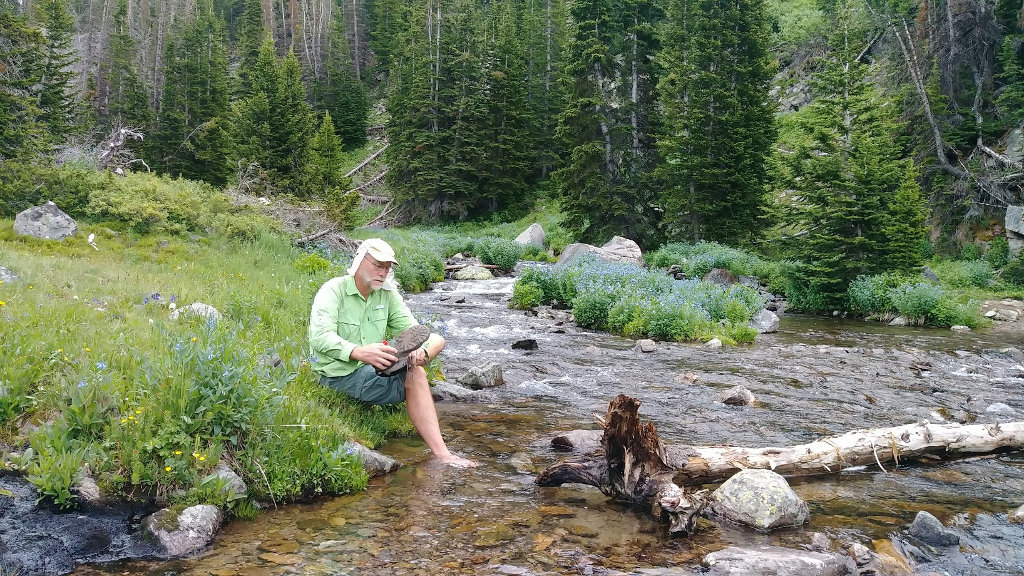

Right off the bat this morning, we needed to cross the stream we crossed to reach our campsite. The four that did not climb Cloud Peak yesterday did a shorter day hike. While doing that, they felt that they found a way to cross the creek lower down on some rocks so we could skip a significant hill climb and drop. Looking for more adventure, and being in no hurry today, we had them lead us. It was a fun off-trail excursion, but ultimately ended at a rockfall and we did have to do a wet crossing of the stream. It was the first of three for the day. But, it was a good idea and did save us a hill climb. Looking over the map and google earth at home, I believe we could have been more successful had we ventured a bit farther north - maybe I'll try that next time.
Just as we crossed the stream, our first rain started. Folks put on their raingear, even me after waiting and hoping it would stop. Less than five minutes later, the rain stopped and that was the only time we needed rain protection the entire week. But, the raingear was very helpful in protecting from mosquitoes and keeping warm in the evenings.
Our hike was all downhill today, to the head of Lake Solitude. This campsite is heavily used by horse traffic but we saw only three hikers all day, and they were going the opposite direction. We got to camp around 12:30 having complete our easy, leisurely stroll down the valley between beautiful, steep mountain cliffs. The clouds held on furtively until about 3pm when they gave up and dissolved to another gorgeous afternoon. Today and tomorrow are our fishing days since we'll be by good water and three of us purchased licenses. So, we fished or relaxed all afternoon, had a nice Chili with hamburger dinner, and fished some more. The spinner fishermen caught more than flyfishing, but we all had fun and caught and released a bunch of brook trout and lake trout.
Day 5
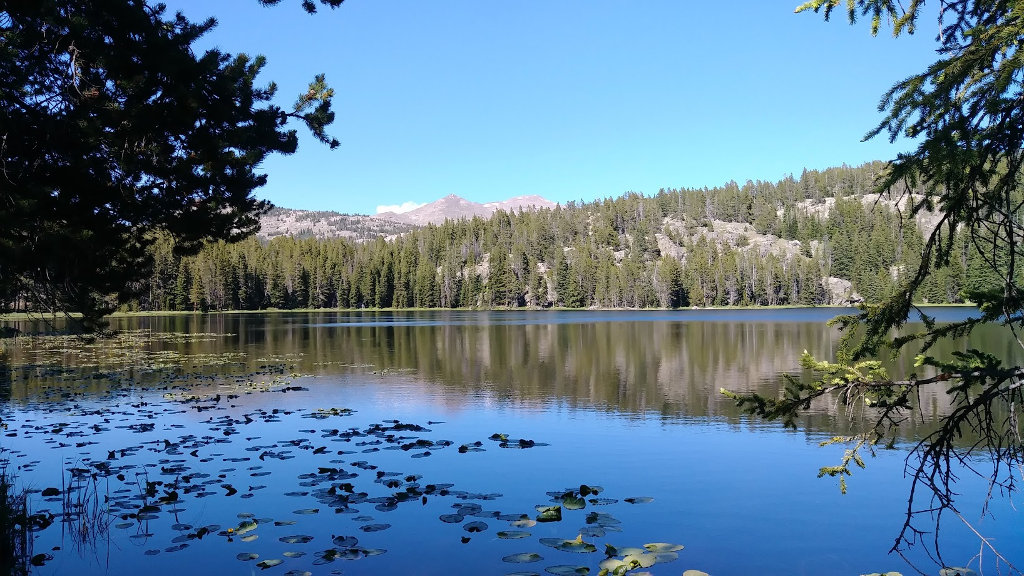

Another no-hurry day with a short hike to Grace Lake for our last night. I was up and fishing by 6:30 and then the usual breakfast time and on trail by 9:30. The only challenge of the day was a 250-foot climb from this valley to the next where we found Grace Lake.
The trail is pounded down from horses so it's very easy to follow and we stayed on it out of the official wilderness and around Grace Lake to a highly-used campsite. We arrived and had camp all set up before 1pm, so of course we went fishing. Grace Lake has some massive brook trout and we caught our share, releasing them all back since we still have tons of food.
Our final dinner, that I lugged over the mountains for the past week, was Mac & Cheese with tuna. I didn't eat any because I don't like M&C, but everyone else took care of it with no problem.
After a few morning clouds, this was yet another clear, refreshing day in the mountains. Well, we were all the way down at 9355 feet so I guess we were not really that far up, but it wa still an awesome day. Since this campsite is out of the official wilderness, we could have a campfire, but no one was really interested and we headed to bed at our typical 9ish time. I asked the younger backpackers when they'd like to get going in the morning and was surprised when they said 9am - sounds great to me!
Day 6
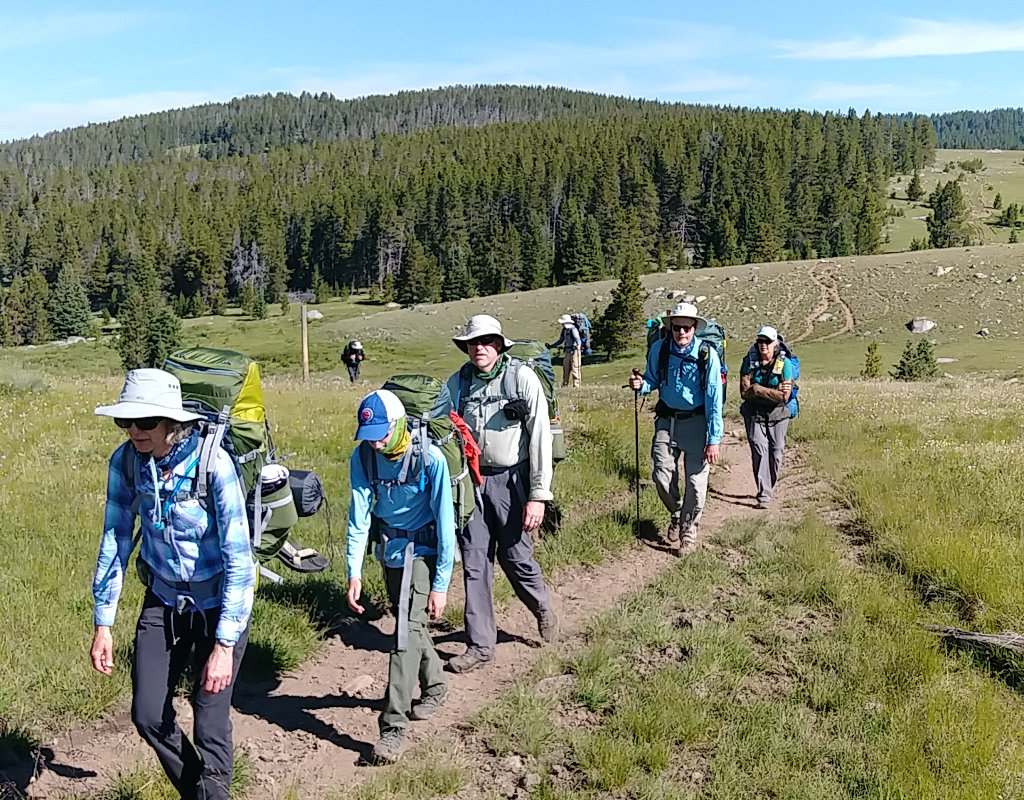

Today's hike started with a rugged 500-foot climb over the shoulder of Elk Mountain followed by a long, gradual downhill to the trailhead. We got an early start, took our time and reached the Battle Park trailhead before 10:30am to see our waiting van right where we left it. A quick rinse under the ice cold pump water and many stops in the outhouse and we packed our gear and drove away.
The bumpy ride back to Buffalo went quickly, but we were not the first group back. Another group had arrived, taken showers, and headed off to lunch - so we did the same. The shower felt great and we headed to Papa Bino's mexican diner where we were treated to huge servings in a modest house. Very fun, especially being waited on by a real-life Wyoming cowboy named Trenton who even showed us his 2018 championship buckle and big scar on his shoulder from a steer mishap - and he's too young to serve alcohol.
After lunch, we all wandered on our own through downtown Buffalo for a few hours because it's more interesting than sitting at the campground. The Sports Lure is a big outdoors store where you can spend lots of time and there are other small shops to weave in and out of. Back at the campground, we had a big pizza dinner, short recap from each trek crew, and then to bed to rest up for the 12 hour drive home bright and early tomorrow.
Hike On!
Leave Comment
Posted: 08/01/2019
Posted: 08/01/2019
09/15/2019
BWCA Canoe
 On my way to the Boundary Waters Canoe Wilderness for a 4-day trek on the water. Hiking will be mostly on the portages. I'll be tracking the trip on my Spot so you can check here tomorrow.
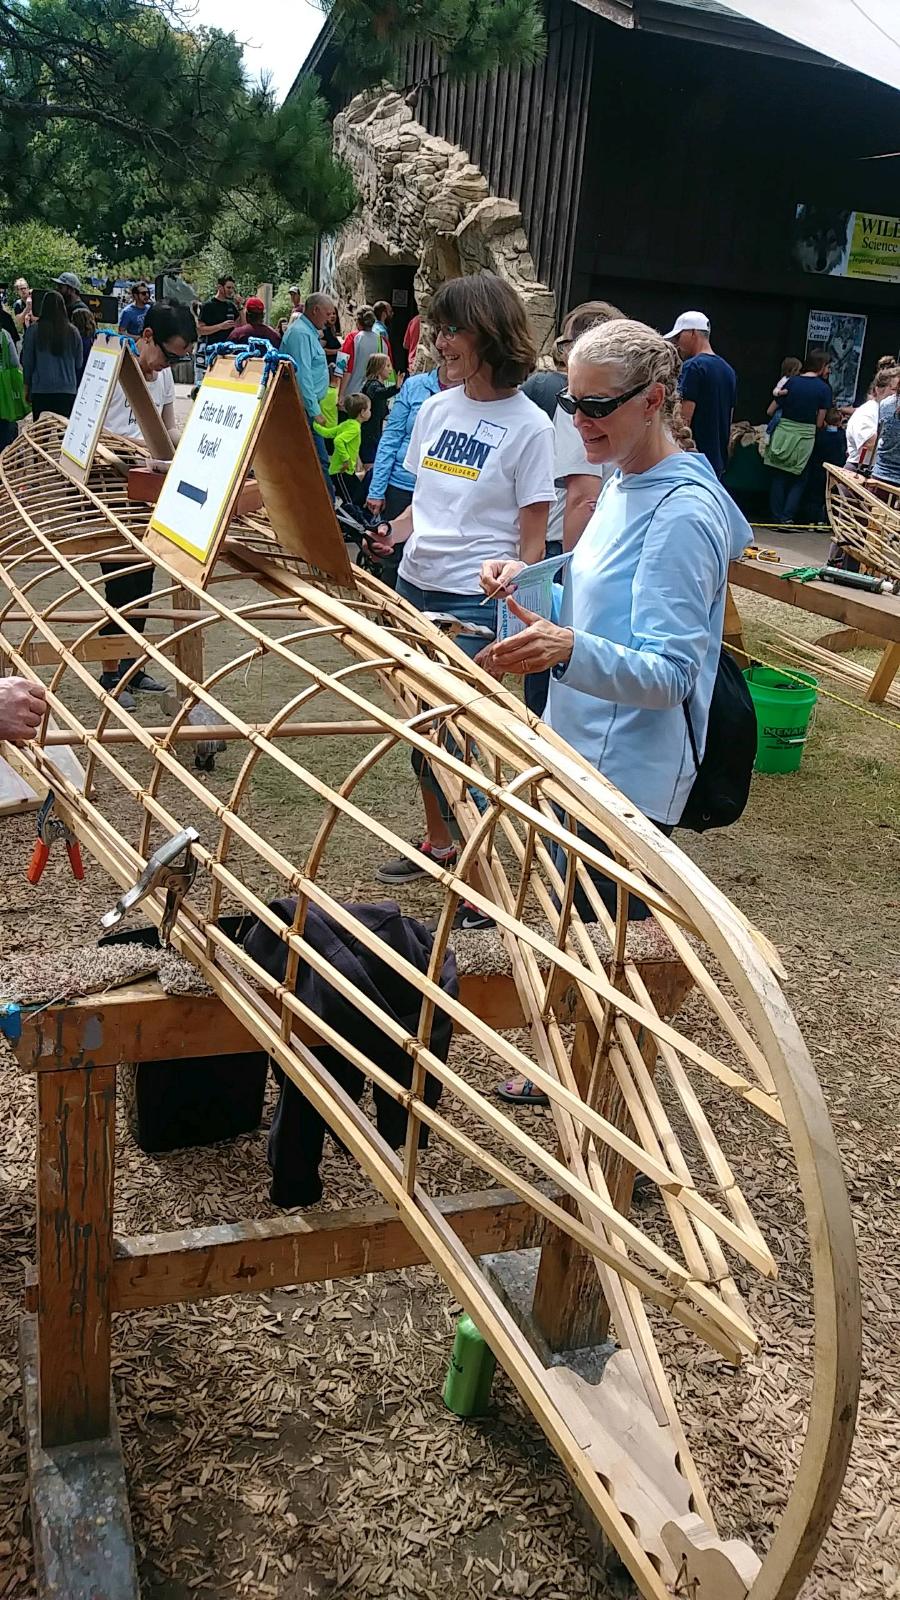
This pic is a cool demo by the DNR at the state fair where you can learn how one style of canoes are made.
Hike (or paddle) On!
On my way to the Boundary Waters Canoe Wilderness for a 4-day trek on the water. Hiking will be mostly on the portages. I'll be tracking the trip on my Spot so you can check here tomorrow.
This pic is a cool demo by the DNR at the state fair where you can learn how one style of canoes are made.
Hike (or paddle) On!Leave Comment
Posted: 09/15/2019
Posted: 09/15/2019
09/22/2019
2019 BWCA Canoe Trek
This week, I was Canoe Dude instead of Hiking Dude!
Last February, I climbed Mt. Kilimanjaro in Africa with a group of church friends and friends of friends. One of those folks was a bloke from Australia. Well, he came to America to visit friends around the country, in CA, MT, and MN. To make sure he experienced the best of Minnesota, four of us went on a 4-day canoe trek in the Boundary Waters Canoe Area Wilderness (the BWCA).
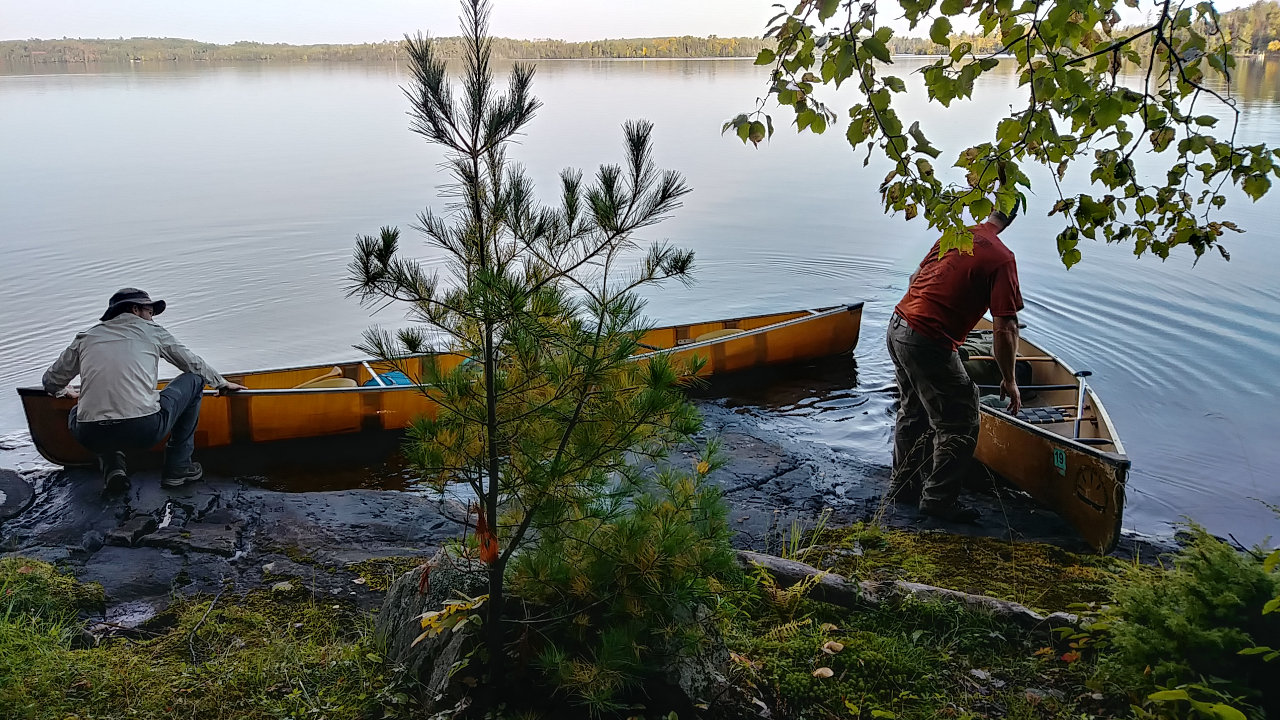

The Boundary Waters is a special place to Minnesotans. It is a million-acre wilderness set aside from development for recreational enjoyment, and is one of the most visited wilderness areas in the USA with about 250,000 users per year. There are over 2,000 established campsites spread around more than 1,100 lakes connected by hundreds of miles of riverways in the BWCA. Permits are required to access the BWCA.
Our adventure began with a 4+ hour drive 'up north' to Ely, MN where we picked up our permit and checked out the local Piragis Outfitters store in which you can find pretty much everything you need and anything you don't need. For example, if you don't want your fresh banana to get bruised, you can buy a plastic banana shell to keep it safe (no, seriously!) It really is a fun store to check out.
A couple miles east of Ely, we piled all our gear in a small motor boat at the boat launch and putted across Farm Lake to a friend's cabin we used as our starting point. We took a short hike through the woods to South Farm Lake and back to get a feel for the place. Then, a dinner of brats, beans, and beer followed by a game of cribbage and a nice night of rest in comfortable beds.
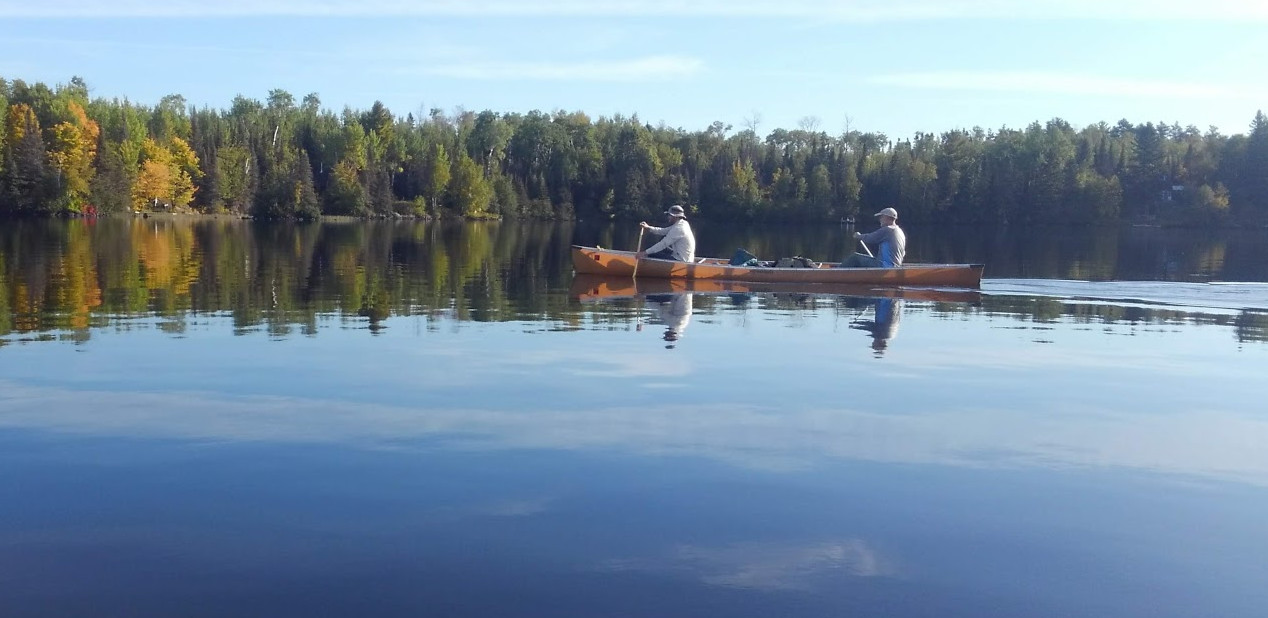

Pancakes for breakfast and we were on the water before 9am. The water was smooth as glass and no one else was around, so we had a wonderful morning paddle into the wilderness.
Minnesota has a wonderful fall color explosion, but we were just on the beginning edge of it. A couple maple trees were red, but most trees were only starting to lose their green, giving way to yellows and oranges.
Our route took us east, up the Kawishiwi River with a couple very short portages, followed by our longest portage of the trip at 210 rods. A portage is a great opportunity to get out of the canoe and hike for awhile. This was my first time balancing a canoe over my head and carrying a pack over a rocky trail through dense woods - it was fun, but hard work.
A 'rod' is an ancient measurement unit that translates to 16.5 feet, or 1/320 of a mile. Measuring canoe portages is one of the few times you'll see it in use these days, mostly from tradition but also because canoes are around 1 rod in length. So, our 210 rod portage meant I carried the canoe for 2/3 of a mile - that was far enough for me.
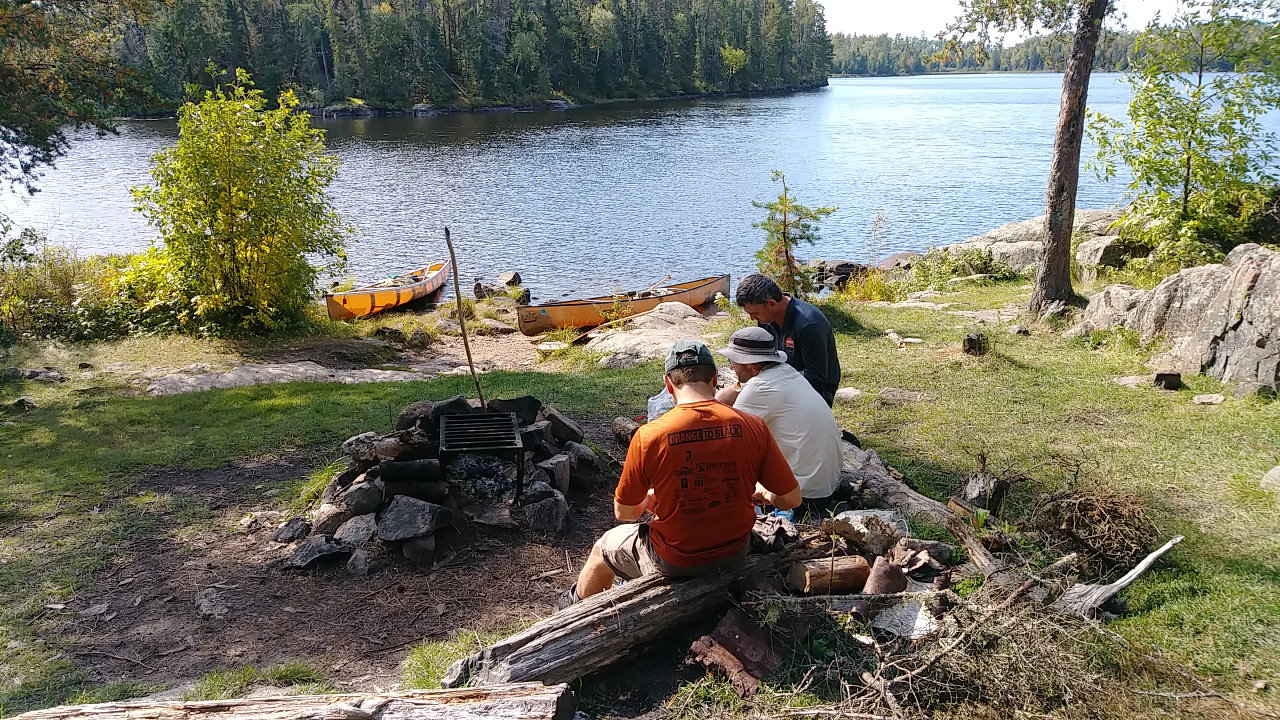

After canoeing a few hours, we stopped for lunch at a typical BWCA campsite. All camping is required to be done only at established sites, so they are often highly impacted. The thought is that concentrating impact to a vew spots will prevent ad-hoc sites from being created and keep the majority of the area pristine. In general, it works great but can mean frustration in high-use summer times when canoeists must keep on paddling until they find an open campsite. This week, we had no problem with campsites since school is in session and most folks are at work - but not us!
You can see the standard campsite layout here - a US Forest Service fire grate, logs around the social area, flat spots for tents, and somewhere off in the woods is an open-pit toilet.
After lunch, we continued up the river, completing another three portages. At one point, the maps showed the water route going two different ways. One way (the correct one) was a longer loop with a couple portages while the other (our choice) showed a more direct path with no portages. We followed the flat water to a creek flowing toward us that was too strong and rocky to paddle up. Rather than turning around and going back a mile or so, we decided to try hauling the canoes upstream since there was no portage trail.
We tied a 100-foot rope to a canoe and tied the 2nd canoe behind. I took the rope upstream and hauled the canoes up, with one person in each canoe steering. Once the canoes were up, Brad held the lead one while I scrambled another 100 feet upstream with the rope. We repeated this 5 times until the size of the rocks, depth of the water, and overhanging brush and trees finally made us give up.
We changed our plans and saw on the map that the alternate route's portage trail was probably less than 1/8 mile over a low hill to our west. Bob and I bushwhacked into the woods to see if we could find it. At this point, I mentioned to Bob, 'Hmmm, here I am in the wilderness with no compass, food, or water, hiking off into the dense forest.' After only a couple hundred feet, we surrendered to the extremely dense brush and admitted defeat.
Upon reaching the canoes, we untied them, piled in, turned around, and shot the rapids downstream. It was exciting and lots of fun for about 2 minutes. I'd say it was worth the effort of hauling them upstream, but I'd probably get some debate about that from Brad who cracked his shin on a rock, raising a big bump and drawing blood. At least, it was an adventure!

We covered around 13 miles our first day. Having not done a multi-day canoe trip before, I didn't know how far to expect to go. Two of us in each canoe, with our gear, we averaged over 2 miles/hour and that included time portaging and stopping for lunch. I'm now confident that 20-mile days are reasonable when planning future trips, if I want to cover more territory.
The canoeing was much easier than I expected. As long as you keep your paddle pulling through the water, you keep moving along. Trying to boost our speed seemed to take much more energy than the resulting speed gain, so a consistent pressure against the water is all it takes. Oh sure, the muscles get tired after 7 hours of paddling, but not nearly what I was expecting. With new views continually flowing past, and always looking around hoping for a moose, bear, or eagle sighting, the hours passed quickly.
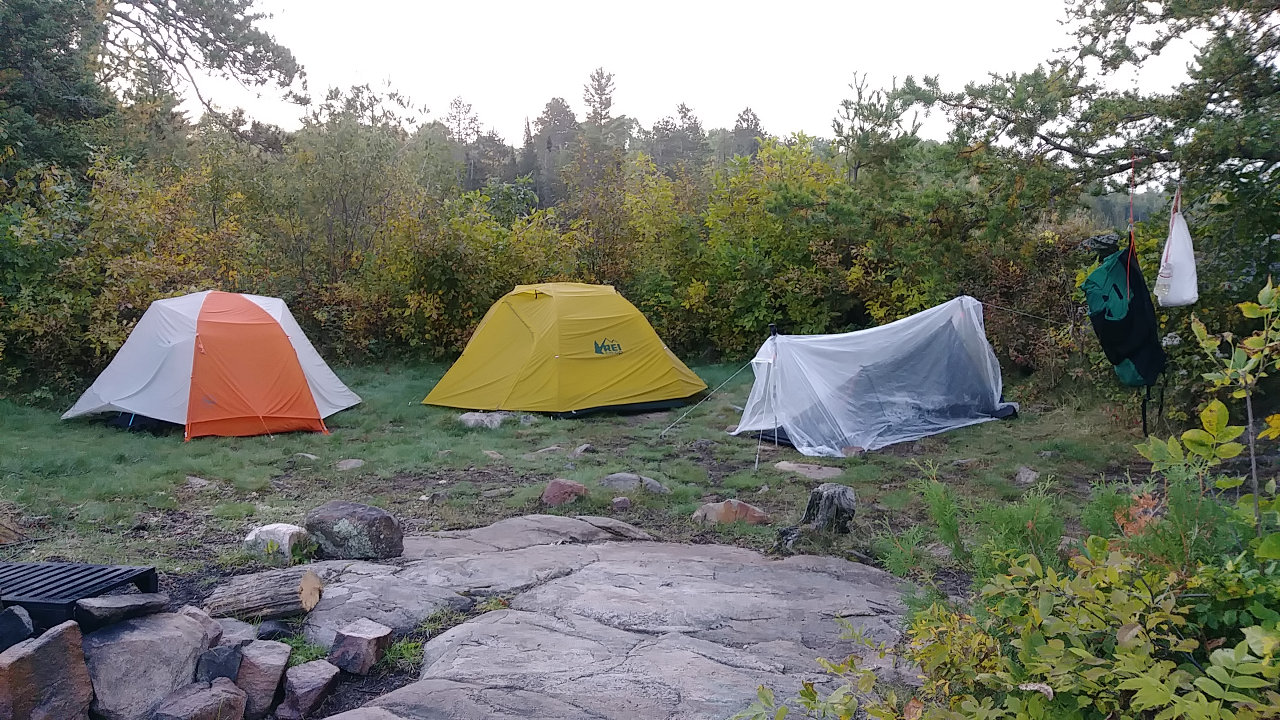
Our campsite for the night was on a small, exposed peninsula. There was plenty of room for 6 small tents and access to firewood far back in the forest. Here, you can see two real tents and my Hobo Hotel on the right. This is just a bug net with a plastic sheet thrown over the top. I'll post more about it later.
One thing about using established campsites means there are often (almost always) scavengers around looking for scraps. We had plenty of chipmunks scurrying around at each site and I expect many mice came out at night. Protecting your food from rodents is a good idea, as well as not dropping any crumbs, scraps, or garbage on the ground.
I found some Chili flavor ramen and Thai Chili flavored tuna packets at Walmart, so my simple dinner was pretty spicey! Each of us brought our own food, so we weren't very efficient but everything was just 'add boiling water' type food. After dinner, we had a nice fire and just chatted until it got dark. It was a great day, but the weather forecast says tomorrow won't be so nice.
I've found that bad weather at the start of a trip is not nearly as bad as at the end. Everyone forgets that awful day in a couple days. But, on a short trip, one lousy day is significant, and tomorrow is supposed to be that day.
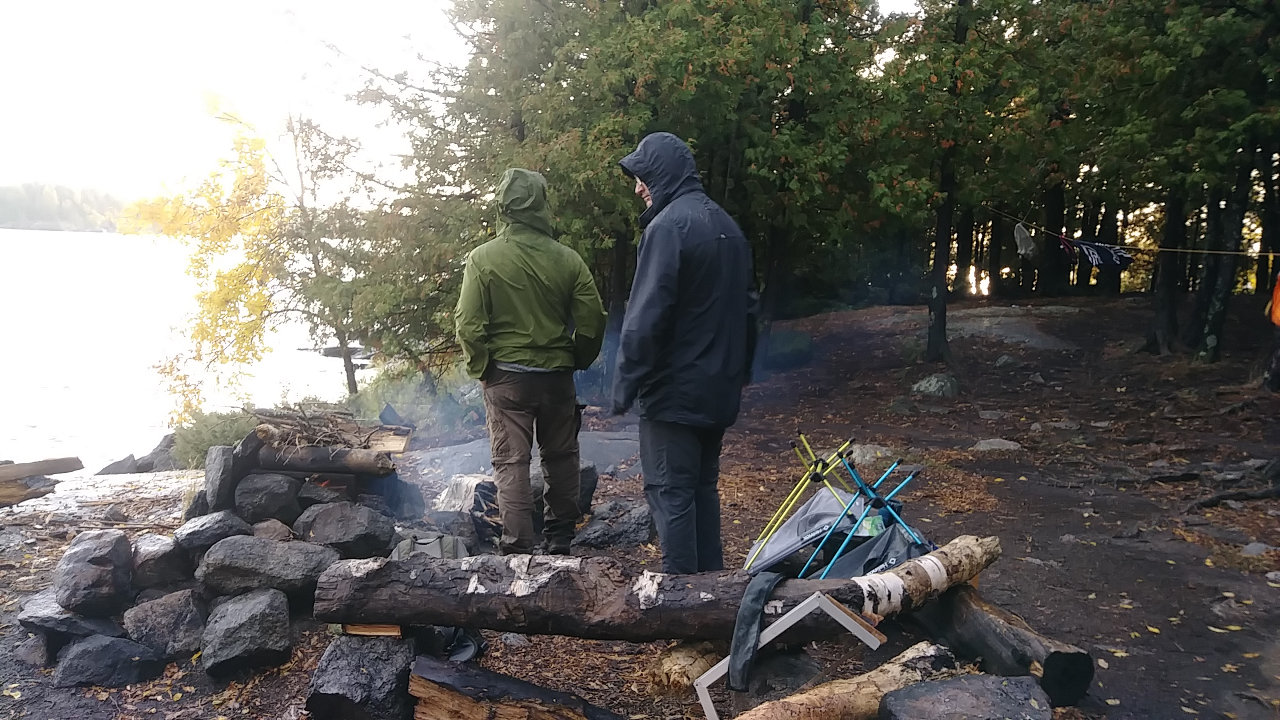

I didn't sleep very well last night, partly due to beavers slapping their tails in the river much of the night. We found out later that Kawishiwi means 'river full of beaver houses' which is a fitting name since we passed by well over a dozen of them.
Today, we decided to use the good morning weather to reach a campsite before the expected rain and winds picked up. It was a short paddle up the South Kawishiwi into and across Gabbro Lake to an excellent site on the southern tip of a very long peninsula. We had a great cedar forest for protection from wind, and a wonderful view across the entire lake from east to west so we could watch the storms roll through. And, roll through, they did!
Just before noon, the rain started, picked up, got very heavy, then torrential, then tapered off to basic rain that finally stopped around 10am the next morning. It was a good idea to keep this a short day on the lake and we stayed mostly dry and warm in camp. Fortunately, one person brought a 10x10 tarp under which we had shelter from the worst of the storm without being forced into our tents. One tent did get overcome by water during the worst of it, but most of their contents stayed dry.
We had gathered wood early, so we got to have a fire again this evening, along with our usual dinners. Tonight, I had chicken ramen with Hot Buffalo tuna - I tell you, StarKist has come out with some good flavored tuna choices.
Not much to share when you sit around camp for almost 24 hours.
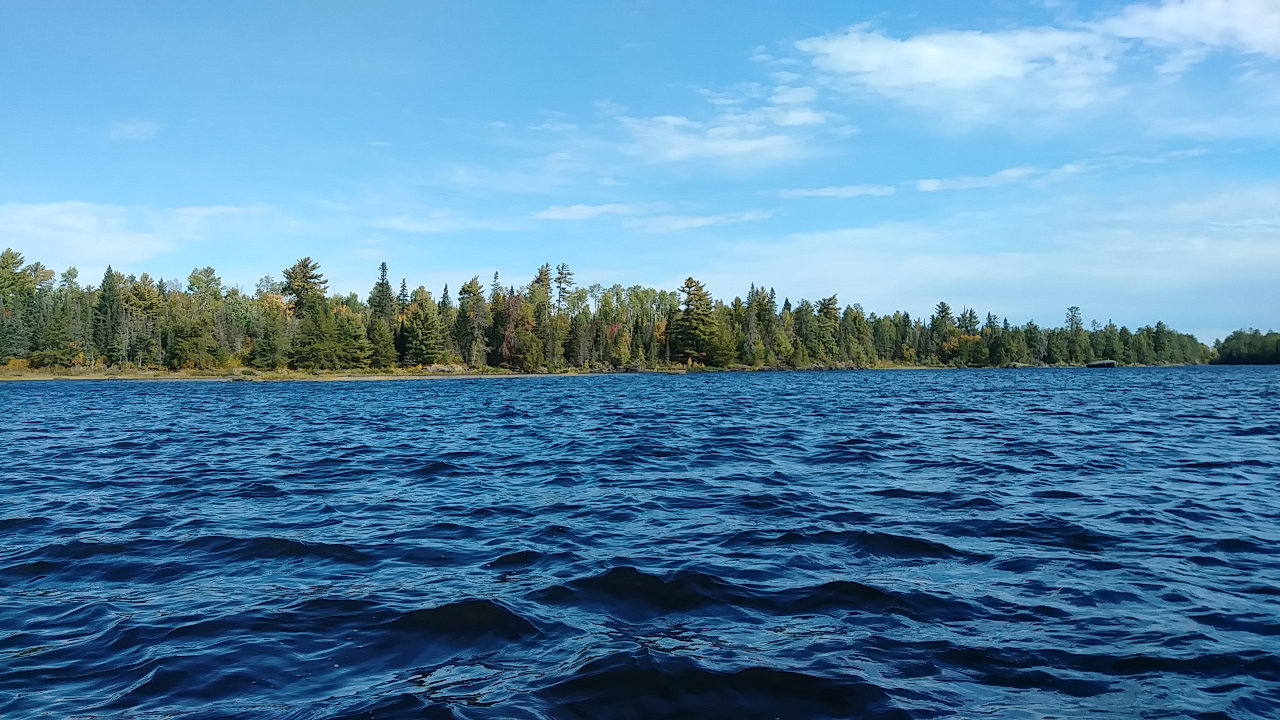

Since we only traveled a few miles yesterday, we either have two fairly short days left or we paddle in farther today and have a very long day out on Thursday. When the rain let up this morning, the wind did not. We will be paddling into the wind to get out, so we chose to go with the two shorter days. But, leave it to us to make a short day as long as possible. :-)
Today's water was not the glass-smooth water of the first day, but it was still beautiful. We left camp and pushed south into the wind to cross Gabbro Lake and use the protection of its southern shoreline for our journey west into Little Gabbro. After the rainstorm of yesterday, it seemed many more loons and eagles were out today. We saw a couple dozen of each on our entire trip.
Whether we're slow learners, or maybe to prove we could do it, today's map showed two waterways out of Little Gabbro...
OK, on a tangent now - Every lake or river I've ever been on has many small creeks, streams, rivers flowing INTO it, but only ONE flowing out. That's the way things work - water flows downhill, concentrating into larger and larger flows. In the Boundary Waters, it does not work that way! These water bodies are all depressions created when the last glaciers ripped through here around 17,000 years ago and gouged out the softer rocks and then water filled them later. That means that when there's enough water, there may be multiple waterways flowing out of a lake that rejoin somewhere far downstream. One might be more navigable than the other, or not, depending on the current available water. Pretty weird, I think.
...Anyway, one of our choices today has a 120 rod portage while the other has an 8 rod and a 12 rod portage. Well, I'd much rather do the two short ones, and maybe we'll get lucky and be able to just navigate through those short ones. After all, they are downstream portages, so we don't have to paddle against the current. We went downriver about a quarter mile to the first portage. There, we found an old wooden dam with big metal spikes mostly blocking the river. The portage around was short and easy.
Another 150 feet downstream, we encountered a short stretch of fast rapids with a zigzag through some big boulders - not marked as a portage on maps. If they were aluminum rental canoes, I would have gone through but these light, borrowed, kevlar canoes might get a few significant scratches from kissing the rocks. So, we scouted for a way through the dense woods. Intertwined brush and many fallen logs meant a very slow portage with a good chance of injury or gouging a canoe on broken branches. Another dead-end for us.
Back to the canoes, and this time we get to retrace our path Upstream - not nearly as fun as down. Some furtive paddling and a couple rock scrapes and we were back to the dam portage. After that, some more aggressive paddling got us to Little Gabbro, around a point, and to the 120 rod portage! Whew! No big deal, we had extra time today so this 90 minutes was just another adventure.
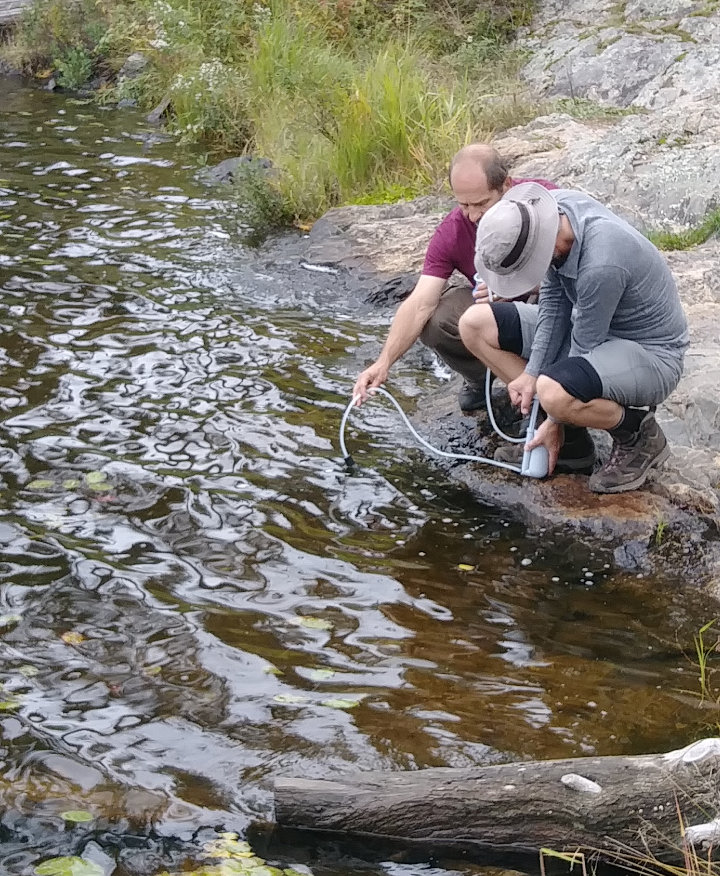

A easy couple miles on the South Kawishiwi River got us to our final 60-rod portage of the day over a beaver dam into Clear Lake. Most of our portages had rocky landings, but this one was nice, thick mud at the put-in point. We paddle from the south to the northwest side of the lake and found an open campsite near our last portage. We could have easily paddled all the way out today, but we're in no hurry.
At camp, we gathered wood, filtered water, and set up tents. Another beautiful view to the south across the lake with a couple loons and eagles around. I did see a moose track in the portage trail, but that was the only sign of any larger animals around.
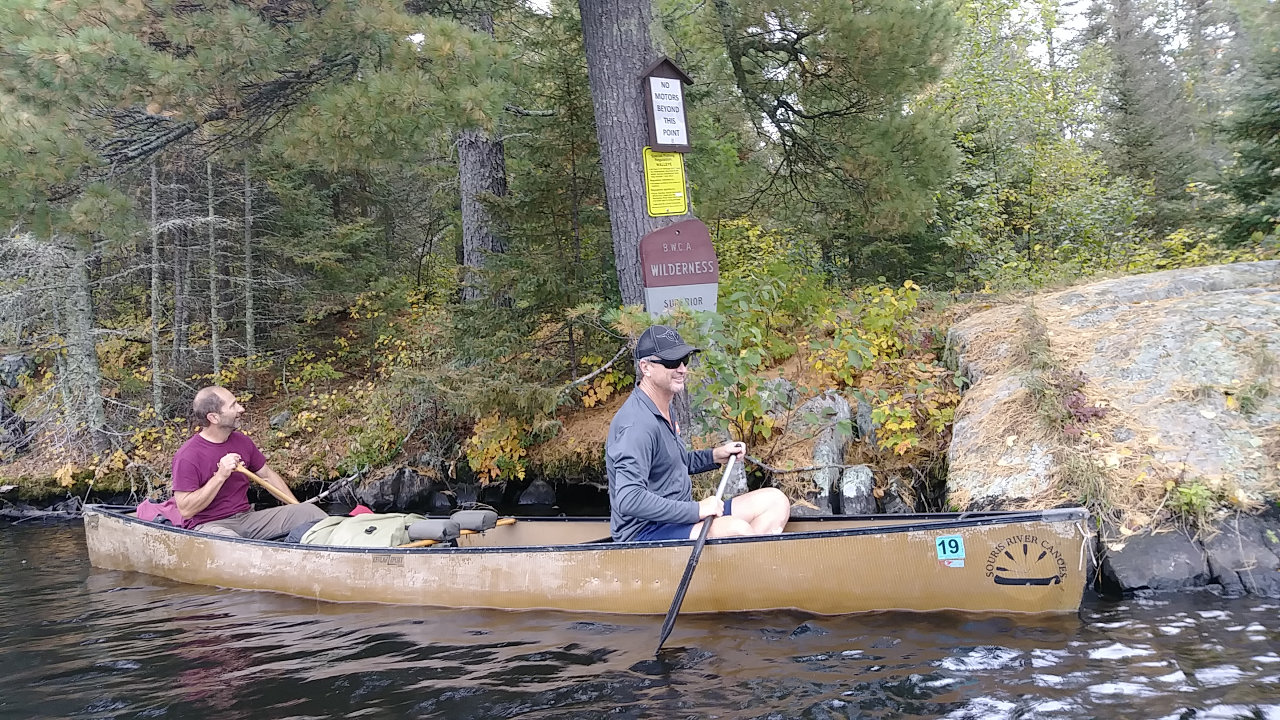

I finally slept pretty well and we had a mellow morning breaking camp. It took 5 minutes to reach the 175-rod portage and then we had 2 hours of smooth, easy paddling back to the cabin. It looked like the fall colors had improved quite a bit in just three days and the cool, dry weather was great for canoeing.
We piled gear in the boat, closed up the cabin, motored over to the boatlaunch and our canoeing trek was finished.
We did add on a 1-mile hike to see Kawishiwi Falls by Ely - cool waterfall with interpretive signs describing the logging operations and current electricity generating dam on the river. After that, we stopped at Gator's Grilled Cheese Emporium in Ely for lunch - fun place with a model train that runs around the ceiling.
I do think September is the best time for outdoor recreation in Minnesota - low humidity, no bugs, fewer people, and colorful trees. This trip was a great introduction to the BWCA and I look forward to coming back next year.
Last February, I climbed Mt. Kilimanjaro in Africa with a group of church friends and friends of friends. One of those folks was a bloke from Australia. Well, he came to America to visit friends around the country, in CA, MT, and MN. To make sure he experienced the best of Minnesota, four of us went on a 4-day canoe trek in the Boundary Waters Canoe Area Wilderness (the BWCA).


Map of our Route
The blue line is our route with green tents where we camped. You can zoom in on any part you want, or click the box icon in the upper-right to make it fullpage.
The Boundary Waters is a special place to Minnesotans. It is a million-acre wilderness set aside from development for recreational enjoyment, and is one of the most visited wilderness areas in the USA with about 250,000 users per year. There are over 2,000 established campsites spread around more than 1,100 lakes connected by hundreds of miles of riverways in the BWCA. Permits are required to access the BWCA.
Our adventure began with a 4+ hour drive 'up north' to Ely, MN where we picked up our permit and checked out the local Piragis Outfitters store in which you can find pretty much everything you need and anything you don't need. For example, if you don't want your fresh banana to get bruised, you can buy a plastic banana shell to keep it safe (no, seriously!) It really is a fun store to check out.
A couple miles east of Ely, we piled all our gear in a small motor boat at the boat launch and putted across Farm Lake to a friend's cabin we used as our starting point. We took a short hike through the woods to South Farm Lake and back to get a feel for the place. Then, a dinner of brats, beans, and beer followed by a game of cribbage and a nice night of rest in comfortable beds.


Pancakes for breakfast and we were on the water before 9am. The water was smooth as glass and no one else was around, so we had a wonderful morning paddle into the wilderness.
Minnesota has a wonderful fall color explosion, but we were just on the beginning edge of it. A couple maple trees were red, but most trees were only starting to lose their green, giving way to yellows and oranges.
Our route took us east, up the Kawishiwi River with a couple very short portages, followed by our longest portage of the trip at 210 rods. A portage is a great opportunity to get out of the canoe and hike for awhile. This was my first time balancing a canoe over my head and carrying a pack over a rocky trail through dense woods - it was fun, but hard work.
A 'rod' is an ancient measurement unit that translates to 16.5 feet, or 1/320 of a mile. Measuring canoe portages is one of the few times you'll see it in use these days, mostly from tradition but also because canoes are around 1 rod in length. So, our 210 rod portage meant I carried the canoe for 2/3 of a mile - that was far enough for me.


After canoeing a few hours, we stopped for lunch at a typical BWCA campsite. All camping is required to be done only at established sites, so they are often highly impacted. The thought is that concentrating impact to a vew spots will prevent ad-hoc sites from being created and keep the majority of the area pristine. In general, it works great but can mean frustration in high-use summer times when canoeists must keep on paddling until they find an open campsite. This week, we had no problem with campsites since school is in session and most folks are at work - but not us!
You can see the standard campsite layout here - a US Forest Service fire grate, logs around the social area, flat spots for tents, and somewhere off in the woods is an open-pit toilet.
After lunch, we continued up the river, completing another three portages. At one point, the maps showed the water route going two different ways. One way (the correct one) was a longer loop with a couple portages while the other (our choice) showed a more direct path with no portages. We followed the flat water to a creek flowing toward us that was too strong and rocky to paddle up. Rather than turning around and going back a mile or so, we decided to try hauling the canoes upstream since there was no portage trail.
We tied a 100-foot rope to a canoe and tied the 2nd canoe behind. I took the rope upstream and hauled the canoes up, with one person in each canoe steering. Once the canoes were up, Brad held the lead one while I scrambled another 100 feet upstream with the rope. We repeated this 5 times until the size of the rocks, depth of the water, and overhanging brush and trees finally made us give up.
We changed our plans and saw on the map that the alternate route's portage trail was probably less than 1/8 mile over a low hill to our west. Bob and I bushwhacked into the woods to see if we could find it. At this point, I mentioned to Bob, 'Hmmm, here I am in the wilderness with no compass, food, or water, hiking off into the dense forest.' After only a couple hundred feet, we surrendered to the extremely dense brush and admitted defeat.
Upon reaching the canoes, we untied them, piled in, turned around, and shot the rapids downstream. It was exciting and lots of fun for about 2 minutes. I'd say it was worth the effort of hauling them upstream, but I'd probably get some debate about that from Brad who cracked his shin on a rock, raising a big bump and drawing blood. At least, it was an adventure!


We covered around 13 miles our first day. Having not done a multi-day canoe trip before, I didn't know how far to expect to go. Two of us in each canoe, with our gear, we averaged over 2 miles/hour and that included time portaging and stopping for lunch. I'm now confident that 20-mile days are reasonable when planning future trips, if I want to cover more territory.
The canoeing was much easier than I expected. As long as you keep your paddle pulling through the water, you keep moving along. Trying to boost our speed seemed to take much more energy than the resulting speed gain, so a consistent pressure against the water is all it takes. Oh sure, the muscles get tired after 7 hours of paddling, but not nearly what I was expecting. With new views continually flowing past, and always looking around hoping for a moose, bear, or eagle sighting, the hours passed quickly.
Our campsite for the night was on a small, exposed peninsula. There was plenty of room for 6 small tents and access to firewood far back in the forest. Here, you can see two real tents and my Hobo Hotel on the right. This is just a bug net with a plastic sheet thrown over the top. I'll post more about it later.
One thing about using established campsites means there are often (almost always) scavengers around looking for scraps. We had plenty of chipmunks scurrying around at each site and I expect many mice came out at night. Protecting your food from rodents is a good idea, as well as not dropping any crumbs, scraps, or garbage on the ground.
I found some Chili flavor ramen and Thai Chili flavored tuna packets at Walmart, so my simple dinner was pretty spicey! Each of us brought our own food, so we weren't very efficient but everything was just 'add boiling water' type food. After dinner, we had a nice fire and just chatted until it got dark. It was a great day, but the weather forecast says tomorrow won't be so nice.
I've found that bad weather at the start of a trip is not nearly as bad as at the end. Everyone forgets that awful day in a couple days. But, on a short trip, one lousy day is significant, and tomorrow is supposed to be that day.


I didn't sleep very well last night, partly due to beavers slapping their tails in the river much of the night. We found out later that Kawishiwi means 'river full of beaver houses' which is a fitting name since we passed by well over a dozen of them.
Today, we decided to use the good morning weather to reach a campsite before the expected rain and winds picked up. It was a short paddle up the South Kawishiwi into and across Gabbro Lake to an excellent site on the southern tip of a very long peninsula. We had a great cedar forest for protection from wind, and a wonderful view across the entire lake from east to west so we could watch the storms roll through. And, roll through, they did!
Just before noon, the rain started, picked up, got very heavy, then torrential, then tapered off to basic rain that finally stopped around 10am the next morning. It was a good idea to keep this a short day on the lake and we stayed mostly dry and warm in camp. Fortunately, one person brought a 10x10 tarp under which we had shelter from the worst of the storm without being forced into our tents. One tent did get overcome by water during the worst of it, but most of their contents stayed dry.
We had gathered wood early, so we got to have a fire again this evening, along with our usual dinners. Tonight, I had chicken ramen with Hot Buffalo tuna - I tell you, StarKist has come out with some good flavored tuna choices.
Not much to share when you sit around camp for almost 24 hours.


Since we only traveled a few miles yesterday, we either have two fairly short days left or we paddle in farther today and have a very long day out on Thursday. When the rain let up this morning, the wind did not. We will be paddling into the wind to get out, so we chose to go with the two shorter days. But, leave it to us to make a short day as long as possible. :-)
Today's water was not the glass-smooth water of the first day, but it was still beautiful. We left camp and pushed south into the wind to cross Gabbro Lake and use the protection of its southern shoreline for our journey west into Little Gabbro. After the rainstorm of yesterday, it seemed many more loons and eagles were out today. We saw a couple dozen of each on our entire trip.
Whether we're slow learners, or maybe to prove we could do it, today's map showed two waterways out of Little Gabbro...
OK, on a tangent now - Every lake or river I've ever been on has many small creeks, streams, rivers flowing INTO it, but only ONE flowing out. That's the way things work - water flows downhill, concentrating into larger and larger flows. In the Boundary Waters, it does not work that way! These water bodies are all depressions created when the last glaciers ripped through here around 17,000 years ago and gouged out the softer rocks and then water filled them later. That means that when there's enough water, there may be multiple waterways flowing out of a lake that rejoin somewhere far downstream. One might be more navigable than the other, or not, depending on the current available water. Pretty weird, I think.
...Anyway, one of our choices today has a 120 rod portage while the other has an 8 rod and a 12 rod portage. Well, I'd much rather do the two short ones, and maybe we'll get lucky and be able to just navigate through those short ones. After all, they are downstream portages, so we don't have to paddle against the current. We went downriver about a quarter mile to the first portage. There, we found an old wooden dam with big metal spikes mostly blocking the river. The portage around was short and easy.
Another 150 feet downstream, we encountered a short stretch of fast rapids with a zigzag through some big boulders - not marked as a portage on maps. If they were aluminum rental canoes, I would have gone through but these light, borrowed, kevlar canoes might get a few significant scratches from kissing the rocks. So, we scouted for a way through the dense woods. Intertwined brush and many fallen logs meant a very slow portage with a good chance of injury or gouging a canoe on broken branches. Another dead-end for us.
Back to the canoes, and this time we get to retrace our path Upstream - not nearly as fun as down. Some furtive paddling and a couple rock scrapes and we were back to the dam portage. After that, some more aggressive paddling got us to Little Gabbro, around a point, and to the 120 rod portage! Whew! No big deal, we had extra time today so this 90 minutes was just another adventure.


A easy couple miles on the South Kawishiwi River got us to our final 60-rod portage of the day over a beaver dam into Clear Lake. Most of our portages had rocky landings, but this one was nice, thick mud at the put-in point. We paddle from the south to the northwest side of the lake and found an open campsite near our last portage. We could have easily paddled all the way out today, but we're in no hurry.
At camp, we gathered wood, filtered water, and set up tents. Another beautiful view to the south across the lake with a couple loons and eagles around. I did see a moose track in the portage trail, but that was the only sign of any larger animals around.


I finally slept pretty well and we had a mellow morning breaking camp. It took 5 minutes to reach the 175-rod portage and then we had 2 hours of smooth, easy paddling back to the cabin. It looked like the fall colors had improved quite a bit in just three days and the cool, dry weather was great for canoeing.
We piled gear in the boat, closed up the cabin, motored over to the boatlaunch and our canoeing trek was finished.
We did add on a 1-mile hike to see Kawishiwi Falls by Ely - cool waterfall with interpretive signs describing the logging operations and current electricity generating dam on the river. After that, we stopped at Gator's Grilled Cheese Emporium in Ely for lunch - fun place with a model train that runs around the ceiling.
I do think September is the best time for outdoor recreation in Minnesota - low humidity, no bugs, fewer people, and colorful trees. This trip was a great introduction to the BWCA and I look forward to coming back next year.
Leave Comment
Posted: 09/22/2019
Posted: 09/22/2019
10/07/2019
SHT Blue Blaze Blitz
Our weekend on the Superior Hiking Trail.
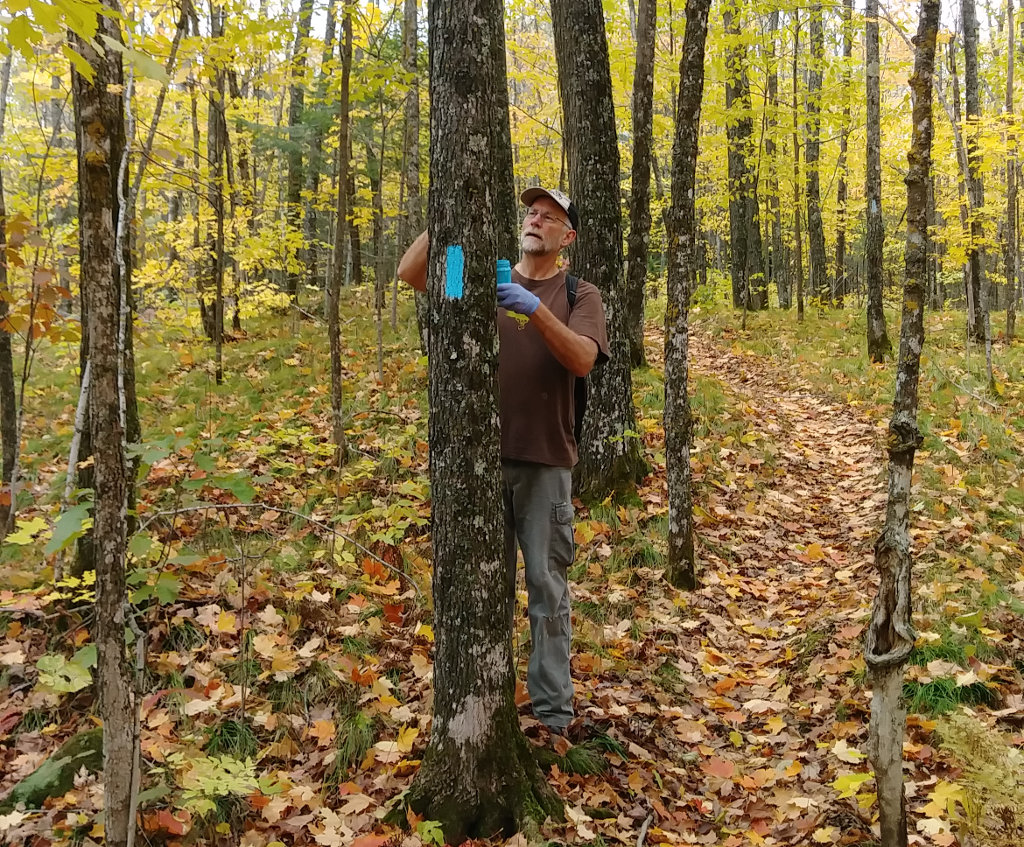
 We had a wonderful weekend doing trail volunteer work on the Superior Hiking Trail this weekend. We painted blazes on about 17 miles of trail as our part of the #BlueBlazeBlitz that saw pairs of volunteers blazing the majority of the 300+ trail miles along the north shore of Lake Superior.
The trail was completely blazed in 2006-2007 by two people contracted by the SHT Association. At that time, the standard of a vertical blue blaze measuring 2-inch by 6-inch and positioned about 6 feet from the ground every 1/10th mile was set. Over the past dozen years, those blazes have faded, or the trees they were on have fallen. On my thru-hike, I joked that the SHTA should use a paint that wouldn't kill the trees since I saw so many on the ground. :-)
Our blazes in 2019 are still blue, and about the size of a dollar bill, but we were instructed to place them about every 100 yards, so they are about half the distance apart as the originals.
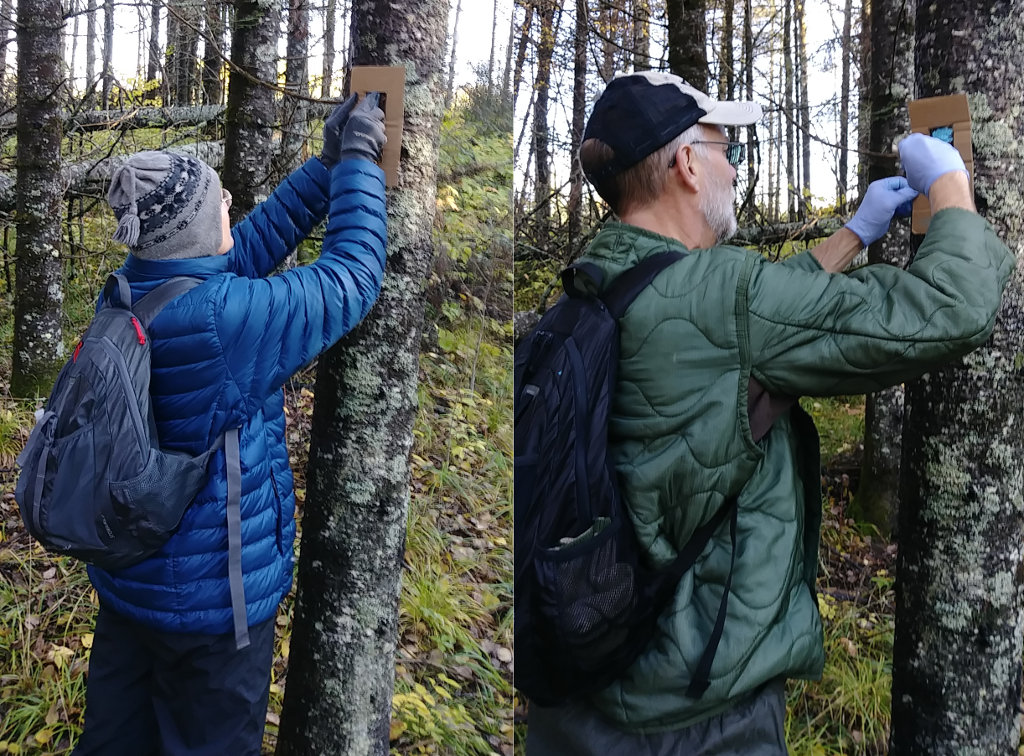
 The process is pretty simple.
Count 100 steps and find a tree for a blaze. Clean an area 6 feet up. Paint the blaze. Repeat 20 times every mile. But, there are some things to learn to make 'good' blazes.
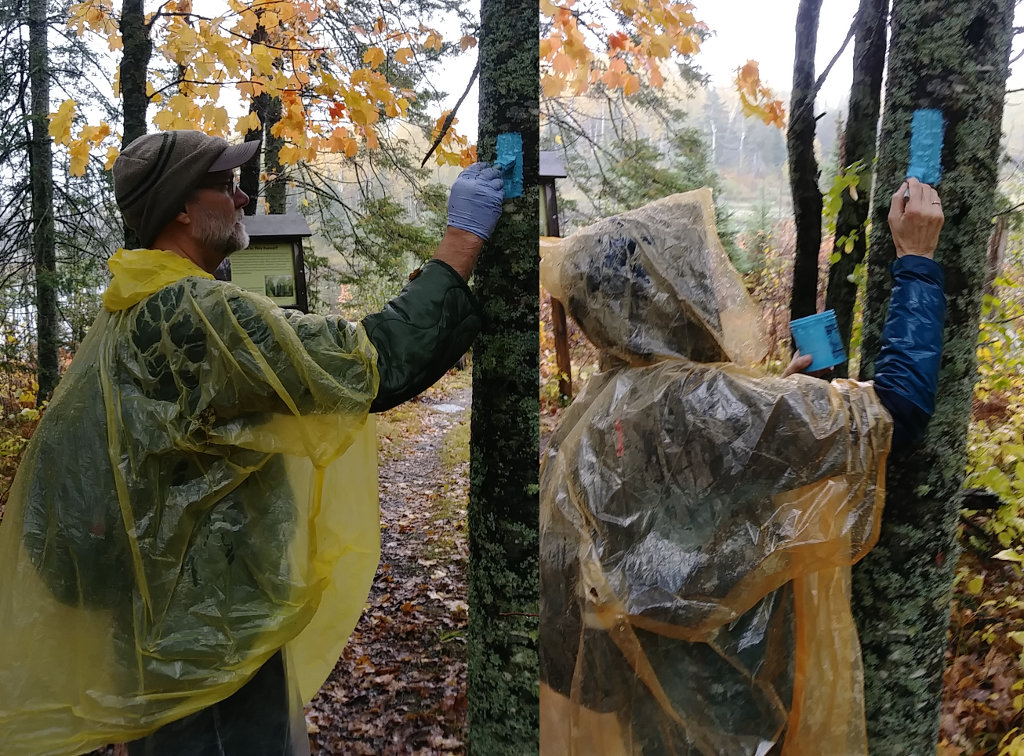
 For our volunteering, we blazed on both Saturday and Sunday. Our longest assigned section was on Saturday and it rained the entire day, non-stop. But, we were told the blazing would go on 'rain or shine', so we successfully covered the 5 miles out and 5 miles back in about 7 hours. After we finished, we learned that some groups chose to not blaze due to the rain, so now we hope our blazes hold up. We did meet another blazer leaving the trail and she had done her section - Good Job!
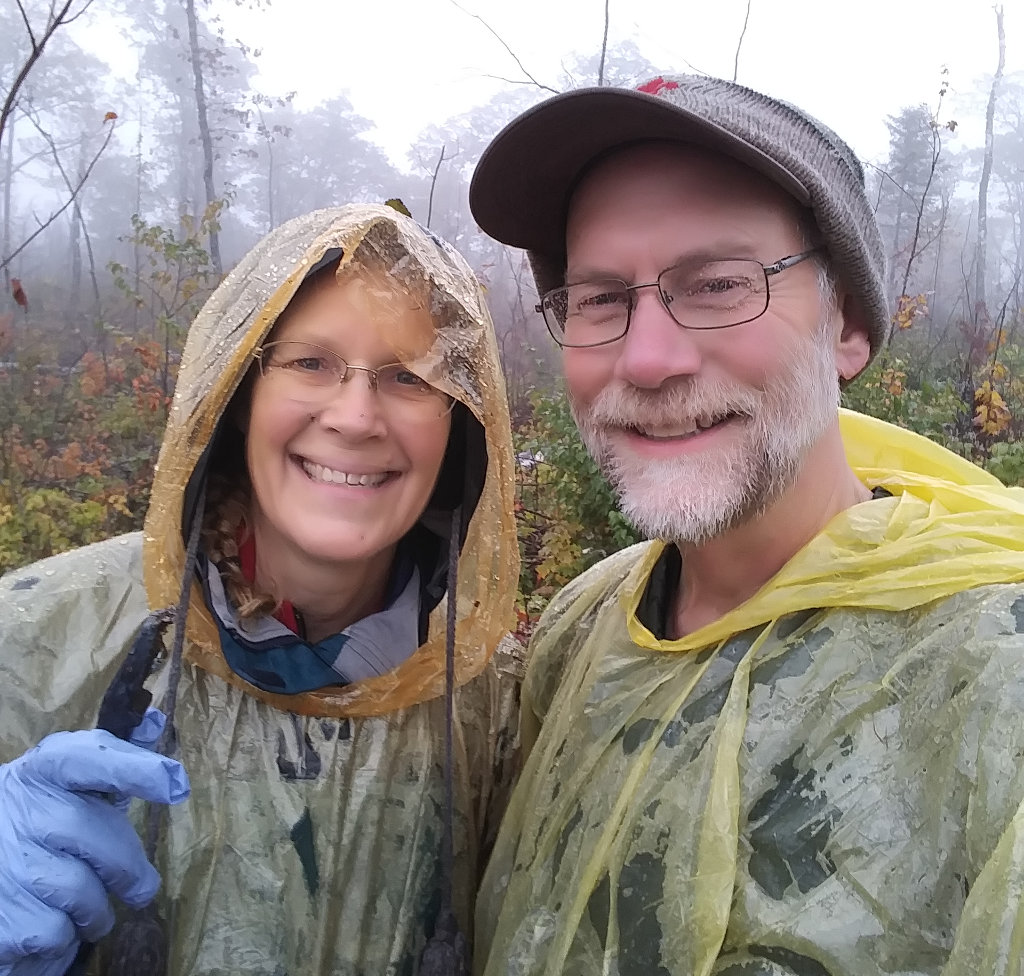
You can see we are wet under our disposable rain ponchos. Most of that was from perspiration being trapped and we were plenty warm the entire time. The only time I cooled off was when we stopped for a quick lunch in a very convenient snowmobile shelter along the trail. As long as we were walking along, it was comfortable - wet, windy, and cool, but still comfortable.
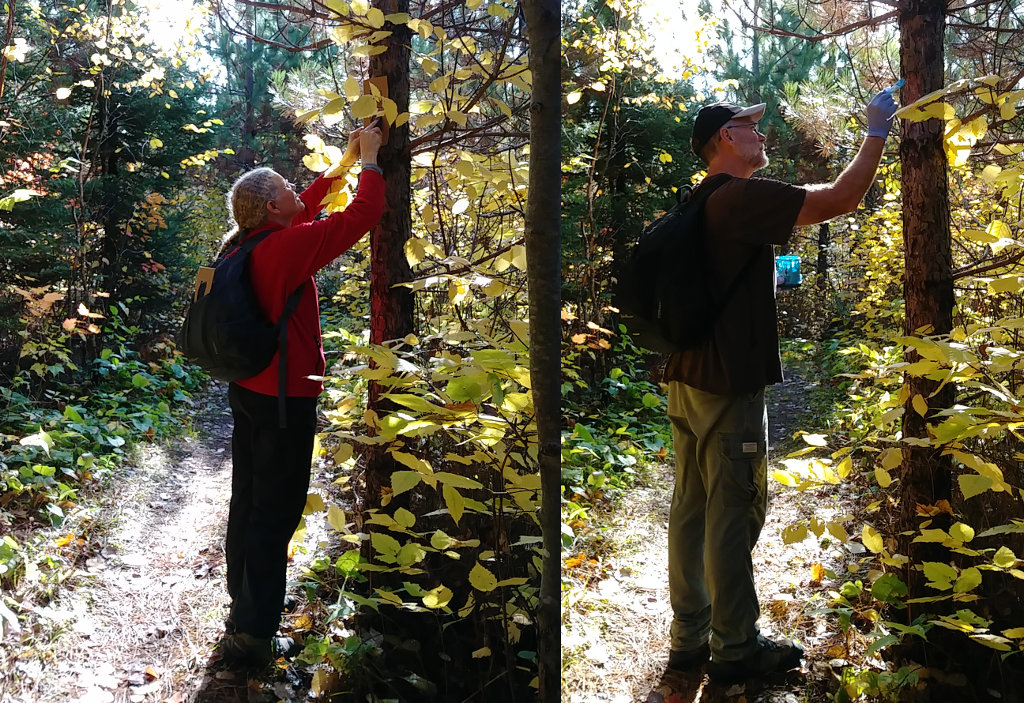
 Sunday's hike was so much more fun! The sun was out and it was a perfect fall day. Our second section was 7 miles round-trip and the blazes were much easier to paint without rainwater to deal with.
We tromped through a lot of water left over from the storm, but stayed dry overall. A nice lunch at the Big Bend campsite at our halfway point was our only rest in the 5 hour hike.
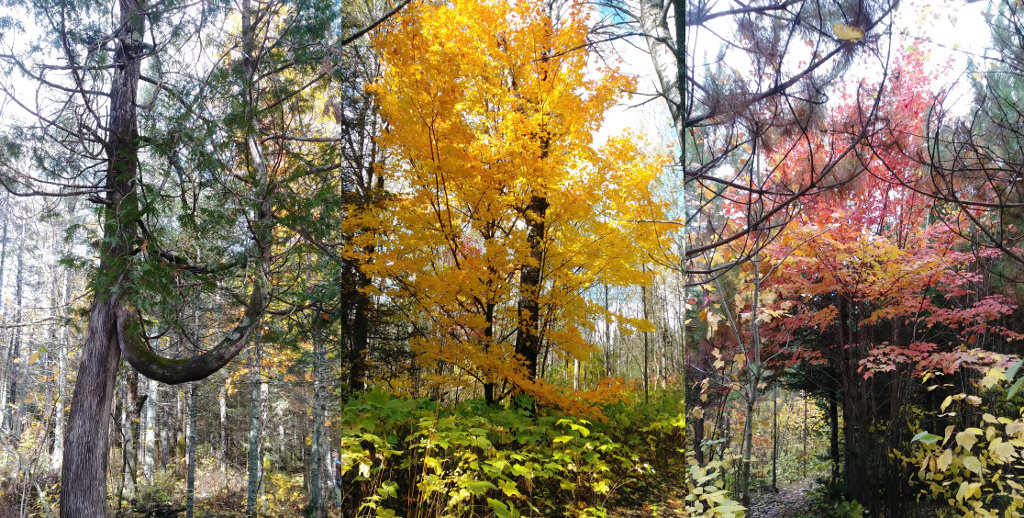
 It was nice to be out in the woods at this time of year. Lots of colors changing, cool temps, and no bugs. These were just a few of the beautiful trees we passed. My favorite part was walking through a maple forest with a canopy of orange and red lit by sunshine.
If you take advantage of hiking on trails, please consider contributing to their maintenance. The SHT is volunteer maintained, as are many trails across the country. It takes many hours of commitment by many people to keep trails open and available for you.
 Hike On

 We had a wonderful weekend doing trail volunteer work on the Superior Hiking Trail this weekend. We painted blazes on about 17 miles of trail as our part of the #BlueBlazeBlitz that saw pairs of volunteers blazing the majority of the 300+ trail miles along the north shore of Lake Superior.
The trail was completely blazed in 2006-2007 by two people contracted by the SHT Association. At that time, the standard of a vertical blue blaze measuring 2-inch by 6-inch and positioned about 6 feet from the ground every 1/10th mile was set. Over the past dozen years, those blazes have faded, or the trees they were on have fallen. On my thru-hike, I joked that the SHTA should use a paint that wouldn't kill the trees since I saw so many on the ground. :-)
Our blazes in 2019 are still blue, and about the size of a dollar bill, but we were instructed to place them about every 100 yards, so they are about half the distance apart as the originals.

 The process is pretty simple.
Count 100 steps and find a tree for a blaze. Clean an area 6 feet up. Paint the blaze. Repeat 20 times every mile. But, there are some things to learn to make 'good' blazes.
- A Good Tree is large enough to fit a blaze on, not a spindly sapling. Birch and White Pine should be avoided because their bark peels or flakes and won't hold the blaze long. A tree that is visible from far down the trail works well, rather than one just around a corner, or covered by brush.
- Scraping off lichen, moss, and debris to create a smooth canvas makes for a better blaze. We were given a template and scraper to define the blaze location.
- Using a small amount of paint and brushing up from the bottom reduces newbie drips.
- If there's an old blaze in the general area that would work, just repainting it is the thing to do.

 For our volunteering, we blazed on both Saturday and Sunday. Our longest assigned section was on Saturday and it rained the entire day, non-stop. But, we were told the blazing would go on 'rain or shine', so we successfully covered the 5 miles out and 5 miles back in about 7 hours. After we finished, we learned that some groups chose to not blaze due to the rain, so now we hope our blazes hold up. We did meet another blazer leaving the trail and she had done her section - Good Job!
You can see we are wet under our disposable rain ponchos. Most of that was from perspiration being trapped and we were plenty warm the entire time. The only time I cooled off was when we stopped for a quick lunch in a very convenient snowmobile shelter along the trail. As long as we were walking along, it was comfortable - wet, windy, and cool, but still comfortable.

 Sunday's hike was so much more fun! The sun was out and it was a perfect fall day. Our second section was 7 miles round-trip and the blazes were much easier to paint without rainwater to deal with.
We tromped through a lot of water left over from the storm, but stayed dry overall. A nice lunch at the Big Bend campsite at our halfway point was our only rest in the 5 hour hike.

 It was nice to be out in the woods at this time of year. Lots of colors changing, cool temps, and no bugs. These were just a few of the beautiful trees we passed. My favorite part was walking through a maple forest with a canopy of orange and red lit by sunshine.
If you take advantage of hiking on trails, please consider contributing to their maintenance. The SHT is volunteer maintained, as are many trails across the country. It takes many hours of commitment by many people to keep trails open and available for you.

 Hike On
Leave Comment
Posted: 10/07/2019
Posted: 10/07/2019
10/20/2019
Compass Training
It's hard to be a Hiking Dude if you can't navigate your way through the wilds. So, I spent my Saturday morning with a great group of Women Who Hike helping them hone their map and compass skills. The morning started a little drizzly but turned into a beautiful fall day to spend out in nature.
We met at a local nature center and spent almost two hours learning what a compass does (and does not do), how to take a bearing, orient a map, read topographic features, find direction without a compass, and following directions for specific distances. I thought it was a pretty packed morning and I really enjoyed meeting some new friends that I hope to see out on the trails.
Much of the information we covered comes from Compass Dude and there is a lot more detailed compass knowledge there, including some activities to try.
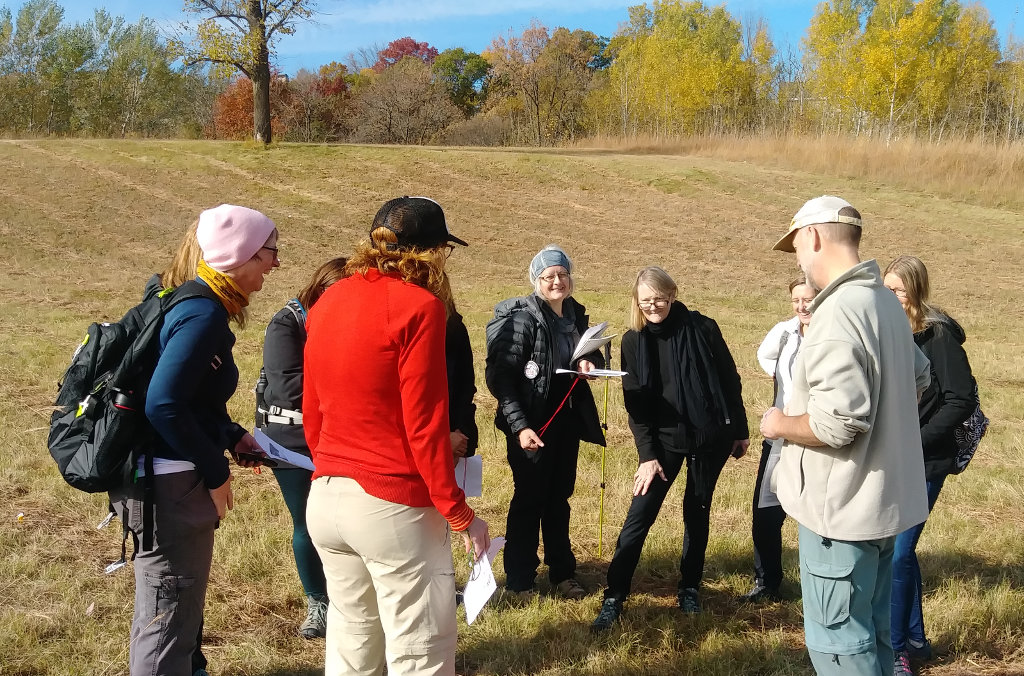

Once everyone was comfortable using their compasses, we played a compass game for about 15 minutes. They all said it was helpful in driving home the skills of following a bearing and estimating distance. You can print the Compass Game if interested. The winning pair of women each received a 'compass' merit badge.
It was nice that the sun came out to help with telling direction without a compass. We showed the Shadow Stick method, Moon method, and Wristwatch method because GPS devices can run out of electricity and compasses can break on rocks. Being able to estimate directions with no tools might be important some day.
If you're a woman looking to start hiking, or looking for some friends to hike with, check out the Women Who Hike website or Facebook page. They have chapters in every state and tend to be a very supportive, helpful group.
Hike On!
Leave Comment
Posted: 10/20/2019
Posted: 10/20/2019
10/29/2019
NorthSoles Review
New footwear include insoles to provide a little cushion and to pad your feet from seams and stitching in the shoe. Factory insoles are typically thin, low-quality pads that quickly deform and wear through, and are either glued in with a couple spots of adhesive or just slipped in after assembly. They provide very minimal benefits, and pretty much everyone recommends replacing them.
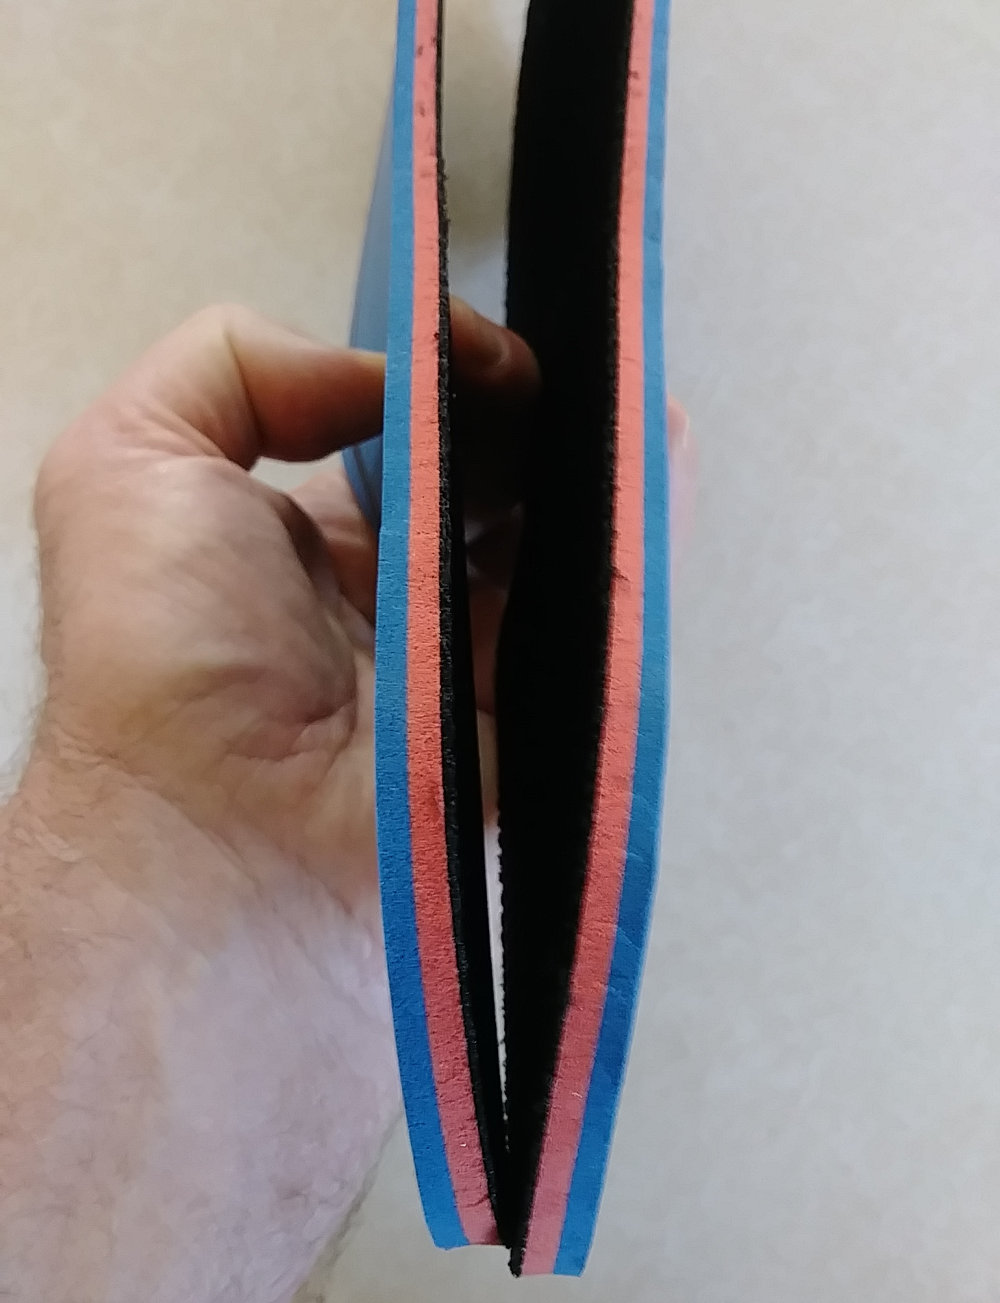

Pre-customized 6mm 3-color Northsole insoles
Always ready to experiment and learn about better, cheaper, lighter, or just plain different ways to do things, I got NorthSole to let me give their new insoles a try. My only compensation is receiving their Bundle Pack at no charge to test.
NorthSole is a Minnetonka, MN company so I'm really interested in seeing what a local company offers and see if it matches up to big, national brand products.
Features:
Aftermarket insoles range from $10 to over $100 and are marketed to perform a wide range tasks, from providing cushion to correcting foot problems.
These are NOT corrective inserts for any foot structural problems, arch support, plantar fasciitis, or supination/ovepronation challenges. These insoles are to provide comfort and a more enjoyable time on trail.
Northsoles are non-contoured so they provide benefits in minimalist no-drop shoes. This means they have no arch support or heel raise. This allows your foot to work they way it should rather than rely on external support. Some people need additional support, but I feel a medical or physical therapy professional should be consulted before modifying your foot support.
The insoles are made of three colorful layers. A black top layer gives your feet a bit of moisture wicking, grip, and softness. It is bound to a soft pink center layer that minimizes pressure points by forming to your foot. The bottom firm blue layer is mainly for shock reduction and durability. When you squeeze the northsoles, you can see the blue layer compresses much less than the pink.
Care:
Remove the Northsoles to air out and dry both the insole and shoe. Handwash occasionally to get rid of dirt and salt build-up.
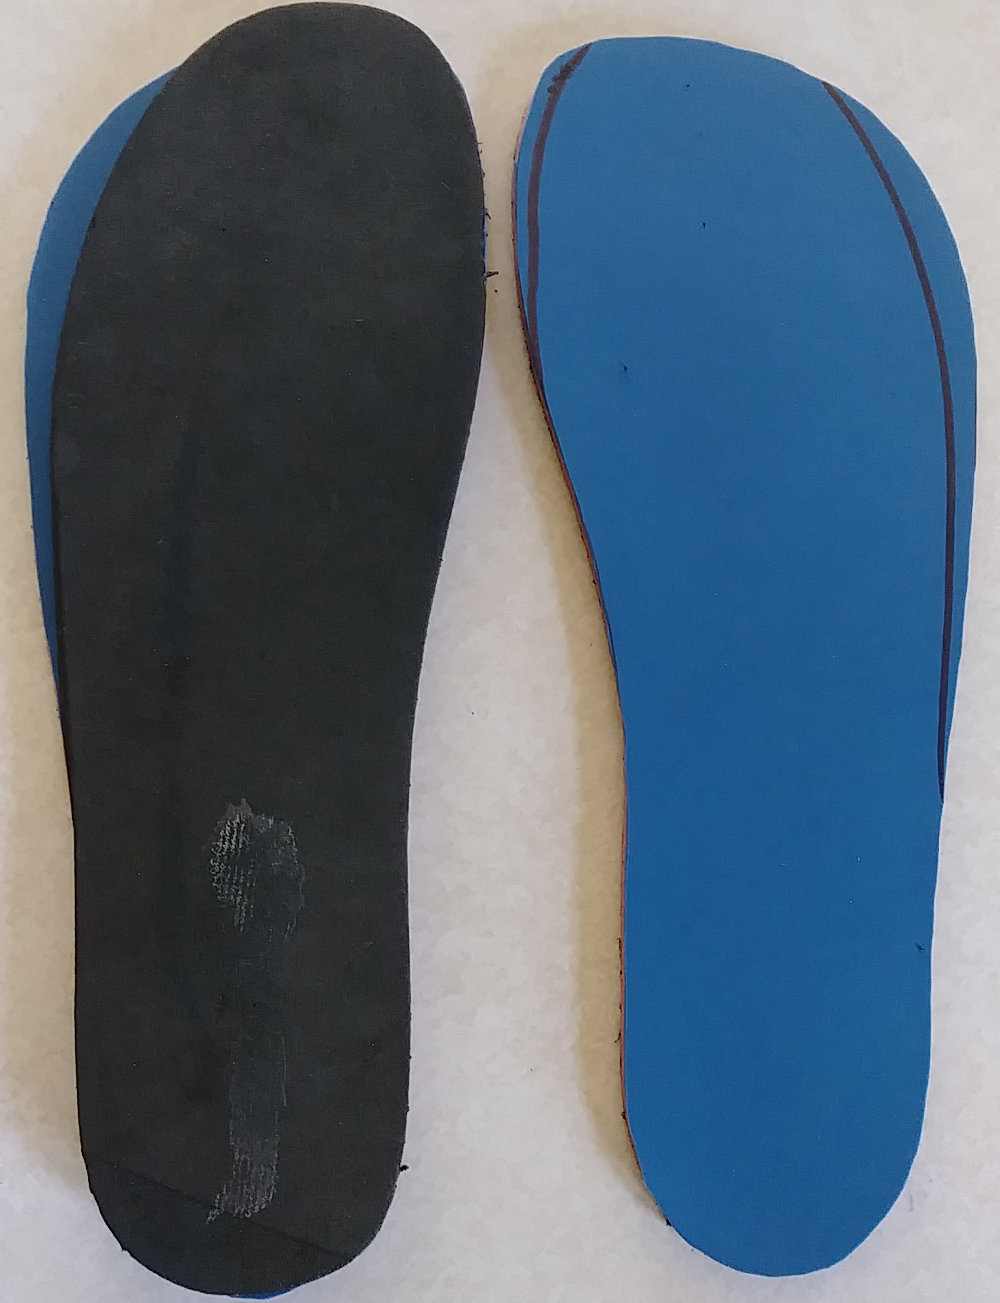

Old insole traced onto Northsole for cutting
My Experience:
I believe there is a trade off between cushioning and effort. Walking on the beach is an example.
Dry sand is very comfortable and absorbs any shock from stepping, but it takes much more effort to walk through than does wet sand. Wet sand is packed and firm. You can run on it easily but there is more jarring to your legs.
Insoles are similar. A thick cushion absorbs impact and requires more energy to walk. But, the extra comfort may be worth that loss in efficiency. Barefoot directly on the ground would be most efficient, but also too uncomfortable for most people to endure.
So, I like enough cushion to be comfortable, but thin enough to be efficient. Being able to feel the ground contour through my shoes is also a plus in my book - that's why I seldom wear thick-soled hiking boots.
I've now worn these Northsoles on my morning hikes and jogs for the past 3 weeks, more than 80 miles so far. They're a little dirty, but there's no visible wear so I expect they should last at least 500 miles.
For a bit more experimenting, I put my old factory insoles back in yesterday to see how they felt. After my 6 mile morning hike, some of my toes felt sore - not skin tender, but more like muscle sore. It was 31 degrees, so it could have been the cold. So, this morning with the temperature 28 degrees, I put the NorthSoles back in. After another 6 miles, my feet and toes felt fine. From that, I'll say the NorthSoles make my feet feel better.
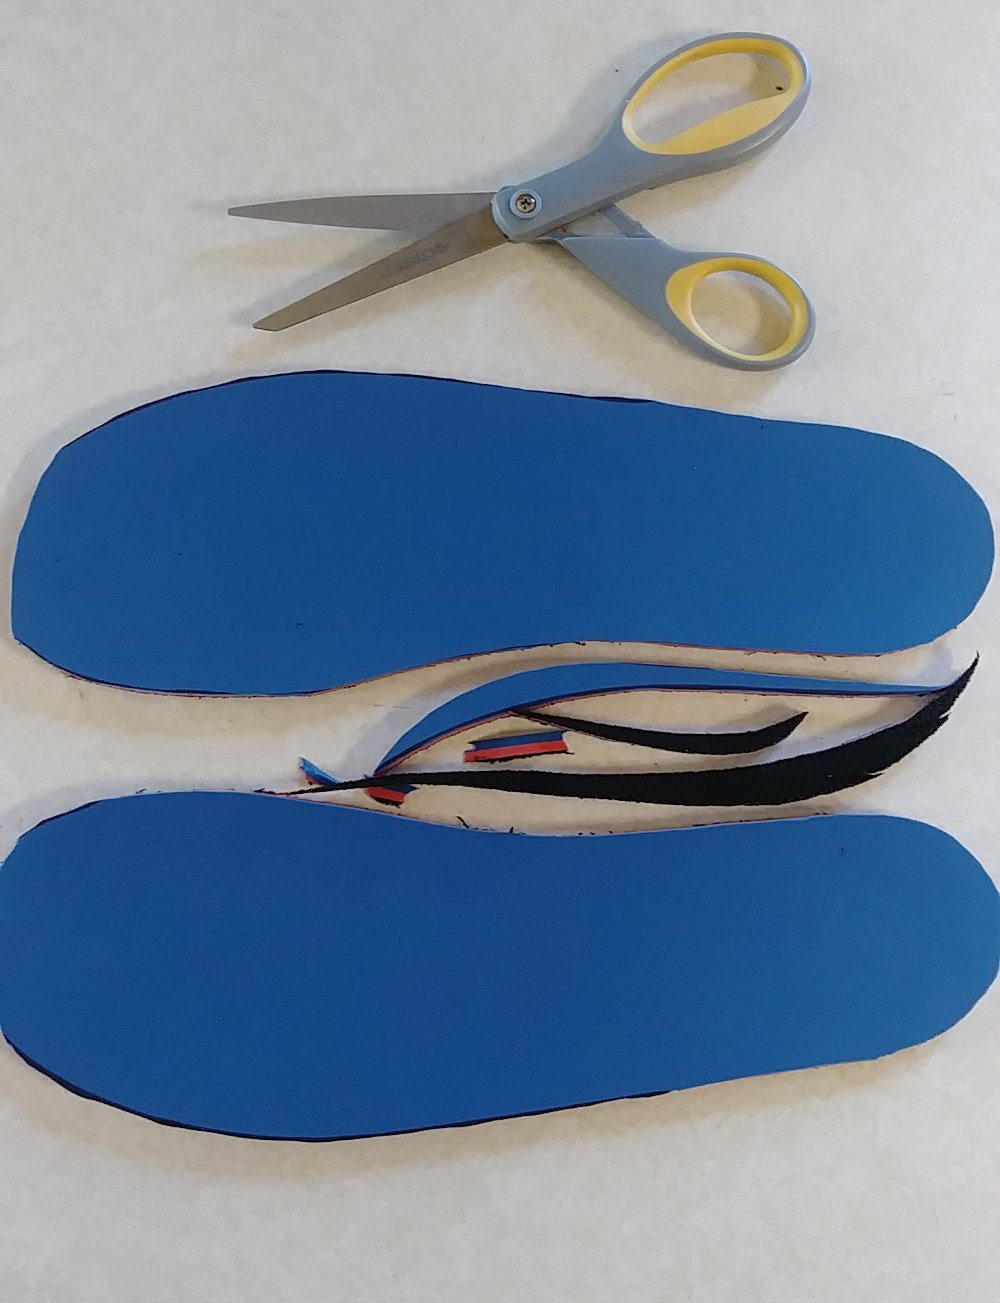

Customized Northsoles for correct fit
The NorthSoles were simple to start using. I slipped out the insoles from my shoes, traced their silhouette on the NorthSoles, cut them out, and slipped the NorthSoles into my shoes. Easy peasy. They fit fine and felt fine.
No complaints. But, they do cost $30 for a pair of 6mm, $25 for 3mm, or $50 for a 2-pack of the 6mm and 3mm. Prices include shipping in USA.
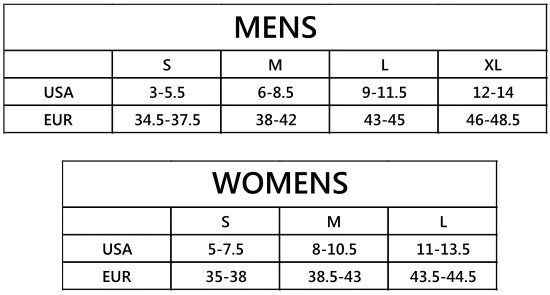
They come in S, M, L, and XL sizes that you trim to match your factory insole size. My size 13 factory insole just barely fit on their XL insole, so you might consider ordering a size up. But, when I let John at Northsole know, he said they'd be increasing the sizes a bit.
My factory insoles weighed 1.2 ounces for the pair (but they're junk). The 3mm NorthSoles weigh 2.0 ounces. The 6mm Northsoles weigh 3.3 ounces. I'm adding about 1 ounce per shoe by using the thicker pair. An ounce is less than 10% of most hiking shoes, but it's still extra weight. It's the old comfort vs. weight decision and, in this case, I think the comfort is definitely worth the weight.
Maybe they'd make a good stocking stuffer for someone you know - go to NorthSole to purchase direct from John in Minnesota.
Now, don't get me started about 'ankle support' from hiking boots over lightweight shoes - that's for another post.
Hike On!


Always ready to experiment and learn about better, cheaper, lighter, or just plain different ways to do things, I got NorthSole to let me give their new insoles a try. My only compensation is receiving their Bundle Pack at no charge to test.
NorthSole is a Minnetonka, MN company so I'm really interested in seeing what a local company offers and see if it matches up to big, national brand products.
Features:
Aftermarket insoles range from $10 to over $100 and are marketed to perform a wide range tasks, from providing cushion to correcting foot problems.
These are NOT corrective inserts for any foot structural problems, arch support, plantar fasciitis, or supination/ovepronation challenges. These insoles are to provide comfort and a more enjoyable time on trail.
Northsoles are non-contoured so they provide benefits in minimalist no-drop shoes. This means they have no arch support or heel raise. This allows your foot to work they way it should rather than rely on external support. Some people need additional support, but I feel a medical or physical therapy professional should be consulted before modifying your foot support.
The insoles are made of three colorful layers. A black top layer gives your feet a bit of moisture wicking, grip, and softness. It is bound to a soft pink center layer that minimizes pressure points by forming to your foot. The bottom firm blue layer is mainly for shock reduction and durability. When you squeeze the northsoles, you can see the blue layer compresses much less than the pink.
Care:
Remove the Northsoles to air out and dry both the insole and shoe. Handwash occasionally to get rid of dirt and salt build-up.


My Experience:
I believe there is a trade off between cushioning and effort. Walking on the beach is an example.
Dry sand is very comfortable and absorbs any shock from stepping, but it takes much more effort to walk through than does wet sand. Wet sand is packed and firm. You can run on it easily but there is more jarring to your legs.
Insoles are similar. A thick cushion absorbs impact and requires more energy to walk. But, the extra comfort may be worth that loss in efficiency. Barefoot directly on the ground would be most efficient, but also too uncomfortable for most people to endure.
So, I like enough cushion to be comfortable, but thin enough to be efficient. Being able to feel the ground contour through my shoes is also a plus in my book - that's why I seldom wear thick-soled hiking boots.
I've now worn these Northsoles on my morning hikes and jogs for the past 3 weeks, more than 80 miles so far. They're a little dirty, but there's no visible wear so I expect they should last at least 500 miles.
For a bit more experimenting, I put my old factory insoles back in yesterday to see how they felt. After my 6 mile morning hike, some of my toes felt sore - not skin tender, but more like muscle sore. It was 31 degrees, so it could have been the cold. So, this morning with the temperature 28 degrees, I put the NorthSoles back in. After another 6 miles, my feet and toes felt fine. From that, I'll say the NorthSoles make my feet feel better.


The NorthSoles were simple to start using. I slipped out the insoles from my shoes, traced their silhouette on the NorthSoles, cut them out, and slipped the NorthSoles into my shoes. Easy peasy. They fit fine and felt fine.
No complaints. But, they do cost $30 for a pair of 6mm, $25 for 3mm, or $50 for a 2-pack of the 6mm and 3mm. Prices include shipping in USA.
They come in S, M, L, and XL sizes that you trim to match your factory insole size. My size 13 factory insole just barely fit on their XL insole, so you might consider ordering a size up. But, when I let John at Northsole know, he said they'd be increasing the sizes a bit.

My factory insoles weighed 1.2 ounces for the pair (but they're junk). The 3mm NorthSoles weigh 2.0 ounces. The 6mm Northsoles weigh 3.3 ounces. I'm adding about 1 ounce per shoe by using the thicker pair. An ounce is less than 10% of most hiking shoes, but it's still extra weight. It's the old comfort vs. weight decision and, in this case, I think the comfort is definitely worth the weight.
Maybe they'd make a good stocking stuffer for someone you know - go to NorthSole to purchase direct from John in Minnesota.
Now, don't get me started about 'ankle support' from hiking boots over lightweight shoes - that's for another post.
Hike On!
Leave Comment
Posted: 10/29/2019
Posted: 10/29/2019
Older Posts Newer Posts
Find more Hiking Resources at www.HikingDude.com


Follow Me
Recent Comments