DIY Pack Post
 Yes, Mom, I made it myself!
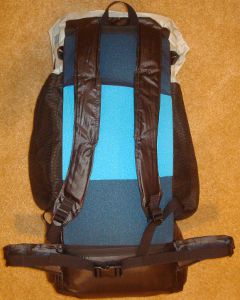
With very little seam ripping and only two permanent alterations (mistakes), I've got my pack I plan to use for 2,000 miles this summer. It is a G4 pattern that I purchased online and sewed at home.
I've been hiking with the pack filled to about 24 pounds this past week and it carries just great. I've added cut pieces of 3/8inch foam pad to the shoulder straps and waistbelt instead of using socks and gloves for padding. I figured the extra 1.1oz. is worth the comfort, and it IS much more comfortable. I also just designed and made slip-on waistbelt pad extenders last night. These have a belt-wide strip of foam to cover my front hipbone that often gets bruised.
Here's more info:
- Weighs 12.2oz. plus 2.4oz of removable foam pad
- has about 4000 cubic inches
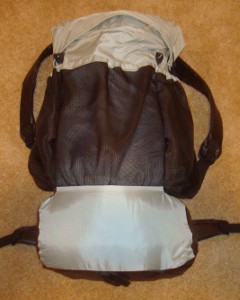
- top-loading main compartment and three large mesh outside pockets, plus 8 tie-on points
- has no frame - uses foam pad for support
- made of 2.2oz. grey rip-stop silnylon and black oxford
- adjustable shoulderstraps and waistbelt
 I made mine grey so it matches my quilt, hat, tent, and beard. ;-)
It seems to have plenty of room for my main gear and I've not used the side pockets yet. I expect to fill those with water during my Arizona hike in a couple weeks. My sleeping quilt gets stuffed in first to fill the bottom and raise the heavy stuff up a bit. I don't squish the quilt down too much, but use the weight of gear above it to compress it down.
I just have one section of a blue foam pad for the back. Most people use a foam pad for sleeping and fold it up to provide the pack structure here. I'm using an inflatable pad instead, but it's 72 inches and I need 78 or my feet are on the ground. So, I lay the pack under my feet and have plenty of insulation and comfort there.
There is quite a bit of stress on the pack where the shoulder straps and waistbelt connect to the pack since this is where all the weight hits. I've double bartacked those points and the material seems to be plenty strong to handle the stress. I guess we'll see as I make my way from Mexico to Utah next month.

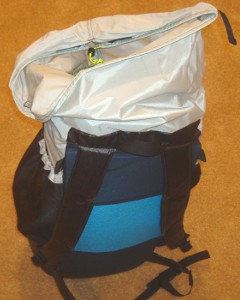
The top has a drawstring and two velcro strips to hold it shut. This top collar can also be extended up if you have a big load. But, be careful about overloading the pack - it's lightweight and should not have more than 25-30 pound load in it.
You can see how the pack top loads here. By packing sleeping gear first, you don't need to dig deep until it's time to set up camp. Keeping the daily needs, such as food, water, maps, hat, filter on top or in mesh pockets makes rest breaks easier to manage.
Oh, the two alterations I made?
- I attached the pack back and sides incorrectly which subtracted about 400 cubic inches of the bottom area.
- One seam on the collar faces out rather than in - I blame that one on the instructions, though.
Hike On
Posted: 8:57 02-23-2012 752
Prev: 2B2B
Next: 2nd QuiltSite Disclosure Statement
Next: 2nd Quilt
archives: 2025 2024 2023 2022 2021 2020 2019 2018 2017 2016 2015 2014 2013 2012 2011
All Comments:
Feb 26, 2013 - Cody
Thanks for sharing!
Mar 05, 2016 - Kerri
Cool! How long did it take you to make it?
Ask a Question
Find more Hiking Resources at www.HikingDude.com


Follow Me
Recent Comments