
Hiking Dude Blog
2025 - Aug Jul
2024 2023 2022 2021 2020 2019 2018 2017 2016 2015 2014 2013 2012 2011
08/03/2013
Trail Journal
 We started hiking from the Ice Age Trail eastern terminus at Potowatomi park at 6am. Stopped for breakfast in Sturgeon Bay and continued on to Maplewood. There, we spied Richard's Grill and sfopped in. We met 3 guys and had a great time over a couple beers. Mark gaves us his extra string cheese and we were off again.
4 hours later, we're in Algoma at the Steelhead saloon having cheese curds and onion rings. It's a tough job, but...
Hike On
IAT Start
 we're on the trail!
Left Potawotomi Park trailhead at about 6am and are looking for breakfast in Sturgeon Bay soon. Check out my current location on the map.
08/01/2013
Papa Bear Arrives
 Papa Bear arrived by train from Seattle on Tuesday night - just a 13 hour delay - Go Amtrak!!
Yesterday, we visited REI and a couple other places. Today, we walked 10 miles. Tomorrow, we head to Wisconsin!
Here's Papa Bear on the trail this morning. Check out my current location on the map.
Leave Comment
Posted: 08/01/2013
Posted: 08/01/2013
07/29/2013
New MYOG Pack
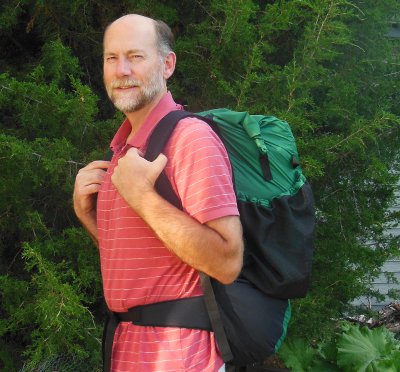
 My pack took quite a beating through the Arizona Desert and Minnesota north woods last year. It held up very well, but I wanted a backup "just in case". So, I ordered a new kit of materials from Quest Outfitters and made a nice green version this time.
For my needs, this pack is just great. The raw materials weighed 26 ounces and the final pack weighs 15.6 ounces. It easily holds all my gear and food for a week, and is comfortable. Quest Outfitters will sell you the materials as a kit and the plans with detailed instructions so you can make your own.
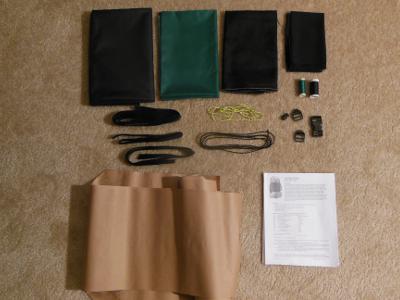
 The kit contains ripstop nylon for the pack body, stronger cordora for the parts that rub more, thick mesh for pockets, and fine mesh to make a sleeve to slip in a blue foam back support. There are also all the thread, buckles, velcro, gosgrain, elastic cord, and every little thing needed for your pack.
I had ordered the instructions and template last year, so I just reused them. I copied teh template pieces to brown paper as soon as I got them and use those rather than cutting up the original.
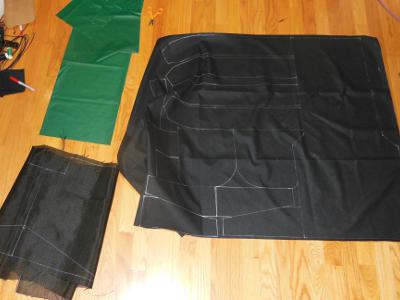
 The first step was to read through ALL the instructions to get an idea of how it all goes together. There are a couple mistakes in the instructions, I believe, and I've let Quest know abou them. They are minor.
Trace all the pieces onto the fabric. I laid them out as tight as possible to save fabric which I might use for some other projects. Quest provides plenty of fabric.
It's important to check that you are drawing on the 'back' side of the fabric so your marks don't show on the finished piece. And, ensuring that you are laying right and left oriented pieces for shoulder straps, belts, and the like is critical.
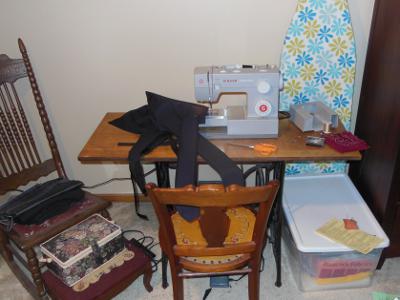
 Having a comfortable area in which to work really helps. Here's where all the magic happens! :-)
 Actually, a bright halogen floor lamp was a big help to keep the area brightly lit. It helped me find dropped pins in the carpet, too.
This is our new sewing machine since I broke our old, old, old one last year making my first pack. It wasn't my fault - a plastic gear inside just gave way, and replacing it didn't work out.
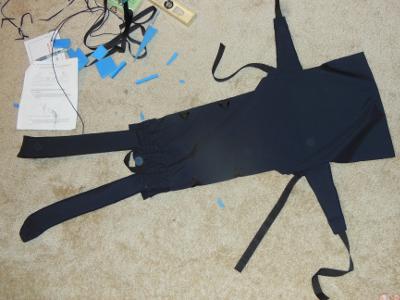
 The pack is built in sections. Here's the back section with shoulder straps and waistbelt. It is the most complicated part, and the most difficult to sew. After this, it gets pretty easy.
The front, right side, and left side are made. Then, all the parts are sewn together.
I made a few modifications from the original pack:
- I left off the back support sleeve since I plan to just slip a piece of cardboard inside the pack.
- I did not add the optional top cover since I'll have a rain poncho that covers me and the pack.
- I angled the side pockets so the fronts are a bit lower, letting my reach back with my hand and get in the pocket.
- I added little water bottle straps to the front shoulder straps so I have two bottles in front, balancing the weight and easy to access.
Well, for about $40 and two days of sewing, I'm happy with my MYOG pack. Hopefully, I won't need to use it until next year, but it's ready to go!
MYOG = Make Your Own Gear
Hike On
Leave Comment
Posted: 07/29/2013
Posted: 07/29/2013
07/26/2013
Rest Stops
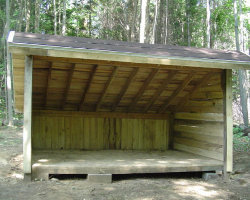
 Most of the Arizona Trail takes hikers through wilderness where you can camp anyplace you wanted within 15 feet of the trail. The Superior Hiking Trail has designated campsites every few miles. Unfortunately, much of the Ice Age Trail route is through populated areas and private land. It's not proper to just drop your tent in someone's backyard or even on their back 40 acres.
 Consequently, a fairly big challenge of thru-hiking the Ice Age Trail is finding places to camp for the night. The Ice Age Trail Association is working hard to create 'Distributed Camping Areas' (DCAs) along the trail specifically for long-distance hikers. These DCAs are just open spaces where hikers can legally set up a tent - usually no water or facilities. There are only a handful of DCAs at this time, so what does a hiker do?
The IATA has some great volunteers and they've compiled a list of Trail Friends - folks that may be willing to have hikers camp on their property. I figure these wonderful people probably get asked for help often, so I've held off on contacting them. I'll call on them when it gets critical.
Instead, I've emailed Boy Scout troops and packs across Wisconsin that are in towns along the trail route. The last couple days have been great because I've received replies back from a few Scouters that have space for me to spend a night! I'm now down to less than 6 nights where I'm not sure what we'll do for camping.
I've also asked a couple friends about a stopover. If you know of anyone along the Ice Age Trail route in Wisconsin that wouldn't mind having a couple old guys crash in their yard, or hunting land, or wherever, please tell them to contact me. It would be greatly appreciated.
Hike On
Leave Comment
Posted: 07/26/2013
Posted: 07/26/2013
07/25/2013
Respect Wildlife

 I met this young fella on the trail this morning. You can tell he's noticed me and is checking things out.
When you encounter wildlife, you should have respect for them and leave them alone. It's best to give them plenty of room and observe from a distance. If they change their behavior because of your presence, then you are too close. This deer was right on the trail and bounded off about 60 yards, then stopped and watched. So, my approach did change his behavior, but I had little choice since he was on the trail. I didn't hang around, just long enough to take the picture and then move on.
Other ways to respect wildlife include camping far from water sources so they have easy access, avoiding areas where young are being raised in the spring, avoiding food sources in the fall when animals are preparing for winter, and keeping a clean camp by disposing of waste properly.
I'll probably see quite a few of this guy's buddies throughout Wisconsin next month.
Hike On
Leave Comment
Posted: 07/25/2013
Posted: 07/25/2013
07/19/2013
Hike Schedule
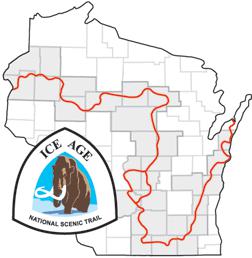
 I've made a rough schedule for my Ice Age Trail hike. Even before I start hiking, I know I won't keep to the schedule, but it's good to have a general plan with approximate miles per day and areas where I'll be spending the night.
 See the schedule. As long as PapaBear and I stay healthy, I expect we'll complete the trail 4 or 5 days sooner than scheduled - but we'll see.
Camping along the trail will be a challenge since much of the trail is through private and populated land. I'm looking for people that would let a couple vagabonds camp on their property. So, if you or someone you know is along the trail, please holler!
It's only about 260 miles straight across Wisconsin. From the map, you can see the Ice Age Trail takes a serpentine path that more than quadruples its mileage. Of all the National Scenic Trails, it takes more miles to cover less distance than any other. Others, such as Pacific Crest and Appalachian, are pretty much a straight shot from end to end.
Hike On
Leave Comment
Posted: 07/19/2013
Posted: 07/19/2013
07/17/2013
2 Weeks to IAT
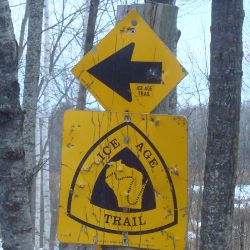
 I have about two weeks until my 1,100 mile Ice Age Trail thru-hike across Wisconsin begins! Am I excited? You Betcha!
My friend that I met on the Arizona Trail last year will be arriving from Seattle by train on July 30. We'll then review our gear, get food in order, and drive to Wisconsin. I hope to start hiking by August 3 or 4, heading West from Sturgeon Bay. Well, actually heading South for the first week, then a U-shape to the West, then another week heading North, then 2 weeks heading West. It's not really a very straight trail since it follows the last glacial terrain.
For the past couple months, I've been ramping up my hiking. Nearly every morning, I've been getting on the trail by my house. Starting with 4-mile hikes, each week I've added a mile. This week, I'm doing 10 miles each morning and that should be good enough. I feel in good hiking shape, even though I've still got 5 pounds that I don't need. But, that will go away soon enough on the IAT.
I know these last couple weeks will be hectic with last-minute preparation, but once I'm on the trail all I have to do is walk. That will be a welcome change to the busy lead up time.
Hike On
Leave Comment
Posted: 07/17/2013
Posted: 07/17/2013
06/25/2013
My Little Friend
 One of the Leave No Trace principles to minimize impact is Travel and Camp on Durable Surfaces. One of the ways to interpret this is to stay on trails when hiking.
As you can see, that is a good idea not only to minimize impact but also to keep safe. I found his little friend of mine along the trail this morning while doing my daily hike. With the three cute little leafs, all shiny and green, he looks harmless enough. No prickly needles or scratchy thorns, but he can cause plenty of trouble if you touch him.
It's the urushiol in the poison ivy that causes skin irritation, more on some people than on others. By staying on the trail, keeping your eyes open, and paying attention to your surroundings, avoiding poison ivy isn't too difficult. When you go off trail, chances of running into it go way up. Actually, just off the trail is one of the best places for poison ivy to grow since it likes wood edges just like the side of a trail, road, or meadow.
It takes only a few minutes after contact with poison ivy for the urushiol to absorb into the skin, but it may take many hours for the itching, rash, and blisters to develop. Immediately washing off the contact area with soap and water is your best bet. Clothes that have contacted poison ivy should also be washed.
Poison Oak and Poison Sumac are also urushiol-producers and cause similar problems as poison ivy.
Burning poison ivy is especially dangerous because inhaling the smoke can effect your lungs.
Hike On Safely
02/26/2013
Food Hanging
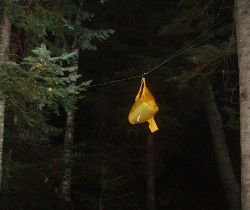 It's not so bad when just car camping, but if your food is lost while deep in the backcountry, you can be in a world of hurt. With a couple days hiking between you and the nearest trailhead, running out of food probably won't kill you, but it's a big step in that direction.
What? How can someone LOSE their food? - you might ask.
- Water - Rain and crackers don't mix well. Dropping a food bag into a lake or stream can ruin unprotected items. Fortunately, this is easy and light to prevent. Repackage everything into zip-loc bags. This reduces packaging weight and keeps everything safe from moisture. Putting multiple small bags into a larger 2.5 gallon zip-loc increases the protection.
- Dirt - When you drop your tortilla with peanut butter on it, you already know which side will hit the ground! You can blow dirt off many items, but not all. Being careful when opening packages, passing bowls, and stirring pots is the best guard against dropping and spilling food. No one's going to want that ramen after you tip the cookpot over, are they?
There's not much concern about dirt getting into food in transit, but spilling food is a common problem. - Stupidity - The food is forgotten in the car, along the trail, or at the previous campsite. By just not paying attention and double-checking yourself, you can forget your food. Yes, I have seen it happen!
- Animals - Critters are opportunists. Anything that smells interesting gets investigated. And, they can find the smallest bits hidden far out of sight. The most common stealers are mice, chipmunks, raccoons, other rodents and birds. Bears generally stay away from people, unless they've been habituated - learned to associate people with easy food. In those popular locations with habituated bears, special regulations are in place for visitors which often includes use of bear-proof cannisters.
Whether it's bears or mini-bears (rodents) that are the concern, protecting food is handled in a similar manner. Storing it in a smell-resistant bag and hanging it out of reach keeps it safe.
On the Arizona Trail, there were often no trees to hang my food. But, bears weren't a concern either. There are wire mesh food bags available that mini-bears can't chew through, like OutSak.
For those times when you need to hang, I've found the PCT Method to be the best if there are large trees around. Along the Superior Hiking Trail, I could often only find smaller trees and came up with my own way of hanging so the food is high enough and away from the tree.
- Throw rope with carabiner on end over high branch.
- Clip food bag to carabiner. Lift carabiner and food bag as high up the rope as possible and loop rope through carabiner so it doesn't slide.Walk the other end of the rope away from the tree to move the bag out from the tree.
- Tie rope to another tree as high up as I can reach.
This puts the food bag well over 10 feet up since I can reach up 8 feet. Well, at least I didn't lose any food!
But, here's something new and interesting...
A couple guys at University of Wisconsin in Stout, WI have designed a new product for hanging food bags. It's supposed to be simple to use and secure from pesky food stealers.
They made this video demonstrating how to use it. Unforatunately, there aren't any close-ups of the device or explanation on how it works.
So, take a look and let us all know what you think - innovation or not?
Hike On
Older Posts Newer Posts
Find more Hiking Resources at www.HikingDude.com


Follow Me
Recent Comments