
Hiking Dude Blog
2025 - Aug Jul
2024 2023 2022 2021 2020 2019 2018 2017 2016 2015 2014 2013 2012 2011
08/24/2016
Day 5 - Lake Country
 I walked 31769 steps on the trail today.
I traveled about 13 miles today.
Our hike was relatively flat compared to previous days. The trail traversed the high boggy area on the back side of the sawtooth mountains that ride from Lake Superior's shore. We crossed over low hills between lakes Sonju and Egge, and many boggy areas along the way. The lakes are beautiful, with swans and loons cruising about. The 4 campsites on these two lakes are nice too. We met Sean, Casey, and Steven at a site when we took a morning break. They wound up at the Leskinen Creek site with us tonight. When we arrived here, Pat and Katie were already here. So, it was a nice evening visiting with new friends and enjoying a small campfire. I would really recommend this section of trail for someone that wants a weekend taste of the SHT - mellow trail, lakes, and nice sites. Concerns of bad weather proved unnecessary as it was quite warm, then cloudy, but now a nice breeze and less humidity tonight. I hope it stays. Food has been good and adequate, water filters working great, and just minor physical pains. We've been very fortunate to meet a wide range of people, all out enjoying Minnesota in their way.
Leave Comment
Posted: 08/24/2016
Posted: 08/24/2016
08/23/2016
Day 4 - Free Beer
 I walked 39597 steps on the trail today.
I traveled about 15.8 miles today.
It seems each day is getting harder than the last. The trail was steeper and rockier, the weather was hotter and more humid, and the muscles and joints complained more. But, it was still a great day of hiking! We hiked from Dyers Creek, crossed the Caribou River, climbed up, over, and across the very hot, south facing Horseshoe Ridge, plummeted down to the Manitou River, and finally climbed up to Aspen Knob for the night. The trail was empty until we reached Crosby-Manitou park. We had just been talking about having a beer when we get home, and wondering about the weather forecast, when we saw two young guys camping by the trail. We stopped to chat and asked if they had heard any weather news. They then offered us beer. Not to be rude, we accepted and had a nice talk with Zach and Ryan, two working actors on a quick camping trip. An hour or so later, we got to our campsite and set up. Four college friends showed up so we got to visit with them this evening. They have been on the trail 11 days and want me to call them the poopy boys - so there you go.
Leave Comment
Posted: 08/23/2016
Posted: 08/23/2016
08/22/2016
Day 3 - Sun, Rivers, and Bugs
 I walked 38302 steps on the trail today.
I traveled about 15.7 miles today.
Another beautiful day for hiking but this one had late summer humidity and the mosquitos finally tracked is down. I got a handful of bites this afternoon. We crossed the Temperance and Cross rivers, handfuls of creeks and uncountable mud holes. We only ran into a few hikers and none seemed to be too interested in chatting. We have the campsite at Dyers Creek to ourselves tonight. The creek is full of small fish and crayfish. We had lots of time to relax in camp and had a fire for the third night on a row. Carlton Peak had great views of Lake Superior and the rivers were nice scenery.
Leave Comment
Posted: 08/22/2016
Posted: 08/22/2016
08/21/2016
Day 2 - Making Tracks
 I walked 38447 steps on the trail today.
I traveled about 16 miles today.
Yeah, that's right - bear tracks! Didn't see any other Wildlife today, but it was a beautiful day for hiking with sun and breeze all day. Once the leftover water on the trail and foliage dried up, the trail was fine. Ran into lots of day hikers around Lutsen, but only one other backpacker on the trail. Tyler started yesterday north of us and plans to hike to his folks' home somewhere in Minnesota. We wound up staying at the same site with him tonight, along with a bunch of Neanderthals. Actually, that's what they asked me to call them in my post. They're a handful of guys, all related, but big age range, that go out on a short camping trip each year. We shared a nice fire, but I'm in bed earlier tonight after our longer than planned distance. Our mashed potatoes and chicken dinner was great - lots better than last nights noodles. Oh, early this morning we walked by the view of the Poplar River valley which I think is one of the nicest spots on the trail. Early tomorrow, we'll go up Carlton Peak - another favorite spot.
08/20/2016
Day 1 - Rain, Mud, and Hiking
 I walked 30967 steps on the trail today.
I traveled about 10.7 miles today.
It really wasn't that bad today. We hit the trail at 1:30 and enjoyed about 5.5 hours on the trail while it sprinkled, showered, and eventually rained. Somewhere in there we did put on our rain gear and left it on most of the afternoon and evening. There's still water dropping from the trees but I think it's just leftover drops being dislodged by the wind. We reached our first camp spot early and decided to push on. The east lake Agnes site was full of tents so I walked the .3 miles to the west site while Martin watched our gear. There was more room so we moved there. We set up tents, got water, and made our meal. We visited with Scott and Jeff, but a couple ladies didn't come out of their tent at all - the weather wasn't that good. While chatting, i mentioned my site (of course) and Jeff already knew of it and used it. Cool! We built a soggy fire, sat around a bit more, and that was that. Now, it's time for lights out. Saw a lot of day hikers, 2 woodpeckers, 3 toads, 2 red squirrels, but nothing bigger. Xps
Leave Comment
Posted: 08/20/2016
Posted: 08/20/2016
Start SHT Hike
08/19/2016
Short SHT Hike
 Pack is packed and ready at 23 pounds, including food.
Superior Hiking Trail trip starts tomorrow! Driving to Cascade River and walking south as far as we can in a week.
Weather WAS looking good, but now I guess I get to try my rain poncho the first day.
My location will get tracked - Check out my current location on the map.
08/13/2016
Bear Paw Wilderness Designs Review
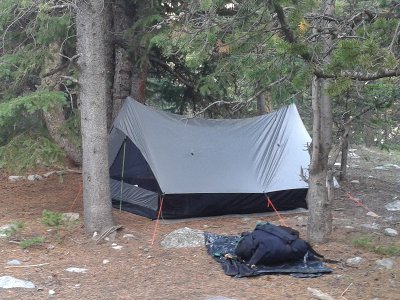

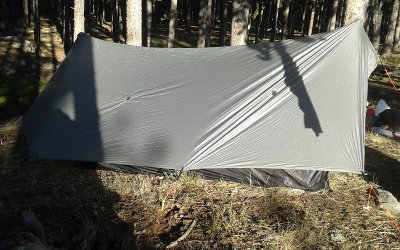
There's a small company in Colorado making some nice lightweight shelters. If you are ready to dump your 6-pound tent for something much lighter and just as protective, you really should check out Bear Paw Wilderness Designs. John owns the company, makes the gear, and even does his own youtube videos. He's ready and willing to customize any of his products for your specific needs. Let me tell you about my experience with BPWD shelters...
I made my own lightweight shelter in 2012, and I'm proud of what I sewed together. It kept me comfortable over many nights and miles, but it wasn't really great when the weather got bad. John gave me one of his tarps and a 1-person bug nest to try out, but I put it off because it weighed a couple ounces more than my own shelter.
This January, my son and I hiked through the Florida Keys and then through the Everglades up to Lake Okeechobee where my son left to return to college and I continued on to Ocala. I used my home-made shelter while my son used the BPWD shelter. As soon as he left, I had him take my shelter home and I switched to the BPWD - wow! I was completely protected from rain and bugs, had plenty of room, and wasted no time in set-up and take-down each day.
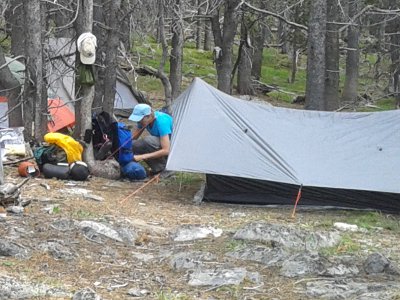

Last month, I ordered a 2-person bug nest from John that would fit under the tarp I already had, replacing the 1-person nest. My wife and I were heading to the Bighorn Mountains of Wyoming, leading a group of youth from our church. We spent 6 nights in the nest under the tarp while mosquitoes buzz bombed us outside, but had no chance in our spacious nest. We had 3 nights of torrential rain and intense lightning, but we stayed completely dry under the tarp that would not even budge when high winds hit it broadside. I'd like to think it was my excellent skill in pounding in stakes, but the shelter held up perfectly.
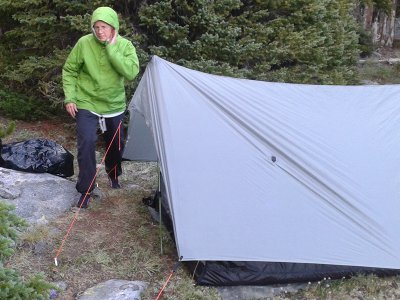
There was a small amount of very fine mist forced through the silnylon during the very, very worst of the storms but much less than other silnylon shelters I've used. The tarp extended over the sides of the bug nest enough that no rain blew underneath. The sidewalls of the bug nest kept all blown rain out while the mesh allowed complete air flow.
We set up on rocky ground, pine needles, and bare dirt. It was easy to get sturdy tension on the tie lines even though we had to place them at different distances and angles due to rocks and roots underground. The individually adjustable locks on each line worked nicely.
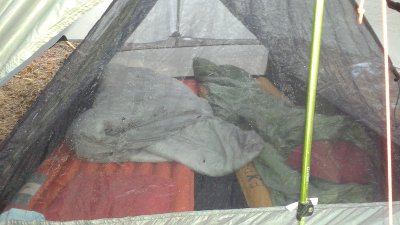

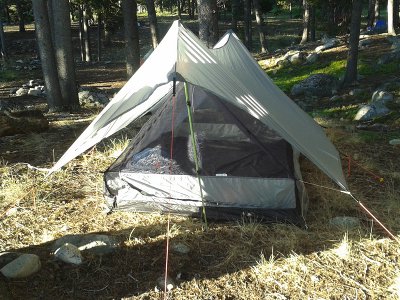
We left the bug nest connected to the tarp at the two ridge points and the four corners. This allowed us to throw down our plastic ground sheet, drop the nest and tarp on top, peg out the corners of the nest and quickly lift the tarp into position. My wife held the front support pole in place while I pounded the lightweight aluminum support stakes in. We repeated that process on the rear support post. It took us about 3 minutes to completely set up the shelter, and the nest was never exposed to rain doing it this way.
I was not able to achieve a perfectly tight ridgeline, but there was very little flapping or ruffling during the windiest storm. A couple inches of space between the internal mesh nest and outer tarp at the top ensured no condensation moisture got inside the nest, even when I bumped up against the mesh.
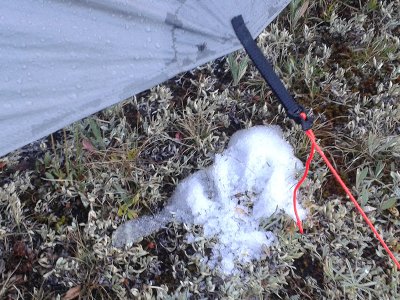
We were in arid conditions, so there was little condensation inside the tarp. I plan to use this shelter again for a week on the Superior Hiking Trail in Minnesota, starting this Friday. I will check for condensation in a more humid area. I'm taking the 2-person nest because it will give me tons of space, at the cost of only a couple ounces.
Bear Paw Wilderness Design Shelter Benefits:
- Roomy - Long enough inside the nest to have a little extra gear above my head, and wide enough for our two sleeping pads plus about 6 inches between. I can sit up easily without pressing against the mesh ceiling.
- Comfortable - protection from rain with lots of ventilation.
- Flexible - The tarp can be pitched high or low, depending on weather and air flow desired. The nest and tarp, tarp only, or nest only, can be pitched depending on what weather and insect concerns you expect.
- Lightweight - the tarp, nest, and lines weigh 36 ounces. Adding in 12 stakes and a ground sheet brings it up to 46 ounces. It packs into a very small bag, taking up little pack space.
- Unobtrusive - the grey color blends in nicely to nature. It just looks like another rock in the mountains.
- USA - designed, made, and sold locally.
- Customizable - John can create pretty much what you want with different styles, sizes, and materials available.
For pricing, and detailed specs, take a look at Bear Paw Wilderness Designs website. I have a Canopy 2 Tent, a Walled Net Tent 2, and a Minimalist 1 net option.
Leave Comment
Posted: 08/13/2016
Posted: 08/13/2016
08/04/2016
Hot Ash Review
So, what's your favorite kind of cooking fuel out in the wilds - wood, alcohol, canister, white gas, fuel tabs, or something else? They all have pros and cons, including efficiency, cleanliness, smoke, carry weight, speed, cost, and impact. I've used them all and am always interested in new options that come along.

The Hot Ash stove came out last year and it's a new entry in the general wood-burning "rocket stove" category. While an open fire tends to be inefficient, slow, and smokey, a rocket stove harnesses the fuel's potential and converts more of it into usable heat. Small twigs are the fuel and a well-designed combustion area creates big heat. Feel free to google "rocket stove design" to find out how they are being used in kitchens, as home heaters, and for outdoor cooking.
The folks at Hot Ash asked me to give their stove a try and let you all know what I thought of it. They provided me with a stove to test. So, the other day, I took a bag on my morning hike and picked up a bunch of twigs and sticks from the trail to burn. Then, I took the stove and sticks to a secluded area of the local park and got busy. Here's what I found out...
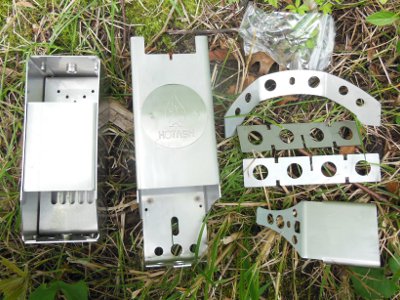

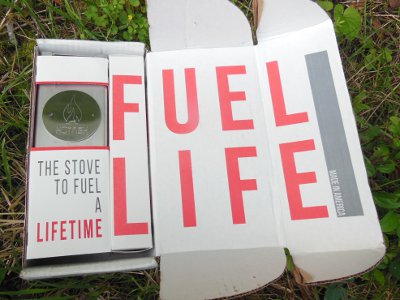
The Hot Ash is a sturdy, thick metal, hot burning, wood fueled camping stove. The design allows it to be disassembled and packed into a 3x3x9 inch box shape (that's about the size of a 16oz. jar of Planter's dry roasted peanuts). That's a pretty small and portable size. It comes in cool packaging with simple instructions and a cloth bag to carry the stove in to keep your other gear clean. The stove is completely stainless steel - and it's thick steel, too. It will withstand pretty much any abuse you want to throw at it, or throw it at. I even pounded it on some rocks a few times and the metal just scratched a bit, no dents.
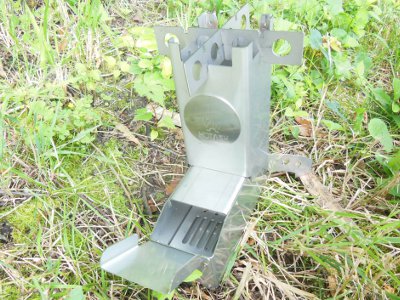

I set up the stove by placing the pieces together and using two thumbscrews to hold on stabilizing feet and fuel chamber. It's very stable and low enough to the ground that there's not much danger of burns from spilled hot liquids. I think one design improvement could be to replace the thumbscrews with a sliding lock, something like a keyhole, so there are no small, loose screws. Other than that, assembly is easy and fast.
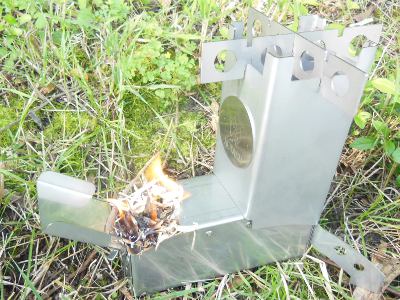

I shaved a few sticks for tinder and shoved the small bits of wood into the horizontal fuel chamber. The fuel chamber is above an elevated air chamber that pulls air in for efficient combustion, the key to a rocket stove design. My dry tinder lit easily and the twigs were burning in less than a minute.
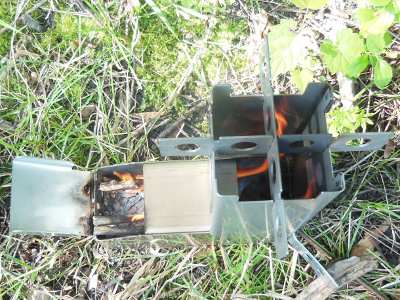

One of the key benefits of a rocket stove is that it burns hot and with very little smoke. It took about 6 minutes from lighting to smokeless, hot fire. Once the air draw was going strong and the heat was roaring up the chimney, the stove burned hot and clean. With the fuel chamber full of small sticks, I let the stove burn to see how long it would last. With no additional fuel, it burned for about 10 minutes and took another 15 minutes to burn to ash and become cool enough to touch the support legs to move the stove.
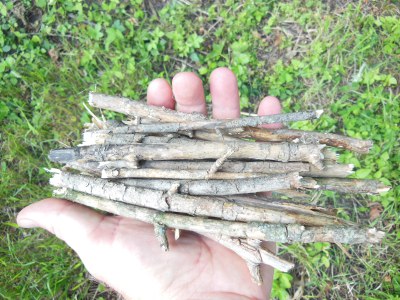

Ten minutes is plenty of time to boil a pint of water. Using just a small handful of twigs, a quick meal can be prepared. For longer heat, it's easy to feed more fuel into the chamber as it burns down.
I had fun playing with the Hot Ash, and I expect it will be a useful stove for many campers. Like any piece of equipment, it must be compared to alternative items that perform the same task, and individuals need to determine how they plan to use it.
Pros
Cons
Who Would Use It?
Hike On


The Hot Ash stove came out last year and it's a new entry in the general wood-burning "rocket stove" category. While an open fire tends to be inefficient, slow, and smokey, a rocket stove harnesses the fuel's potential and converts more of it into usable heat. Small twigs are the fuel and a well-designed combustion area creates big heat. Feel free to google "rocket stove design" to find out how they are being used in kitchens, as home heaters, and for outdoor cooking.
The folks at Hot Ash asked me to give their stove a try and let you all know what I thought of it. They provided me with a stove to test. So, the other day, I took a bag on my morning hike and picked up a bunch of twigs and sticks from the trail to burn. Then, I took the stove and sticks to a secluded area of the local park and got busy. Here's what I found out...


The Hot Ash is a sturdy, thick metal, hot burning, wood fueled camping stove. The design allows it to be disassembled and packed into a 3x3x9 inch box shape (that's about the size of a 16oz. jar of Planter's dry roasted peanuts). That's a pretty small and portable size. It comes in cool packaging with simple instructions and a cloth bag to carry the stove in to keep your other gear clean. The stove is completely stainless steel - and it's thick steel, too. It will withstand pretty much any abuse you want to throw at it, or throw it at. I even pounded it on some rocks a few times and the metal just scratched a bit, no dents.


I set up the stove by placing the pieces together and using two thumbscrews to hold on stabilizing feet and fuel chamber. It's very stable and low enough to the ground that there's not much danger of burns from spilled hot liquids. I think one design improvement could be to replace the thumbscrews with a sliding lock, something like a keyhole, so there are no small, loose screws. Other than that, assembly is easy and fast.


I shaved a few sticks for tinder and shoved the small bits of wood into the horizontal fuel chamber. The fuel chamber is above an elevated air chamber that pulls air in for efficient combustion, the key to a rocket stove design. My dry tinder lit easily and the twigs were burning in less than a minute.


One of the key benefits of a rocket stove is that it burns hot and with very little smoke. It took about 6 minutes from lighting to smokeless, hot fire. Once the air draw was going strong and the heat was roaring up the chimney, the stove burned hot and clean. With the fuel chamber full of small sticks, I let the stove burn to see how long it would last. With no additional fuel, it burned for about 10 minutes and took another 15 minutes to burn to ash and become cool enough to touch the support legs to move the stove.


Ten minutes is plenty of time to boil a pint of water. Using just a small handful of twigs, a quick meal can be prepared. For longer heat, it's easy to feed more fuel into the chamber as it burns down.
I had fun playing with the Hot Ash, and I expect it will be a useful stove for many campers. Like any piece of equipment, it must be compared to alternative items that perform the same task, and individuals need to determine how they plan to use it.
Pros
- Fuel is free - it just burns wood, actually just twigs.
- Clean burning - once burning, it produces little smoke.
- Sturdy - it won't dent, deform, or break when dropped.
- Made in USA
- Compact - doesn't take much space when packed up.
- Fun - feeding small sticks into the fuel chamber is not a bad way to relax for a few minutes. The feel of real fire is something special, rather than the blue flame of gas.
Cons
- It weighs 3.1 pounds. You can save 1/2 pound by leaving the support legs and cross-pieces at home. This is heavy to take backpacking since an alcohol stove, canister stove, or even white gas stove with over a week's fuel is lighter. (I feel the stove is actually much stronger than needed - a lighter gauge steel on the chimney and chamber would work well and cut the weight.)
- It is not fast. Gathering fuel, building the fire, and then cooking, take much longer than other stoves, but faster than an open fire.
- Success is reliant on the environment. If there is no fuel, or it is wet, then you have no heat. If there are open fire bans in place, you can't use it.
- Cost - the purchase price is more expensive than many other cooking options.
Who Would Use It?
- Car Campers - setting up camp for a couple days. No fuel to carry, small space, and real flames make it a good solution when weight is no concern.
- Preppers - in case of emergency, it will be ready when a catastrophe hits. Just use scrap wood or debris for fuel.
- Dinosaur Lovers - someone trying to conserve fossil fuels and consume renewable carbon fuel will prefer this over a gas stove.
Hike On
Leave Comment
Posted: 08/04/2016
Posted: 08/04/2016
07/31/2016
Day 6 - Out of the Mountains
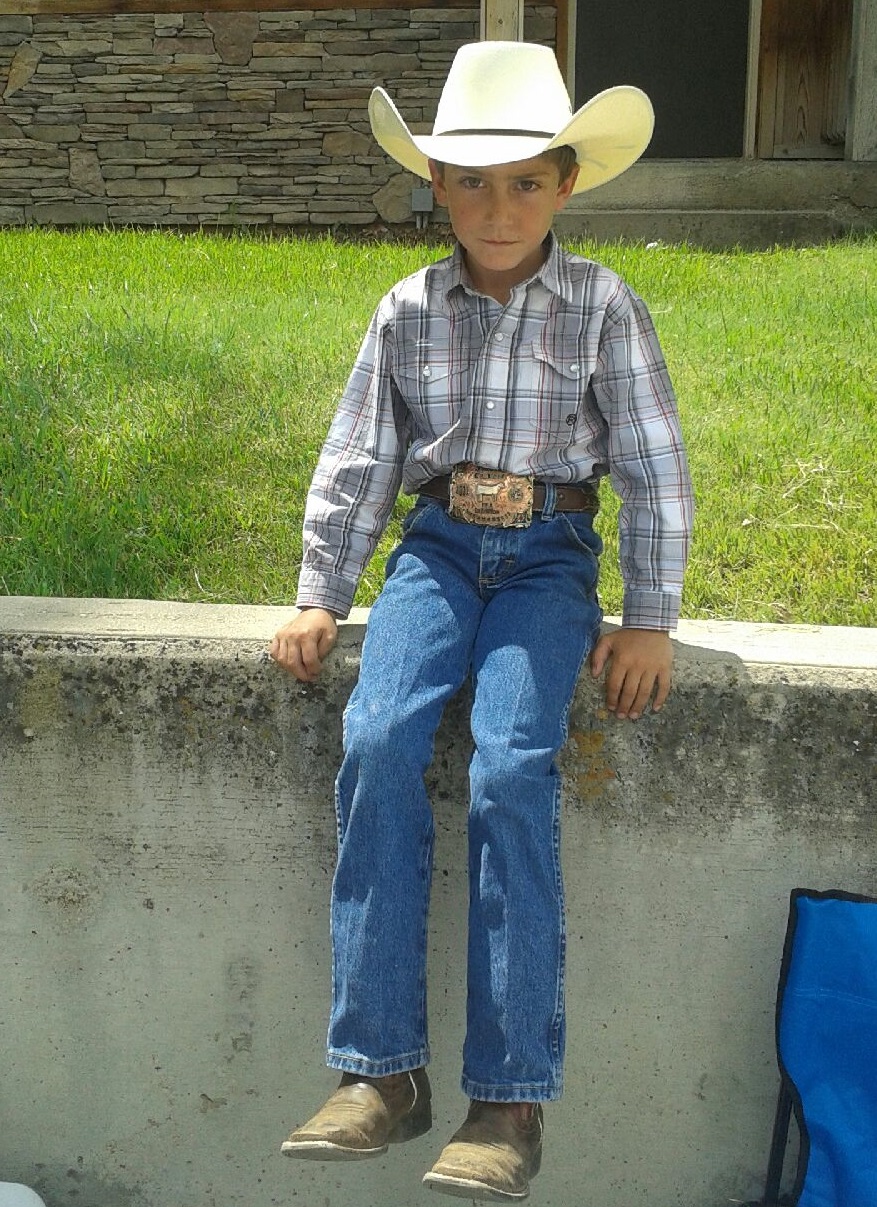 A short, brisk hike down the mountain and we were back in civilization, taking showers in Buffalo, WY. We had the afternoon to explore the small town that just happened to be holding its 'Crazy Days' event - basically a sidewalk sale. My highlight was meeting this real, live, Wyoming cowboy selling lemonade with his little brother!
 It was a super week with great weather having storms only at night, fun people, plenty of wildlife, and majestic views.
Leave Comment
Posted: 07/31/2016
Posted: 07/31/2016
Older Posts Newer Posts
Find more Hiking Resources at www.HikingDude.com


Follow Me
Recent Comments